wikiHow is a “wiki,” similar to Wikipedia, which means that many of our articles are co-written by multiple authors. To create this article, 47 people, some anonymous, worked to edit and improve it over time.
The wikiHow Video Team also followed the article's instructions and verified that they work.
This article has been viewed 262,904 times.
Learn more...
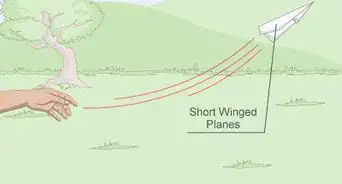
A loop de loop paper plane is a type of paper airplane that performs a loop upon release. It can be a fun variation of a standard paper airplane as this plane mimics tricks that you might see fighter jets perform in air shows. This type of paper airplane won't fly like a regular paper airplane. Instead, it will perform a loop before gliding to the ground. This is due to its design consisting of two flat, wide wings and elevator flaps in the back that make it loop. To make a loop de loop paper airplane, all you need is a piece of paper and a few simple folds before you can take off.
Steps
Making the Initial Folds
-
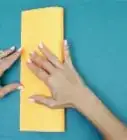
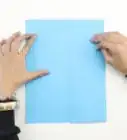
1Fold and unfold the paper in half lengthwise. Using standard A4 or printer paper, measuring 8.5 inches by 11 inches, fold it in half lengthwise and make a crease before unfolding the paper.
- Align the edges of your paper and run your hand down the crease to get a nice fold.
- When you unfold your paper, you will now have a valley crease.
-
2Position the paper vertically and fold the top two corners downward until the edges meet at the crease. Using your center crease as a guide, align each edge so both folds are even.
Crease the outer edges to keep your folds in place.You will now have two triangles which together form one large triangle.
Advertisement -
3Keep the paper positioned vertically and fold the tip down. Fold the triangle you just created downward towards you. [1]
- Fold along the bottom edge of your triangle.
- The tip should align with the crease and make your paper look like a tall envelope.
- The top layer of paper will resemble an equilateral triangle pointing down, like the flap of an envelope.

Creating the Body of Your Paper Plane
-
1Keep the paper oriented in the same position and fold the top two corners downward to meet in the center. The two corners will meet about 1 centimeter (0.4 in) above the tip from your previous fold.
- These two points will naturally fold on a diagonal leaving a space in the middle.
- With these sides folded in, you should have a flat nose at the top of your paper plane.
-
2Fold up the small triangle tip. Fold the triangle of about 1 centimeter (0.4 in) up to cover the center points from your previous fold.
- This fold will help to keep the flaps you’ve just folded in place.
-
3Fold the paper back in half lengthwise. Fold backward along your initial crease keeping your previous folds on the outside.
- When making this fold, you’re folding in the opposite direction of your very first fold.
Forming the Wings of Your Paper Plane
-
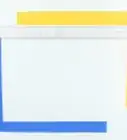
1Position the paper so the nose is pointing away from you and fold down the wings. Leaving a 1 centimeter (0.4 in) area for the body, fold down one side of the paper.
When you flip your paper over to fold down the second wing, match the fold of the first wing. It’s important that both wings are equal for proper flight.
-
2Fold up the elevator flaps on each of the wings. Take a portion of paper on the back of each wing and fold it away from you to form an isosceles triangle, meaning the two sides are longer than the base.
These elevator flaps create drag when you throw the plane. The flaps pull the nose up causing your paper plane to perform a loop de loop in the air[2]
After you fold the first elevator flap, flip your paper over to fold the second. Make sure the edges of the folds are even with one another
-
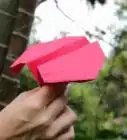
3Fan out the wings and lift the elevator flaps to prepare for flight. Pinch the base of your plane and fan out the wings so that the top of the plane is flat. Next, fold up the elevator flaps so that the flaps create a 90-degree angle with the top of the wings.
- You can either tape or staple the front and back of your plane to keep the wings closer together, and the base more stable if you wish.
-
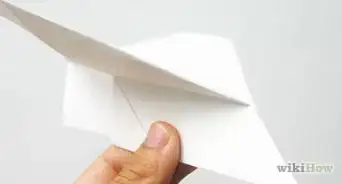
4Throw your loop de loop paper airplane. Hold the plane in its center and throw using your forearm.
- When you throw your loop de loop plane, angle the nose upward slightly to help the plane fly farther and perform a loop.
- Flick your wrist forward upon release when throwing.
Community Q&A
-
QuestionWhy didn't my airplane fly?
 Community AnswerIt could be a matter of improper angles, improper speed, or creases in the plane. I would recommend trying a new plane and being more gentle with your throws.
 -
QuestionCan this airplane actually make a loop?Community AnswerYes, but only if you fly it with just enough force. If you fly it too hard or too soft, if won't.
-
QuestionWhy did mine not work?
 Community AnswerYou may have folded the wings wrong so try the steps again. Try with an easier air plane and then try to do this.
Warnings
- Never aim your plane at anyone. Though this plane performs a loop, it could still hit someone if you aren’t careful.⧼thumbs_response⧽
Things You'll Need
- Printer paper.
- Stapler or tape if desired.