This article was co-authored by Amy Guerrero and by wikiHow staff writer, Luke Smith, MFA. Amy Guerrero is an Arts and Crafts Specialist and the Owner of Sunshine Craft Co., a crafting studio based in Phoenix, Arizona. Amy specializes in macrame, DIY crafting, and teaching fiber arts. She offers monthly in-person and online workshops along with having developed a range of DIY craft kits for at-home projects. Amy holds a BS in Industrial Design from Philadelphia University. She worked as a graphic designer before starting her own business. Sunshine Craft Co. is a creative hub that offers a wide range of workshops, tools, and resources for any craft project to inspire creativity and community engagement.
There are 8 references cited in this article, which can be found at the bottom of the page.
This article has been viewed 782,936 times.
Your ninja training isn’t complete until you’ve learned to make your own paper throwing star. Real, metal throwing stars aren’t easy to come by, and they’re a bit too dangerous for everyday use anyway. Origami shuriken, on the other hand, are easy to make and, with a little practice, easy to throw. Follow our simple steps to prepare your paper and fold your origami stars, then get out there and fight some rival ninja clans.
Things You Should Know
- Use square origami paper, or fold and cut a piece of rectangular paper into a square.
- Cut or tear the square into 2 identical rectangles to make both pieces of the ninja star.
- Perform opposite folds on both papers, so that you have 2 Z-shaped pieces that are mirror images of each other.
- Decorate your ninja star with markers to personalize it.
Steps
Preparing Your Paper
-
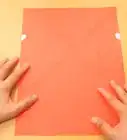
1Find a piece of square paper. Origami paper works best and is easier to fold, but you can also use a piece of computer or A4 paper cut to size. Choose origami paper according to what color you’d like your ninja star to be. You can make a 2-colored star with 2 different colors of paper if you'd like.[1]
- To make square paper, lay your rectangular paper in a flat, horizontal position. Take one corner of the paper and fold it over until it meets the opposite edge, forming a triangle, with a rectangular strip left over. Remove the rectangular portion of the paper by tearing or cutting it away with scissors.
- You only need 1 piece of square paper for this project, but throughout, we'll use 2 sheets with 2 different colors, as this will help make the process clearer as we go. You can follow along using 2 sheets, or feel free to just perform steps 1-3 on one piece of square paper.
-
2Fold your square paper in half to form a rectangle. Press down on the fold to make a strong crease. Then, unfold the paper. This is called a “valley fold,” which is when your fold creates a "valley" with its crease.[2]
- If you are using paper that has one colored side, start with the color side facing down.
- If you are using a single square sheet, draw an “O” on one (which will correspond with our “orange” sheet above), then a “B” on the other (which will go with the “blue” sheet) to help you differentiate as you follow the tutorial.
Advertisement -
3Cut or tear along the creases to make 2 rectangles. Whether you started with 2 papers or 1, at this point, going forward, you'll just need 2 rectangular pieces of paper.[3] These pieces will eventually be folded together to make the throwing star.
- We use 2 different color rectangles to make things clearer for you, but you can use rectangles of the same color if you'd like!

Making the Ninja Star
-
1Fold the rectangles in half on a vertical crease (hot dog style). This is called a “book fold.”[4] If you’re using computer paper and want to make a smaller ninja star, you can shorten your folded rectangles by cutting or tearing part of the paper off, but keep in mind that the longer your rectangles, the easier the ninja star will be to make.
- Make sure that both folded pieces of paper are the same length.
-
2Fold the papers in half on horizontal creases (hamburger style), then unfold. Be sure to only unfold the horizontal crease you just made! We’ll use this crease as a guideline, making the next folds easier. You should now have 2 folded rectangles with a valley fold running horizontally in the center of each.[5]
-
3Cross-fold your rectangles along the horizontal crease you just made. Take the right half of your blue (“B”) piece of paper, and fold it so that the right edge is facing down, with the top edge now running along the center crease. Fold the left side of the paper in the opposite direction, upwards.[6]
- Take the right half of your orange (“O”) piece of paper, and fold it so that the right edge is facing up, with the bottom edge now running along the center crease. Fold the left side of the paper in the opposite direction, downwards.
- If done correctly, you will have two mirroring “Z” shaped pieces of paper.
-
4Flip both pieces of paper over. The folds you just created will now be facing down.[7] Position the pieces of paper so that they lie on your worktop in the same way as in the above image
-
5Fold the top squares of both pieces of paper inward to form a triangle. On each piece of paper, take the top right corner of the top square, and fold inward on a diagonal to make a triangle. The folded edge should align with the crease you made in Step 2.[8]
-
6Fold the bottom squares to create a triangle. Take the bottom left corner of each bottom square, and fold along the diagonal, inwards and toward the center of the paper. Just like in the last step, the folded edge should now align with the crease you made in Step 2. Your 2 pieces of paper should be mirror images of each other.[9]
-
7Fold the left triangle of both papers inward. Fold the left triangles inward along the center crease so that the tips are flush with the sides of the papers, as well as with the folded corner on the opposite end–which creates a parallelogram shape.[10]
-
8Fold the right triangle of both figures in. Repeat the previous step, but with the triangles on the right this time, folding them so that they lay flat over the center shape, so that your 2 pieces of paper are now 2 parallelograms.[11]
-
9Flip the orange paper over. The blue piece of paper will now have the triangular flaps facing upwards while the orange piece will have the flaps facing downwards. The pieces are still mirror images of each other.[12]
-
10Open the flaps of both pieces of paper and layer them over each other. Unfold both pieces, so that they both look like Zs, with one Z facing backwards. Rotate the blue paper so that it rests vertically with the flaps pointing up. Place the orange paper on top of the blue piece with the flaps pointing down toward the work surface. The 2 pieces of paper should be perpendicular to one another.[13]
-
11Tuck the tips of the blue triangles into the folds of the orange paper. Take the tip of each blue triangle portion that’s pointing up, and tuck it into the top pocket of the orange paper. Then, press down on the edges to create a crease to hold everything in place. Your ninja star is starting to take shape![14]
- You’ll see two pockets on the top piece of orange paper that you can slide the triangles of the blue paper into.
-
12Flip the ninja star over and repeat the tucking process. Tuck the remaining two orange triangles into the blue pockets. The order in which you fit the tips in doesn’t matter, but you may have to shift your paper around slightly to get everything in place.[15]
- If you're finding it difficult to slide the paper in, try pinching the sides of the pockets to open up space.
-
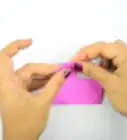
13Draw designs on your star to make it yours. If you used white paper, or even colored paper, you can add a bit of flair to further customize it. Draw your ninja insignia to let everyone know that it’s your shuriken.[16]
-
14Throw your ninja star by the point. Hold the star vertically, with your thumb and forefinger pinching one of the star’s points. Pull your arm back, and throw the star as though you’re throwing a baseball, but more gently, and with a slight flick of your wrist as you let go. Practice makes perfect![17]
Community Q&A
-
QuestionOn the sixth step, why do I need to fold both pieces of paper into diamonds?
 Community AnswerIt just makes it easier to turn into a Z shape. You don’t have to do it that way, but I'd recommend sticking to the instructions as given.
 -
QuestionWhat is the best way to throw these ninja stars?Community AnswerHold it level by one of the points. Then hold it level horizontally. Now, throw it like a Frisbee. To do so, fold your wrist inward, and then flick it out until it lines up with the rest of your forearm. Let go of the star. It should fly out straight. This may take some practice though!
-
QuestionCan you make a bigger ninja star?
 ThRubyFalconCommunity AnswerYou can use bigger paper, or tape squares together.
Warnings
- Don't throw your ninja star at people, as this may injure them.⧼thumbs_response⧽
Things You'll Need
- 2 square pieces of origami paper
- Scissors
- Flat surface for folding

References
- ↑ https://www.campercaboodle.com/share/sKApDSaPsZLjqovQWziJ9
- ↑ http://www.origami-make.org/origami-fold-valley.php
- ↑ https://thepurpleyarn.com/origami-ninja-star-step-by-step/
- ↑ http://www.origami-instructions.com/origami-book-and-cupboard-fold.html
- ↑ https://origami-resource-center.com/ninja-star/
- ↑ https://thepurpleyarn.com/origami-ninja-star-step-by-step/
- ↑ https://thepurpleyarn.com/origami-ninja-star-step-by-step/
- ↑ https://origami-resource-center.com/ninja-star/
- ↑ https://origami-resource-center.com/ninja-star/
- ↑ https://thepurpleyarn.com/origami-ninja-star-step-by-step/
- ↑ https://thepurpleyarn.com/origami-ninja-star-step-by-step/
- ↑ https://origami-resource-center.com/ninja-star/
- ↑ http://www.origami-make.org/origami-ninja-star/page-05.php
- ↑ http://www.origami-make.org/origami-ninja-star/page-06.php
- ↑ https://www.campercaboodle.com/share/sKApDSaPsZLjqovQWziJ9
- ↑ https://www.campercaboodle.com/share/sKApDSaPsZLjqovQWziJ9
- ↑ https://www.throwninjastar.com/throw/
About This Article

To make a ninja star from square paper, cut a square piece of paper in half to make 2 rectangles, and fold each rectangle in half vertically. Then, crease the rectangles horizontally, taking the bottom and top pieces to make cross-folds in a “Z” shape. Flip the paper over, and fold the squares of each paper to make triangles. Fold the triangles into the center, making two parallelograms, and unfold the outer flaps of the papers before placing them on top of each other in an cross shape. Tuck the triangle flaps into the pockets of the papers and enjoy. If you want to learn how to decorate your ninja star once it's finished, keep reading the article!