X
wikiHow is a “wiki,” similar to Wikipedia, which means that many of our articles are co-written by multiple authors. To create this article, 13 people, some anonymous, worked to edit and improve it over time.
This article has been viewed 61,983 times.
Learn more...
Paper clocks are fun to make. You can use them to decorate a room or as a prop in a play or skit. You can even use them to teach time. This article will show you how to make a simple clock using paper, a brad, and some imagination.
Steps
Part 1
Part 1 of 3:
Getting Started
-
1Gather your supplies: Because this clock is made out of paper, it won't be able to move its hands on its own. You can move the hands yourself, but for that, you will need a brad or paper fastener. Here's a list of what you will need:[1]
- Paper plate
- Paper
- Brad (paper fastener)
- Scissors
- Crayons, markers, stickers, etc
-
2Find a plain, white paper plate. A plate with pictures on it may look pretty, but you won't be able to see the numbers. Don't worry, you can color the plate later.[2]
- If you can't find a plain paper plate, use a regular plate to trace a circle onto a piece of paper. Cut the circle out and use it instead.
Advertisement -
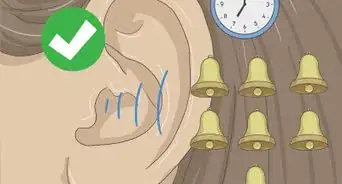
3Write the numbers 1 to 12 around the rim of the plate. If you have a very narrow rim, then write the numbers on the plate itself.[3] Try to make the spaces between the numbers as even as you can. It might also be a good idea to write the numbers with a pencil first. You can draw over the numbers with crayon or marker later.
- Try to write the 12, 3, 6, and 9 first. This may help you keep things even.[4]
- You can also use foam or sticker numbers instead of writing them out.
-
4Draw a two arrows on a piece of colored paper and cut them out. One arrow should be a little shower than the other one. Make sure that the bigger arrow can reach the numbers.[5]
- The big arrow will be the minute hand, and the small hand will be the hour hand.
-
5Decorate the plate and arrows. If you want to add color to your clock, now is the time. You can color the clock with crayons, paint, or markers.[6] You can add stickers or even glitter to it. Try not to put too much on it, or you will not see the numbers.
- If you used paint or glitter glue, you will need to let everything dry before moving on.


Advertisement
Part 2
Part 2 of 3:
Putting the Clock Together
-
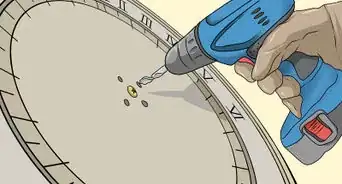
1Poke a hole in the center of the clock. You can use a ballpoint pen, a toothpick, or a wooden skewer to do this. If you are a child, ask an adult to help you with this step.
- To find the center, flip the plate over so the back is facing you. Draw a huge X across the back of the clock. Make sure that the points of the X are touching the edges of the clock. The center of the X is the center of the clock.
-
2Punch a hole in the bottom of each arrow. Line up the bottom of the arrows up first, then punch the hole through both arrows at the same time. This will make it more even. You can use a hole puncher to make this easier. If you don't have a hole punch, you can poke the hole using a ballpoint pen.
-
3Place the arrows on the clock. Make sure that the hole in each arrow lines up with the hole in the clock.[7]
-
4Stick the brad through the holes. The pointy end should be coming out of the back of the clock.[8]
-
5Turn the cock over and flatten the prongs. Separate the prongs first, then flatten them against the plate. You can use a butter knife to pull the prongs apart. If you are a child, ask an adult to help you. Brads can be very sharp.
-
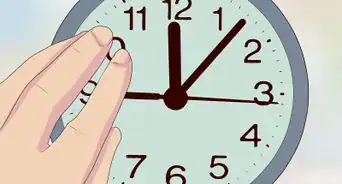
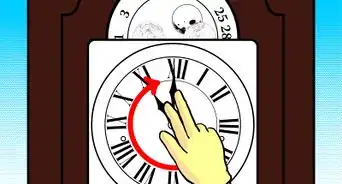
6Use your clock. Turn the clock back over so that you can see the numbers again. You can now move the arrows around. Try not to pull or tug too hard, or the paper will rip.


Advertisement
Part 3
Part 3 of 3:
Decorating Your Clock
-
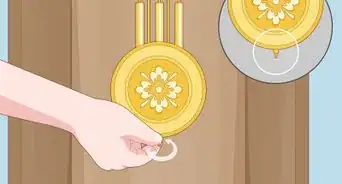
1Hot glue a piece of ribbon to the back of the clock so you can hang it. Take a few inches of ribbon and fold it in half to make a loop. Tie the two ends into a knot to keep them together. Turn the clock over so that you can see the back. Put a drop of hot glue close to the top. Press the ribbon down onto it and let it dry.
- Glue guns can get very hot. Ask an adult to help you with this step.
- You can also staple the ribbon to the plate instead.
-
2Add a swinging pendulum to your clock. Cut a long, skinny rectangle out of some yellow paper. Cut a circle out of the same paper and glue it to the bottom of the rectangle. Wait for the glue to dry, then poke a hole near the top of the rectangle. Turn the clock over so that the back is facing you, and open up the brad. Slip the prongs through the hole in the rectangle, then flatten them again. Turn your clock back over and swing the pendulum.
-
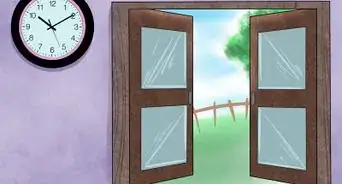
3Glue the clock onto a large sheet of brown paper. Be careful not to get any glue onto the brad, or you may not be able to turn the arrows anymore. Cut a wave-like shape around the edges of the brown paper, and pin it to your wall. Your clock will look like a grandfather clock!
- Consider combining this with the swinging pendulum.
-
4Paint the clock face before you write the numbers down. If you want the paint the clock after you have written the numbers, you may need to re-write them. Some paint is translucent, and some paint is opaque.
-
5Outline the clock and arrows with some glitter glue. If you cannot find any glitter glue, then draw on the clock with some regular glue, and cover it with glitter. Tap the excess glitter off onto a sheet of paper. Use the paper to funnel the glitter back into its container.
-
6Label the two clock hands, or make them different colors. You can write "hour" on the little hand, and "minutes" on the big hand. You can also cut the hands out of two different colors, to make them easier to tell apart.
-
7Paint the rim of the paper plate a different color. This will make your clock look even more realistic. Colors such as black, brown, blue, or red will work great for this. You can also try using gold or silver paint.
-
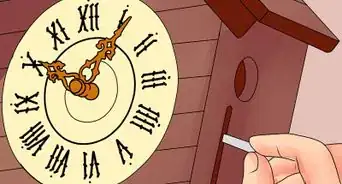
8Decorate the numbers. You don't have to write the numbers using marker. Try using stickers or foam letters instead.[9] You can also try using a silver or gold permanent marker.
- Consider using the Roman numbers instead: I, II, III, IV, V, VI, VII, VIII, IX, X, XI, and XII. Start at the 1 o'clock position with the "I" and continue around the rim. The XII should be at the top of the clock, where the 12 would be.


Advertisement
Community Q&A
-
QuestionCan I make the clock turn by itself?
 Community AnswerUnless you can attach a motor to it and structure it so that the motor moves every minute, you cannot make the clock turn by itself.
 -
QuestionDoes the paper have to be a perfect circle?
 Community AnswerNo, but you will have a more accurate representation of a clock if the circle is accurately drawn.
 -
QuestionHow do I make it move at the back?Community AnswerOn the back of the paper plate or the face of the clock, there is ribbon. The ribbon is attached to the hour and minute. As you pull the ribbon, the clock moves.
Advertisement
Things You'll Need
- Paper plate
- Paper
- Brad (paper fastener)
- Scissors
- Crayons, markers, stickers, etc


References
- ↑ https://lingobuddies.fun/blog-posts/paper-plate-clock-craft-for-kids/
- ↑ https://www.youtube.com/watch?v=uFKqqPPtB3s
- ↑ https://lingobuddies.fun/blog-posts/paper-plate-clock-craft-for-kids/
- ↑ Mum in the Mad House, How to Make a Paper Clock
- ↑ https://www.youtube.com/watch?v=uFKqqPPtB3s
- ↑ https://lingobuddies.fun/blog-posts/paper-plate-clock-craft-for-kids/
- ↑ https://www.youtube.com/watch?v=uFKqqPPtB3s
- ↑ https://lingobuddies.fun/blog-posts/paper-plate-clock-craft-for-kids/
- ↑ https://www.youtube.com/watch?v=uFKqqPPtB3s
- ↑ Teach Mama, The Terrific Task of Teaching Kid how to Tell Time
About This Article
Advertisement