This article was co-authored by Kieren Dutcher. Kieren Dutcher is a Professional Artist and a Teaching Artist at the NIAD Art Center in Richmond, California, and other venues around the Bay Area. With 30 years of experience, she specializes in colorful illustrations inspired by folk art, nature, and color. Kieren earned her Master of Education in Art Education from San Francisco State University and her BFA from the California College of the Arts. Her work has been published by St. Martin's Press, Uppercase Magazine, Highlights Magazine, in hospitals, and on TV. Her picture book Chinese and English Nursery Rhymes: Share and Sing in Two Languages (2010) won best book of the year from the Chinese American Library Association.
wikiHow marks an article as reader-approved once it receives enough positive feedback. In this case, several readers have written to tell us that this article was helpful to them, earning it our reader-approved status.
This article has been viewed 251,976 times.
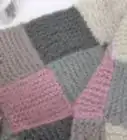
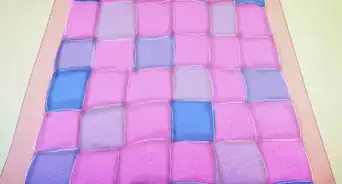
Patchwork quilts are enchanting to look at, to own and to create. One of the first craft projects many young girls learned to create in generations past was to make a patchwork quilt. Getting started is really simple and you will grow in your creative abilities each time you complete a quilting project.
Steps
Before You Sew
-
1Accumulate scraps of fabric. These could be from your other sewing projects, old dresses, or fabrics from family and friends. Save these for your patchwork quilt.
- Depending on your tastes, these could be all of one uniform size or of varying sizes and shapes. Think of how the pieces would form into a whole. Try to have at least 6 different patterns.
-
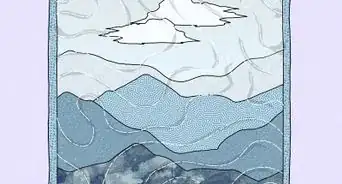
2Find a pattern. Look through the Internet (Google Books is a good place to start) and craft books for a pattern that suits your interests or create your own by deciding what you want your quilt to look like.
- Quilt designs take small pieces of fabric and create a collage look of one part of the blueprint of one design. The pieces are generally no smaller than a 2-inch (5.08 cm) square and may be much larger, depending upon your chosen design.
Advertisement -
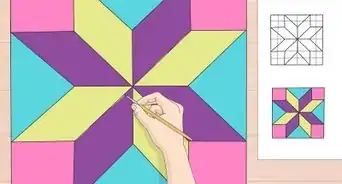
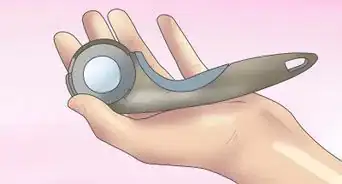
3Settle on the quilt pattern you want to use. Then, cut out pieces of fabric that will provide the colors and patterns you need. A good pair of scissors will be of great use here.
- Make sure to allot for a 1/4" (6 mm ) seam allowance on all sides. If you want 2" squares, make your squares 2.5" on all sides.
- Of course, you don't have to use squares. Rectangles and triangles will work, too.
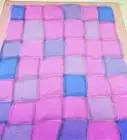
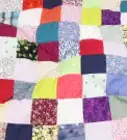
- Form your pattern on the floor. It's a lot easier to arrange your quilt when it's not sewn together. Arrange the pieces in the exact order you want them. In addition to seeing how the colors fit together, you'll see how big your quilt is and if you're happy with the size.
- Make sure to allot for a 1/4" (6 mm ) seam allowance on all sides. If you want 2" squares, make your squares 2.5" on all sides.


Creating Your Quilt
-
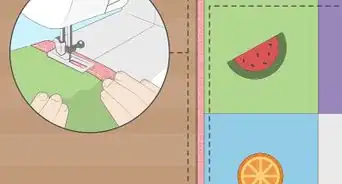
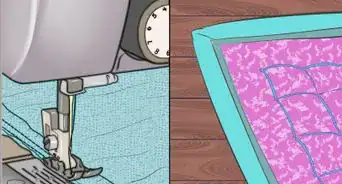
1Sew the cut pieces of your quilt top together. Go strip by strip. You can use a sewing machine or do it by hand, if you trust your stitches - and if you have the patience.
- Once you have all your strips sewn, then sew the strips together. It'll be easiest to get each strip together first instead of patching it together haphazardly.
- Make sure the sides of the fabric are all facing the right side! Printed sides need to be together. If you're using a sewing machine, make sure your foot is set at 1/4".
-
2Press the quilt top with an iron. Set it at the temperature appropriate for your fabric. Flatten the seams to be sure the quilt will have a straight look when completed.
-
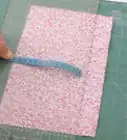
3Use single-fabric backing for your quilt. It needs to be 8 inches (20.32 cm) wider and longer than the finished quilt top. A fabric store will cut it for you, but you may need to buy two long pieces and sew them together.
- Lay out the backing in an area where you can spread out your work. Place it face down on the floor. The pretty side should be facing away from you.
- Put the backing down on the floor or a large, wide table. Place the better side of the fabric face down. Spread the backing out evenly.
- Tape the top and bottom to the floor using masking tape, smoothing out wrinkles as you go, before taping each side down. It's important to get this as smooth and wrinkle-free as possible, without pulling the fabric so tight that natural line of it is distorted.
- Once you are happy with that, take some Quilter's 505 and spray it liberally over the fabric.
-
4Smooth the quilt batting over the top of the fabric. The batting will tend to hold creases from where it was folded, but as long as you have smoothed them out, don't worry that the crease lines are still visible (as above). Batting does not need to be ironed.
- Spray another layer of 505 on the batting.
-
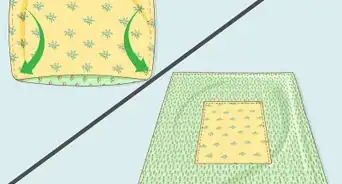
5Place the quilt top next, face up. It all needs to be flat with no wrinkles. You'll notice that the quilt top is smaller than the bottom two layers - this is intentional as otherwise it is very hard to align the layers perfectly. Smooth out any wrinkles, until your quilt top sits perfectly flat.
- Pin the sections together at a distance of 6 inches (15.24 cm) apart. You can use as many or as few pins as you'd like. Start pinning from the center and work your way outward, pinning in concentric circles. This means that any extra fabric is pushed to the outer of the quilt, rather than being allowed to bunch up toward the centre.
- Once everything is pinned, unpeel the masking tape, freeing the quilt from the floor.
- Pin the sections together at a distance of 6 inches (15.24 cm) apart. You can use as many or as few pins as you'd like. Start pinning from the center and work your way outward, pinning in concentric circles. This means that any extra fabric is pushed to the outer of the quilt, rather than being allowed to bunch up toward the centre.
-
6Start sewing it all together. How you quilt the layers together is very much down to personal preference and accomplished quilters often use a free-motion stitch that undulates across the quilt in loops and swirls. However, by far the most simple method is to 'stitch-in-the-ditch'. This simply means to machine across the quilt so that your stitches fall into the 'ditch' created where two fabrics have joined at a seam.
- Tack the pieces together at the pins or apply around patterns in the quilt with contrasting thread to match the fabric. You will also need to tack a couple of stitches in the middle of each square keep the backing and top from slipping.
- Once the quilt is fully quilted, you can then square up the quilt, cutting off the unwanted bits of backing and batting that show around the edges.


Forming the Binding
-
1Cut binding strips. This all depends on the size of your quilt. A good starting point is around 2.5" (6.25 cm) wide. These will form a smooth border around the edges of your quilt.
- Cut enough strips to surround your quilt. The end product needs to be a bit longer than your quilt to overlap on both sides.
- If you don't have four long strips, sew the strips together to cover the length of the quilt.
-
2Align the binding. With right-sides-together (this means face-to-face), align the binding strip with the top edge of the quilt and then pin along the long edge of the quilt.
-
3Sew exactly 1/2" (1.25 cm) from the long edge. Sew from one end of the quilt to the other. When you reach the end, carefully cut the excess binding off, so that the bottom of the binding aligns perfectly with the bottom of the quilt.
- Repeat for the opposing side and then again for the other two.


Expert Q&A
-
QuestionHow do you fix an old damaged quilt?
 Kieren DutcherKieren Dutcher is a Professional Artist and a Teaching Artist at the NIAD Art Center in Richmond, California, and other venues around the Bay Area. With 30 years of experience, she specializes in colorful illustrations inspired by folk art, nature, and color. Kieren earned her Master of Education in Art Education from San Francisco State University and her BFA from the California College of the Arts. Her work has been published by St. Martin's Press, Uppercase Magazine, Highlights Magazine, in hospitals, and on TV. Her picture book Chinese and English Nursery Rhymes: Share and Sing in Two Languages (2010) won best book of the year from the Chinese American Library Association.
Professional ArtistThe good old-fashioned way: by hand! Just sew a patch over the pieces that are ripped using needle and thread. It's actually rather easy. -
QuestionWhat is batting used for in quilting?
 Community AnswerBatting is the cushioning that goes between the top layer and the bottom layer (back).
 -
QuestionCan I make a quilt without using a batting between the top and bottom?
 Community AnswerIt is possible to make quilts using fleece on the bottom and no batting. The thickness of the fleece acts like batting.
Things You'll Need
- Varied fabric pieces
- Quilt pattern
- Sewing machine
- Scissors
- Quilt backing material
- Batting for the inside of the quilt
- Iron
- Large table for quilt assembly (optional)
- Straight pins
- Contrasting thread

About This Article

To make a patchwork quilt, start by gathering scraps of fabric from other sewing projects, old dresses, or baby clothes. Next, find a pattern you like and cut out pieces of fabric that will provide the colors and shapes you’ll need. Then, sew the cut pieces of your quilt top together with a sewing machine or by hand. Once all the strips are sewn together, lay out the single-fabric backing for your quilt face down on the floor. Then, pin the quilt top over it, face up, and sew it all together. To learn how to form the binding of the quilt, keep reading!