X
wikiHow is a “wiki,” similar to Wikipedia, which means that many of our articles are co-written by multiple authors. To create this article, volunteer authors worked to edit and improve it over time.
This article has been viewed 103,195 times.
Learn more...
Are you new to quilting? Here's how to set up and tie your first quilt. Nothing hard, nothing difficult. You'll need either a quilting frame or a flat surface, two sheets of material of a matching size, quilting batting of an appropriate thickness for the quilt you want to create, yarn, and some thread. Easy steps.
Steps
-
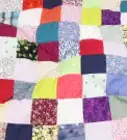
1Lay out your material. If you are using a quilting frame (it can be homemade), tack the bottom of the quilt to the frame, face down.
-
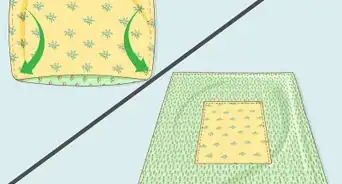
2Lay the batting down and cut to size. You'll want to stretch it a little, so cut it about 2–3 inches (5.1–7.6 cm) smaller than your sheets.Advertisement
-
3Lay out the batting.
-
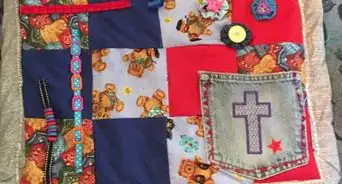
4Lay the top sheet on, outside up, and tack it down. Tack the corners first, then centers, then about every 5–6 inches (12.7–15.2 cm) along the entire edge of the blanket. When you tack, be sure to get all the layers on the tack - bottom, middle and top. The tighter you pull the sheets, the easier it is to sew the quilt.
-
5Make it tight.
-
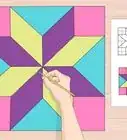
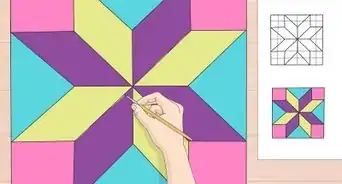
6Mark your blanket for where you are going to sew (tie) the yarn. 4" separations are preferred. That makes it so that you can continuously sew and tie, only stopping when you run out of yarn in your needle. Start your marks 6-8" from the edge of the blanket (the boards you are tacking the material to) because when you finish the blanket, you'll roll the edges and take up about 4–6 inches (10.2–15.2 cm) on each side. A tape measure will work fine too. Use a fabric marker which washes out easily.
-
7Tie your blanket.
- Select the yarn you will be using. you may use several different colors or just one through the entire blanket. This is the simplest way to tie your blanket quickly.
- Thread the needle. Use a quilting needle, or a large needle. Most quilting needles are about 3" long with a large eye. Use cheaters to help thread the yarn. They are available at most material stores. Only thread about 6 feet (1.8 m) of yarn each time.
- Start by putting the needle fully into the blanket at one of your marks. It should stick out the bottom.
- Then, without actually going through, turn the needle to the side (horizontal) and pull it back until about ¼" of the needle can be seen as a bump in the top of the quilt. Push the needle through that bump.
- Now you have the needle through the entire blanket, pull it, with the yarn, all the way through until only about 2" of the yarn sticks out of the stitch.
- Tie the yarn in a square knot - ½ Knot pulled tight, then another ½ knot.
- Move to the next marker and do the next stitch. Don't cut anything!
- Tie a knot in the yarn without cutting it.
-
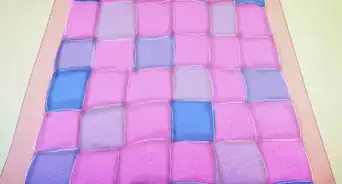
8Repeat until you run out of yarn. When you do, tie off the last stitch, cut the needle free, re-thread the needle and keep going. Any pattern works. You can do straight lines or boxes. Boxes work well because you can do a whole section without having to get up.
- Somewhere in the process, the markers will be further away than you can reach. Before you roll it, clip all the yarn exactly in the middle between the knots. When you're done clipping, you'll have perfect knots with exactly the right amount of yarn on the knot.
-
9Roll the blanket. With one of your helpers, undo the clamps at the edge of the blanket, remove the tacks down the edge the will be rolled, and role the frame under the blanket to the edge of the marks that you haven't stitched yet.
-
10When the blanket is done, take it off the frame and roll the edges.
-
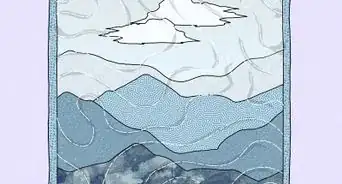
11Roll the edges. Lay the blanket flat on the floor. Roll an edge, starting from the middle on any side. Roll it 2" wide and at least 2 times, then pin it flat.
- When you get to a corner, fold the corner down towards the center of the blanket about 3". You end up with a small triangle on the corner.
- Continue rolling the first edges until you use up the triangle and are left with a straight edge.
- Then start rolling the next edge matching the straight edge again. As you do, it will automatically form a straight edge corner!
- Continue rolling the rest of the edges and corners, using pins to hold it in place.
-
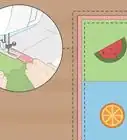
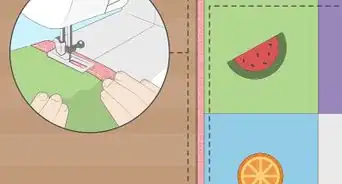
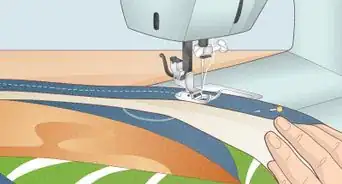
12Finish up! You may either hand stitch the rolled edges, or use a sewing machine to stitch the rolled edges. A pretty wavy pattern on the border adds flair.
- The secret to getting the border to look right is to be sure to hold the material firmly as it passes through the sewing machine. Since the blanket is the equivalent of about six or seven layers of material, the sewing machine will try to move the bottom material, but leaves the top behind. It is best to stretch the border as it passes through the sewing machine, assuring that the top and bottom layers stay together until they are sewn.
- Although you can get a lot fancier, this same process will work for any blanket.


Advertisement
Community Q&A
-
QuestionWhat do I apply to the knot to keep it from untying with repeated washing?
 Community AnswerMy grandmother used to cut her threads before knotting. She would tie once and then switch hands so that the left hand thread was now in the right hand and vice versa. She would then tie again and her blankets never came unraveled after that!
 -
QuestionWhat is the best tying material to use? If yarn, what type?
 Community AnswerNo. 8 perle cotton thread. Some people use acrylic yarn, but it leaves fuzz.
 -
QuestionWhy shouldn't I cut yarn when making a quilt?
 Community AnswerNot cutting the yarn is just another way of doing it. You may prefer to cut your yarn in the middle between 2 'x's and tie a square knot or a cute bow (tack the center of the bow to keep it a bow). Leaving a tail and then going from one 'x' to another with one long piece of yarn is more efficient, even if you want to cut in the middle and knot.
Advertisement

About This Article
Advertisement