wikiHow is a “wiki,” similar to Wikipedia, which means that many of our articles are co-written by multiple authors. To create this article, volunteer authors worked to edit and improve it over time.
The wikiHow Video Team also followed the article's instructions and verified that they work.
This article has been viewed 100,683 times.
Learn more...
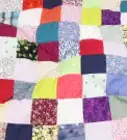
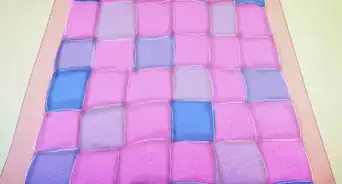
Quilts are created when pieces of fabric are cut and sewn together in a pattern and layered with additional padding for warmth. After completing the detailed process of sewing a quilt (see How to Make a Quilt) the last step is to bind the edges with fabric to give your quilt a “finished” look. This article details the process for making binding strips and using them to bind your quilt.
Steps
Make the Binding
-
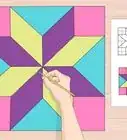
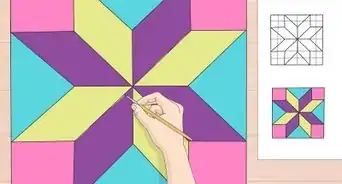
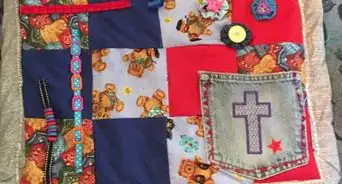
1Choose a binding fabric. Your quilt’s binding can be designed to make a bold statement or blend in with the pattern. Envision the way you want your finished quilt to look as you make your fabric choice.
- Fabric with a crosswise grain, as opposed to a lengthwise grain, is a sturdier choice for binding. Because of the direction of the grain, a split in one area won’t run along the entire length of the binding. Instead, it will run crosswise and end at the seam where the binding joins the quilt.
- Bias binding strips, with a grain that runs diagonally, are also good for sturdy binding. Again, a split in the fabric won’t travel as far since the grain doesn’t run the length of the fabric.
-
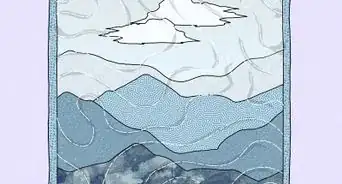
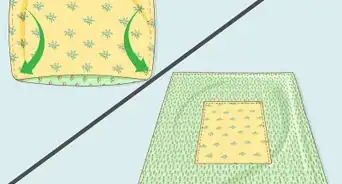
2Take measurements. The amount of fabric you’ll need to buy is determined by how large your quilt is and how much you want the binding to stand out.
- Choose the width of your binding. If your quilt already has a built-in border, you may want thinner binding. If you’d like the binding to act as a border, you may want it to be wide. Keep in mind you’ll be cutting the fabric into strips that will then be folded in half.
- Measure the four sides of your quilt to determine the length of its perimeter. You’ll need twelve to fifteen extra inches of binding material.
Advertisement -
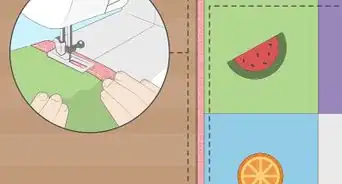
3Cut the binding fabric into strips of your chosen width. You may find a rotary cutter to be helpful for larger projects. Fabric scissors will also do the trick.
-
4Sew the pieces together using the following method until you have a binding strip long enough to outline the perimeter of your quilt:
- Lay two strips at a right angle with the ends overlapping, so that they form an inverted “L” shape. Pin the strips at the outer corner using a straight pin.
- Stitch a diagonal line across where the two strips meet. Pull the top strip down so the two strips form a straight line. Trim away the extra fabric triangle on the outside of the seam, leaving ¼” seam allowance.
- Continue attaching more strips in this fashion until you have one long strip.
- When your binding strip is long enough, iron it straight and flat. Fold it in half lengthwise and iron it again to create a crease down the middle of the fabric.

Bind the Quilt
-
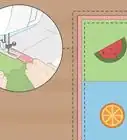
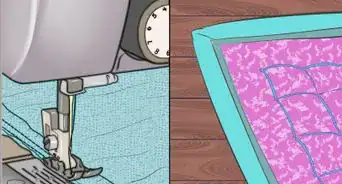
1Prepare the quilt for binding. After you have finished quilting, use your sewing machine to stitch in a straight line 1/8” from from the edge of the quilt around its entire perimeter. This will ensure that the layers of the quilt stay flat and in place during the binding process.
- When you’re finished stitching, trim any rough edges or excess batting from the perimeter of the quilt to make sure it is neat and even.
-
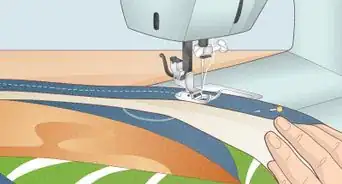
2Begin sewing the binding. Line up the raw edges of the binding strip with the raw edge of the quilt. The folded part of the binding strip should be on the inside of the quilt top. Begin sewing about three inches from the corner, leaving an unsewn “tail” that will be tucked into the binding later.
- Choose the seam allowance that fits the look of your quilt. The most common seam allowance is ¼”.
- Use the walking foot on your sewing machine to prevent the fabric from bunching up.
- Sew along the first side of the quilt until you’ve reached the same distance from the corner as your seam allowance. If you’re using a ¼” seam allowance, stop stitching ¼” from the corner.
- Backstitch a few centimeters and cut the threads.
-
3Bind the first corner. Begin by folding the long tail of the binding up, so that it runs parallel to the next side of the quilt you’re going to bind. The lower edge of the strip will form a 45-degree angle. Keeping that folded angle in place, fold the tail down so that its raw edge is aligned with the raw edge of the next side of the quilt. This is called mitering a corner. Begin sewing a new line at a right angle to where the first stitch ended. Backstitch over the corner to make sure it stays firmly in place.
-
4Sew all the edges and corners. Continue sewing the binding along the edge of the quilt, using the same seam allowance you used on the previous edge. As you approach each corner, stop stitching the same distance from the edge as your seam allowance. Miter the corner and continue sewing along the last edge.
-
5Finish sewing the first side. When you reach the place where you began binding the quilt, trim the tail, leaving just enough fabric to overlap the starting place by about four inches. Fold the fabric under at a diagonal and tuck the other tail at the beginning of the binding underneath. Continue stitching along the edge of the quilt and sew over your original seam by an inch or so. Backstitch and trim your thread.
-
6Turn the quilt over and bind the other side. Flip the quilt and fold the binding strip to the same measurement as your seam allowance. If you used a ¼” seam allowance, fold the binding strip over the edge ¼”. Use your walking foot to begin stitching along the edge of the quilt.
- Guide your quilt carefully and stitch slowly. Adjust the quilt as needed to ensure your seam is straight.
- When you reach the corner, miter it. Fold the end of the binding strip under at a 45-degree angle at the corner, then laying it flat along the next edge. Carefully pivot the quilt in the sewing machine at the corner and continue stitching the next edge of the quilt. Sew each edge and corner of the quilt in this manner.
- Continue stitching about an inch over the place where you started. Backstitch, then trim the thread.
Community Q&A
-
QuestionWhy does the edge of my quilt wrinkle while sewing on binding?
 Atalanta64Community AnswerAs you sew, the material stretches as the needle punches through.
Things You'll Need
- A quilt
- Binding fabric
- Rotary cutter
- Mat with measurements
- Fabric Scissors
- Straight pins
- Sewing Machine

References
- Videos provided by Missouri Star Quilt Company
About This Article
To bind your quilt, begin sewing about 3 inches from the end of the binding. Sew along the first edge of the quilt before binding the first corner. To do this, fold the long end of the binding up so it runs parallel with the second edge of the quilt. Begin sewing at a 90 degree angle from the last stitch before backstitching over the corner to keep it in place. Do this for all of the quilt's edges. When you get back to where you started, trim the tail, sew over the original binding by around 1 inch, then turn the quilt over and bind the other side. For more tips, including how to make the binding, read on!