wikiHow is a “wiki,” similar to Wikipedia, which means that many of our articles are co-written by multiple authors. To create this article, 12 people, some anonymous, worked to edit and improve it over time.
wikiHow marks an article as reader-approved once it receives enough positive feedback. In this case, 89% of readers who voted found the article helpful, earning it our reader-approved status.
This article has been viewed 106,841 times.
Learn more...
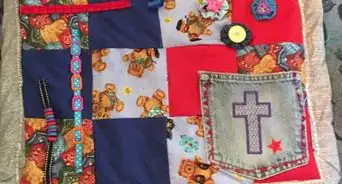
A quillow is a blanket that folds into itself, becoming a pillow. It's a simple project that requires a free afternoon, some basic sewing skills, and a few yards of soft, inviting fabric. Quillows are great to store in your car for impromptu picnics, bring to sporting events, or keep on your couch to curl up and watch a movie.
Steps
Material Prep
-
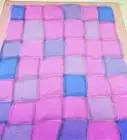
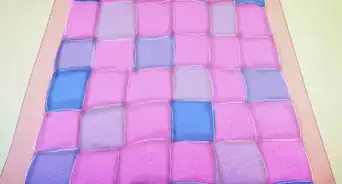
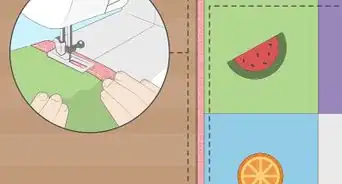
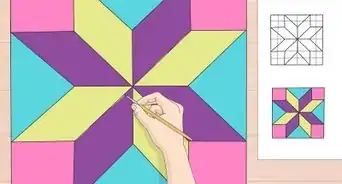
1Select your fabric. The blanket is made by sewing together two pieces of fabric. You can choose matching fabric for both sides, or you can mix patterns and types of fabric for the bottom and top. Consider how you plan to use your quillow and who it is for. A baseball fan might like a pattern with bats and mitts or the logo of his favorite team; a dog lover might appreciate a pattern of little paw prints. Use your creativity!
- For a blanket that will cover an adult, you will need 2 pieces of fabric that is 2 yards (1.8 m) long and 60 inches (150 cm) in width, plus an additional 1⁄2 yard (0.5 m) for the pillow.[1]
- For a baby blanket, buy two 1 1⁄2 yards (1.4 m) of fabric. Trim these later to crib size (usually 36 inches b 44 inches) and use the remaining fabric for the pillow.
- Fleece, flannel, or cotton fabric are good choices to make warm, cozy blankets. You may also find soft, plush fabrics perfect for baby.[2]
- If you plan to use your quillow for picnics, consider making one side of the blanket water-proof with either water-proof fabric or a heavy vinyl shower curtain. This will help keep your blanket dry in wet grass and make it easier to clean off dirt and sand.[3]
-
2Select your batting. This is the insulation or padding you layer between your top and bottom pieces of fabric. Look for a high-quality batting that won't separate and isn't too thick, or you may have trouble folding your quilt into the pocket.[4]
- Get the same size batting as your fabric (or bigger--you will trim it down).
- Cotton batting is a popular choice because it is breathable and ages well, plus it's machine washable. If you're looking for cotton batting with a little more "poof," look for one with scrim or a cotton/polyester blend.[5]
- Wool batting is durable and is a great choice for a blanket you want to be extra-warm. It is a little more expensive than other batting, and you must be very careful when washing, or it will clump up inside your blanket.[6]
- Polyester batting is inexpensive and will retain it's shape, making it ideal for a baby blanket, since it will be washed regularly. It's a little more more "poofy" than wool or cotton, so don't get one that is too thick.[7]
Advertisement -
3Buy thread that matches your pattern. Unless you're looking for contrast, you want your stitches to blend in with the colors of the blanket.
-
4Trim your fabric to the desired size. If the dimensions of your fabric aren't already the size you'd like, lay the fabric flat and use a yard stick and rotary cutter to cut through the fabric.
- Place a self-healing matt under the fabric before you cut. This will make it easier to slice through and won't damage the table or floor underneath.
- If you aren't sure about the dimensions of the pillow pocket, find the measurement for 1/4 of the length of the main blanket, then add 1–2 inches (2.5–5.1 cm) to that number. Then find 1/3 of the width of the main blanket, and add 1–2 inches (2.5–5.1 cm) to that number.
- Remember you will lose roughly between 1/8-1/4 of an inch when you sew the quilt together, depending on the seam.


Main Blanket
-
1Lay the fabric down, one piece on top of the other, with the right sides touching each other. The "right" side refers to the side of the fabric that will be exposed, or the side with the pattern on it.
-
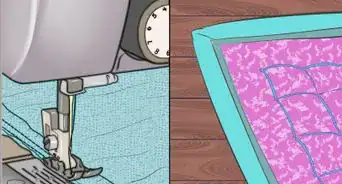
2Lay the batting on top of the two pieces of fabric, then pin the edges of the three layers together.
- Trim the batting to the exact size of the fabric, if it is not already the same size.
- Leave a 12 inch (30.5 cm) opening somewhere along the edge.
-
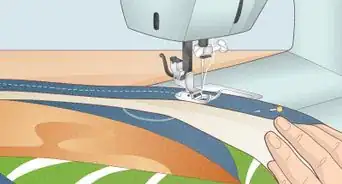
3Stitch the three layers together with a 1⁄2 inch (1.3 cm) seam, taking care to not sew the 12 inch (30.5 cm) opening closed. Remove the pins.
- If you have trouble sewing a straight line, mark the 1⁄2 inch (1.3 cm) seam with a colored pencil or "invisible" marking pen that rinses out with a little water.[8]
- You may choose to zig-zag stitch the raw edges as well if you think the blanket will be frequently laundered or get a lot of rough use.
- Use sharp scissors to trim off the four corners with a diagonal cut. Don't clip your stitches![9]
- Press the edges with a hot iron to lock the stitches and increase the durability of your blanket.
-
4Turn the blanket right-side out through the 12 inch (30.5 cm) opening. Reach in through the opening and use a pencil to push out your corners.
- Smooth out the quilt and iron to the edges. Pressing your quilt will ensure a neat, polished look when you are finished.
- Fold in the raw edges of the 12 inch (30.5 cm) opening so it is even with the rest of the blanket and press it with the iron. Pin it closed, with the excess fabric (or raw edge) tucked into the opening.
-
5Sew a 1/4 inch seam around all four edges of the quilt, closing the 12 inch (30.5 cm) opening. This final seam secures the edges of the quilt so it will last longer. It also gives the blanket a neat, professional look.
- This 1/4 seam should be between the edge of the blanket and the 1⁄2 inch (1.3 cm) seam you already sewed.
- You can skip the final seam and just sew the opening shut with a 1⁄8 inch (0.3 cm) seam, but the blanket won't be quite as durable and the edges may not look quite as clean.[10]


Pillow Pocket
-
1Fold the 1⁄2 yard (0.5 m) fabric in half, right sides facing each other, and stitch the long edges of the rectangle together with a 1⁄2 inch (1.3 cm) seam. Make sure the edges are lined up and pinned before you begin stitching. You are making a mini-version of the main blanket, only without the batting.[11]
- One side of the rectangle should still be open so you can flip the fabric right-side out.
- Snip off the corners with scissors. This gives your pocket nice, sharp edges.
-
2Turn the blanket right-side out through the open side of the pillow pocket. Again, reach into the opening and use a pencil to push out the corners.
- Press the fabric with a warm iron, locking the stitches and smoothing out any wrinkles.
- Fold the open side of the rectangle so its is even with the edge of the rest of the pillow pocket. Use the iron to crease the fold and pin the opening closed.
-
3Sew a 1/4 inch seam to close the open edge only; do not stitch the way around the pocket. You will be sewing these edges later, when you attach them to the large blanket.


Assembling
-
1Lay the larger, main blanket on a flat surface and lay the pillow pocket at the top center of the blanket. The edge of the pocket you already stitched with a 1⁄4 inch (0.6 cm) seam should be lined up with the edge of the large blanket. Pin the pocket in place.
- The top of the blanket is one of the shorter sides of the rectangular blanket (the width). If you made a square blanket, the top is whichever side you choose.
- Measure the blanket on either side of the pillow pocket, making sure it is in the exact center on the edge of the blanket (not the exact middle of the entire blanket).
- You can sew the pocket on the front or back of the main blanket. It will be concealed if you sew it on the side that is on the ground. If the pillow pocket is on the front of the blanket, you can use it as a storage pocket while the blanket is in use.
-
2Sew the three outer edges of the pillow pocket to the blanket using a 1⁄4 inch (0.6 cm) seam. Do not sew the edge of the pillow pocket that is lined up with the edge of the blanket, or you will have no pocket in which to tuck your blanket!


Folding
-
1Lay the blanket on the ground, pocket side down. The pocket is at the "top" of the blanket.
-
2Fold the outer edges of the blanket to the opposite edges of the pocket. You are folding the blanket into thirds, lengthwise. The blanket should be longer than it is wide, and be the width of the pillow pocket.[12]
- If you were to flip the blanket over now, the pillow pocket would be fully visible, with the open edge at the top.
-
3Fold the blanket up from the bottom, once again into thirds.[13]
- The blanket should now be folded to the dimensions of the pillow pocket.
-
4Flip pocket over the blanket. To do this, reach one hand into the pillow pocket and grab hold to the edge that is sewn to the blanket. Hold the open edge of the pillow pocket with your other hand. Pull the inside edge of the pillow pocket toward you while simultaneously pulling or flipping the free edge away from you and around the folded blanket.
- It may help to think of it this way: the pillow pocket is being flipped inside out and you are stuffing the blanket into the flipped pocket.
- It may take a few tries to get the hang of the flip.
-
5Smooth the edges and fluff for a perfect pillow.
-
6Convert back to a blanket by simply flipping and unfolding the blanket. It should pop out of the pillow easily.


Community Q&A
-
QuestionShould I do extra stitching on this quillow when using polyester batting?
 Community AnswerYour batting will tell you how far apart you need for stitching. Polyester is usually 2-4 inches apart.
 -
QuestionYour illustration shows the pillow pocket in the dead center of the blanket, but instructions say to place it on the edge. Which is it?
 LeeM StradleyCommunity AnswerI wondered about that too, so I tried it both ways, and both work. If it’s placed in the center, the final folds are done from each end so that the pillow is on top. If it’s placed on an edge, the final folds are started from the bottom. I am going to try making one with the opening facing into the quilt - the closed end of the pillow is sewn along the edge. That way the final fold simply folds into the pillow without the pillow being folded onto itself.
 -
QuestionCan I just sew the pillow pocket to the top of the sewn quillow with the opening of the pocket toward the lower end of the quillow?LeeM StradleyCommunity AnswerI thought of that too, and I think it would make the folding simpler. The final fold would then just fold into the pillow. The end result, however, would mean that one part of the quilt would be exposed instead of being entirely stored within the pillow. On the other hand, if the quillow is not being tossed around much, that might not matter.
Things You'll Need
- Fabric
- Pins
- Thread
- Needle
- Batting
- Yard stick (optional)
- Rotary cutter (optional)
- Sewing machine
- Iron
- Scissors

References
- ↑ http://www.theribbonretreat.com/blog/simple-quillow-tutorial.html
- ↑ http://www.apartmenttherapy.com/top-5-warmest-b-160999
- ↑ http://www.craftbuds.com/all-in-one-picnic-blanket-tote/
- ↑ http://www.connectingthreads.com/tutorials/A_Guide_to_Batting__D88.html
- ↑ http://www.connectingthreads.com/tutorials/A_Guide_to_Batting__D88.html
- ↑ http://www.connectingthreads.com/tutorials/A_Guide_to_Batting__D88.html
- ↑ http://www.connectingthreads.com/tutorials/A_Guide_to_Batting__D88.html
- ↑ http://www.sew4home.com/tips-resources/sewing-tips-tricks/stitching-and-cutting-corners-correctly
- ↑ http://www.sew4home.com/tips-resources/sewing-tips-tricks/stitching-and-cutting-corners-correctly
About This Article
To make a quillow, start by trimming your fabric to the desired size and laying the fabric down, one piece on top of the other, with the right sides touching each other. Next, lay the batting on top of the two pieces of fabric, pin all three layers, and stitch them together, leaving a 12 inch opening. Then, flip the fabric right-side out and create the pillow pocket. Finally, sew the pillow pocket to the blanket using a 1⁄4 inch seam. For tips on choosing fabric, read on!