This article was co-authored by wikiHow staff writer, Kyle Smith. Kyle Smith is a wikiHow Technology Writer, learning and sharing information about the latest technology. He has presented his research at multiple engineering conferences and is the writer and editor of hundreds of online electronics repair guides. Kyle received a BS in Industrial Engineering from Cal Poly, San Luis Obispo.
This article has been viewed 262,507 times.
Learn more...
Repeating patterns are a timeless tool in graphic design. And, get this, they’re easy to make in Adobe Photoshop! You can make a basic repeating pattern, or get fancy and make a seamless design. This wikiHow guide will show you how to make a pattern in Photoshop on Windows & macOS.
Things You Should Know
- Draw, fill, and place images on a new canvas.
- Create a seamless design by turning on View > Pattern Preview.
- When you finish making the pattern, flatten the layers by going to Layer > Flatten Image.
- Save a pattern by going to Edit > Define Pattern…
Steps
Basic Pattern
-
1Open up a new, small canvas. To do so, click "File" → "New." This canvas will be the thing that is repeated throughout your pattern. Whatever size this canvas is will be the size of each repeated item in the picture. For now, set the height and width to 100 pixels or so, then zoom in to see the pattern up close.
- You can change the canvas size later, so don't worry about getting it exactly right the first time if you're struggling.[1]
- You can choose any type of background, from white to transparent, depending on your desired pattern.
-
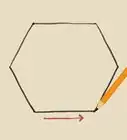
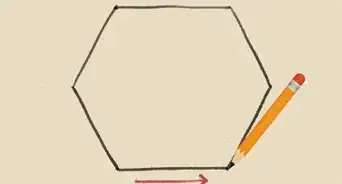
2Fill in the canvas with your unique pattern. You might put something in the center, knowing it will repeat, or fill the whole thing up. You can even put in other images or text. If you have multiple layers, flatten the entire file by going to Layer > Flatten Image.[2]
- If you're just practicing, place a dot in the very middle of the frame. This will end up creating a polka dot pattern.
- You can turn on "View" → "Show Guides" to help you center and space out your pattern if you want exact measurements.[3]
Advertisement -
3Click "Edit" → "Define Pattern." You can find this up in the top bar. This allows you to save your pattern and use it later.[4]
-
4Name the pattern and hit "OK", This will save your new pattern. This is all you have to do! Your pattern will now appear in the patterns menu.


Seamless Design Using Pattern Preview
-
1Open a new canvas and turn on Pattern Preview. Go to View > Pattern Preview. This feature will show you a workspace outside of the canvas that repeats the canvas contents.[5]
- You can resize the image as needed during the editing process.
-
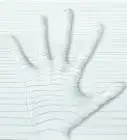
2Add items to the canvas. You can draw, type, and add images to the canvas. Placing something that overlaps the edge of the canvas will automatically create a seamless pattern continuation on the opposite side.
- You could make a cool, merged-photo pattern!
- Or, try removing the background of a picture and using the subject as a pattern.
-
3Create a new pattern preset. Go to Edit > Define Pattern… Then, name the pattern and click OK. You’ve saved your new seamless pattern!


Seamless Design Offset Method
-
1Open a new canvas and create your pattern. Start by just drawing, copying, or adding the images you want in your pattern. The size of the canvas will be the size of each repeating piece of the pattern later on, so remember this as you're working.
-
2Flatten the image if you have multiple layers. Depending on your workflow and pattern, you may end up with multiple layers. Merge them together by right-clicking in the Layer's Palette and selecting "Flatten Image." Note, however, that this will prevent you from editing the individual layers.
- It is often best to use "Save As" to save a copy of the pattern with layers, allowing you to go back and make changes if need be.[6]
-
3Offset your pattern using the Filters menu. In the top bar, click "Filters" → "Other" → "Offset." This will slide the pattern slightly, making it easier to repeat perfectly. Make sure you set the following settings:
- Vertical Offset: Set to half of your image's height. If you have a 600px tall canvas, set the vertical offset to 300px.
- Horizontal Offset: For now, set this to zero.
- Wrap Around: Make sure that this setting is checked.
-
4Offset the pattern again, this time focusing on the Horizontal Offset. Again, use "Filters" → "Other" → "Offset" to pull up the appropriate menu. Then set the following settings:
- Vertical Offset: Set this to zero.
- Horizontal Offset: Set this to half of your image's total width. If the width is 100px, you set the Horizontal Offset to 50px.
- Wrap Around: Make sure that this setting is checked.
-
5Fill in any gaps created in your pattern by the offsetting. When the filter is put into effect, it moves some of your pattern over. You can, however, use copy and paste or create new drawings to fill in the small spaces if you desire.
- Remember to flatten your image again if you decide to create more layers or images.
-
6Offset the image one more time, focusing on the Vertical Offset, if the four corners are not yet meeting. Remember, this pattern wants to repeat perfectly, so the each side should be balanced with the other. For example -- if your pattern is made up of stick figures, and the top of a head pokes out the bottom of the pattern, that figure's body should be right on the top edge of the pattern, so that they match up when repeated. To get this, Offset the image one more time, using the same settings as the first time.
- Vertical Offset: Set to half of your image's height. If you have a 600px tall canvas, set the vertical offset to 300px.
- Horizontal Offset: For now, set this to zero.
- Wrap Around: Make sure that this setting is checked.
-
7Save your new pattern to put it to use. Click "Edit" → "Define Pattern." This saves your pattern in the pattern box. You can choose a new name, then hit "OK" to save the pattern.


Expert Q&A
-
Questionthis is a lot of stuff to try and remeber, how do you remember?
 Kyle SmithKyle Smith is a wikiHow Technology Writer, learning and sharing information about the latest technology. He has presented his research at multiple engineering conferences and is the writer and editor of hundreds of online electronics repair guides. Kyle received a BS in Industrial Engineering from Cal Poly, San Luis Obispo.
wikiHow Technology WriterHonestly, I don't remember a lot of Photoshop workflows! I keep several tutorials bookmarked to reference later. If you do a process often enough, you'll eventually commit it to memory. You can also create a Photoshop Action to automate some or all of the process.


References
- ↑ http://www.hongkiat.com/blog/creating-custom-pattern-in-photoshop/
- ↑ http://www.photoshopessentials.com/basics/repeating-patterns-intro/
- ↑ http://www.creativebloq.com/photoshop/repeating-pattern-41411342
- ↑ https://helpx.adobe.com/photoshop/using/creating-patterns.html
- ↑ https://helpx.adobe.com/photoshop/using/pattern-preview.html
- ↑ http://ohmyhandmade.com/2013/hands/lets-create-a-repeat-pattern-in-photoshop/
About This Article

1. Create a new small canvas.
2. Fill the canvas with your desired artwork.
3. Click Edit.
4. Click Define Pattern.
5. Name the pattern and click OK.