This article was co-authored by Crystal Bear. Crystal Bear is a Professional Photographer and the Owner of Summer Bear Photography. Crystal specializes in weddings and portraits for women. She holds a BS in Interior Design and Consumer Science from San Francisco State University. Coming from a design background, Crystal brings a sense of style and artistry to her work that brings out her client’s inner confidence, showcases their beauty both inside and out, and puts them at ease. She also specializes in using the correct lighting and branding for women entrepreneurs.
There are 8 references cited in this article, which can be found at the bottom of the page.
This article has been viewed 686,365 times.
Merging two or more different pictures allows you to create beautiful graphics in a multitude of fields within the image. Photoshop lets you create special effects, but in this case, you'll just get acquainted with how to mix two images in a harmonious way to create a synergistic, simple blend.
Steps
Merging Images into the Same Photo
-
1Select the images for your composition, then open them both in the same window. To do so, you have several options. The easiest is to click and drag the images into Photoshop straight from your Desktop, Finder, or Windows Explorer window. However, you could also:
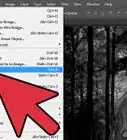
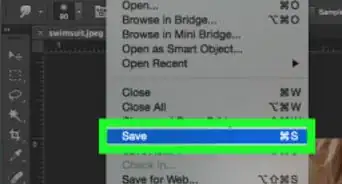
- Click "File" → "Open." This will open two separate tabs above your image. Click and drag a tab to pull it out of the frame. Then click and drag the image to the tab you want both photos in.
-
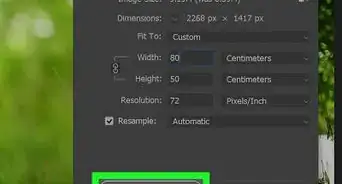
2Adjust the size of each layer, if need be, with the Transform Tool. This powerful feature lets you re-size, rotate, angle, and adjust an image's size. To use it, click on the layer you want and press either Ctrl+T (PC) or Cmd-T (Mac) to start transforming. You'll see a box with little handles that let you adjust things.
- Hold Shift when re-sizing to keep the same dimensions.
- Hold Ctrl/Cmd when re-sizing to only move the point you're clicking on, creating "perspective."
- Hold Alt/Opt when re-sizing to keep all the angles of the image the same (the corners), but change the size.
- Click just outside the edges of the image to rotate it.[1]
Advertisement -
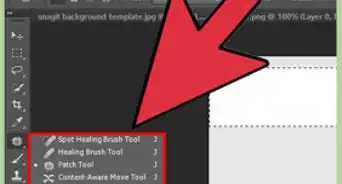
3Use the Eraser tool to cut away any non-essential areas. If you know you definitely don't want something, pull up your Eraser (E) and start hacking away. While working, here are some helpful hints:
- Hit Ctrl-Alt-Z (PC) or Cmd-Opt-Z (Mac) to undo any accidental erasing. Hit Ctrl-Z or Cmd-Z to redo it if you go back too far.[2]
- If you create a selection (the moving, dotted line) then you can only erase what is in the selection. This is a good way to protect areas you can't erase, by only selecting areas you need to erase from.
- Erasing is permanent, meaning the pixel data is lost. There are steps below that let you make pixels invisible instead, saving them if you need them later.
-
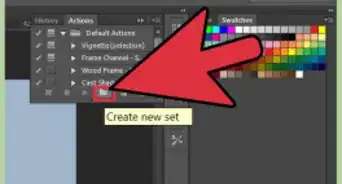
4Use layer masks to erase non-permanently, as well as "gradually" erase images into each other. Layer masks are you best friend when merging. They allow you to erase parts of a layer without actually deleting the data, meaning you can easily undo it all if you mess up. To make one, highlight the layer you want, then click the small rectangle icon with a black circle in the center at the bottom of the layer's pallet. From here:
- Turn on the brush tool. It will automatically be set to black and white.
- Make sure your layer mask is selected. It is the second, all white square to the right of your layer.
- Color in anything you want to be erased in black on the actual image. It will erase, not add black ink.
- Anything colored in gray will partially erase, up until it is fully black or white.
- Re-color the mask with white to make the image reappear.
- Note that you can use gradients, weird brushes, stamps, and the pen tool as well! Any way you "color" the mask will show up.[3] [4]
-
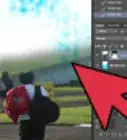
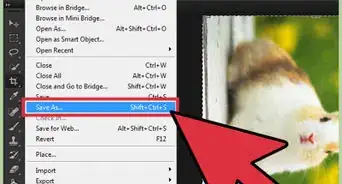
5Use your selection tools and "Refine Edge" to isolate specific things in your image" If you just want to pull a person into an image, or Photoshop a flag from one photo into the background of another, then merging the images may not be necessary. Instead, use the following tools to select your object, then right-click and choose "New Layer Via Cut."[5]
- Shaped Selections: The icon looks like a dotted box, and is first up. If you click and hold the icon it exposes more shapes to use.
- Lasso Tools: Click create a selection, finishing when you connect the two ends of you line or click again to finish it. There are also options for angular and "magnetic" (following colors) lassos.
- Quick Selection Tool: Resembles a paintbrush with a small dotted line around the end of the brush. This is your most powerful tool. Click and drag it on an image and it will attempt to find and select the object automatically. Change the tolerance, shown above, for better results.
- Magic Wand: Click and hold to find it behind the Quick Selection tool, or vice versa. The Wand selects all pixels in the same color range as the place you just clicked, which helps remove large swaths of background all at once.
- Pen Tool: Icon looks like a regular fountain pen. This is the most powerful tool you've got, but also the most time consuming to use. The pen tool creates "paths" with anchor points that can b be adjusted on the fly, giving you more control than basic selections.


"Hiding" Your Merges Smoothly
-
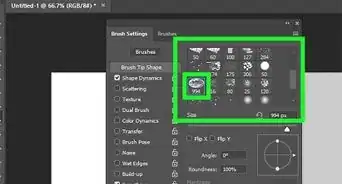
1Change the opacity of your brushes and erasers for tighter control. Partial transparencies also stack, meaning you can use this to "shade in" images realistically. If you need a partial edge or gentle transition, set the brush or eraser opacity to 10% or so. Now, every time you shade over that area, you erase 10% of pixels each time. So, if you erase it 10 times in one area, then move over and erase 8 times, then 6, etc, you would get a nice, gradual merge.
-
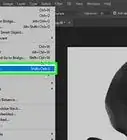
2Use "Refine Edge" to get perfect cuts and selections. Found through "Selection" → "Refine Edge," this shows off what your image will look like without a background. This allows you to see your new photo perfectly, fine tuning it before merging it in. Any selection, on any layer, can be refined. When done, click "Selection" → "Inverse" and hit the Delete key to erase all the pixels you refined out.
- Radius: Shrinks the edge all the way around. Each pixel you "add" cuts a pixel closer to your selection.
- Smooth: Rounds the edges
- Feather: Adds partial transparent "blur" to the edge of the selection.
- Contrast: Makes harder edges and points. Opposite of "Smooth."
- Shift Edge: Grows or shrinks the entire thing based on the percentage you supply.[6]
-
3Try the "Auto-Align Layers" if you're matching near-identical photos. This feature will sync up the two images, like a group photo where one person closed their eyes. Pull in another copy where they have their eyes open, then select both layers by Ctrl/Cmd-clicking them. From there, select "Edit" → "Auto-Align Layers."
- Select "Reposition Only" for the best results.[7]
-
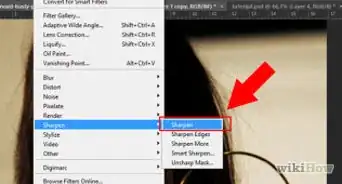
4Play with "Blending Modes" to match the lighting in your merged images. Blending modes relate one layer to another. So, for example, if your bottom layer has strong lighting, you can tell your top layer to take some of these light pixels and use them to lighten up your top layer. Sound confusing? The best part is, it is simple and easy to experiment without permanent damages. To use them:
- Click on the top layer of the ones you're merging.
- Click on the drop-down menu, currently set to "Normal" above the layers.
- Choose a new blending mode, noting how it changes your image. Try out
- Pin Light
- Lighten
- Multiply
- Overlay
- Soft Light
- Dissolve[8]


Expert Q&A
Did you know you can get expert answers for this article?
Unlock expert answers by supporting wikiHow
-
QuestionCan you merge photographs of people?
 Crystal BearCrystal Bear is a Professional Photographer and the Owner of Summer Bear Photography. Crystal specializes in weddings and portraits for women. She holds a BS in Interior Design and Consumer Science from San Francisco State University. Coming from a design background, Crystal brings a sense of style and artistry to her work that brings out her client’s inner confidence, showcases their beauty both inside and out, and puts them at ease. She also specializes in using the correct lighting and branding for women entrepreneurs.
Professional PhotographerYou can, but it probably won't look very good. The best time to use the merge feature is when you're trying to merge photos that you took of a landscape from far away.
Support wikiHow by unlocking this expert answer.
wikiHow Video: How to Merge Photos Using Photoshop


References
- ↑ https://helpx.adobe.com/photoshop/using/transforming-objects.html
- ↑ http://photoshopcafe.com/tutorials/blend/blend.html
- ↑ https://helpx.adobe.com/photoshop/using/combining-multiple-images-group-portrait.html
- ↑ http://www.photoshopessentials.com/photo-effects/photo-blend/
- ↑ http://www.photoshopessentials.com/photo-effects/photo-blend/
- ↑ https://helpx.adobe.com/photoshop-elements/using/layer-styles.html
- ↑ https://helpx.adobe.com/photoshop/using/combining-multiple-images-group-portrait.html
- ↑ http://www.photoshopessentials.com/photo-editing/how-to-merge-layer-blend-modes-in-photoshop/
- http://www.webcoursesbangkok.com/blog/photoshop-tutorial-merging-two-photos-together/ - Original source, shared with permission.
About This Article

You can use Adobe Photoshop to artfully blend and merge two photos into one. First, open both images in Photoshop—to open each image, click the "File" menu in Photoshop, click "Open", and select the photo. Then, click "Open," and then do the same for the second photo. Now you'll need to get both photos onto the same canvas. To do this, click the tab of the base image, or bottom image, to open it. You'll see another tab at the top that contains the name of the second image—drag that tab to the center of the base image to add it as a second layer. If you need to adjust the size of the top image, you can use the Free Transform tool. To use it, click the top image in the Layers panel, and then press Control + T on a PC, or Command + T on a Mac. Hold down the Shift key as you drag the handles inward or outward so you don't warp the image. Now, add a layer mask to gradually blend the images together. Start by selecting the top layer in the Layers panel, and then click the small rectangle icon with a black circle at its center. Now press the G key to open the gradient tool. Make sure the foreground color is black and the background color is white, and then choose a gradient pattern from the drop-down menu. Drag the gradient anywhere on the image to blend the layers in the gradient pattern. You can also use the brush tool to blend things manually. With this tool, anywhere you paint with black, the background image will show through more strongly. You can adjust the brush's opacity by selecting a different percentage from the Opacity drop-down. You may also want to check out Blending Options. Select the top layer in the Layers panel, and then choose a blending option from the drop-down menu, which should be set to "Normal" or "Screen" by default. There are many options to choose from, but try the "Overlay" option to adjust the colors of the top layer based on the bottom layer, or "Soft Light" for a diffused spotlight look. When you're happy with your image, select the "Layer" menu and click "Flatten" to flatten the layers, and then save your file in the desired format.