X
wikiHow is a “wiki,” similar to Wikipedia, which means that many of our articles are co-written by multiple authors. To create this article, 14 people, some anonymous, worked to edit and improve it over time.
This article has been viewed 22,523 times.
Learn more...
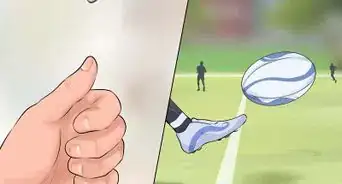
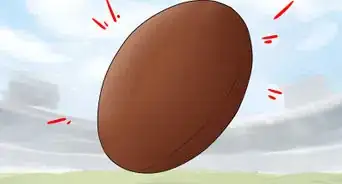
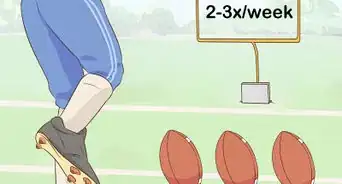
Rugby tees are used only on penalty kicks. Kicking tees are used to elevate the ball off the ground, allowing the kicker to get under the ball and drive it with maximum power. If you're short a tee you can easily make one, either on the field or off, with some simple supplies.
Steps
Method 1
Method 1 of 2:
Making a Tee at Home
-
1Make a tee out of an old 1.5-liter bottle for a quick and easy kicking platform. There are no hard and fast rules about what can and can't be a kicking tee, so as long as the finished bottle doesn't have any jagged edges it should be perfect. In fact, Dartmouth recently used a water bottle against Yale in a game where they forgot their tee.[1]
-
2Clean out the bottle and remove any labels. Give the bottle a quick rinse to get the juice or soda out, then remove any labels and caps. You just want a plain clear bottle to work with.Advertisement
-
3Use a boxcutter, sharp knife, or a fresh pair of scissors to cut the bottom off the bottle. You want to cut a clean, straight line across the bottom, roughly 1.5 inches up. The final cylinder should be smooth and regular, forming a perfect circular opening on the bottom.
- This is the part of the tee that sits on the ground, so the more evenly you cut it the better it will balance.
-
4Make a mark 4.5" from the bottom of the bottle. This is going to be the lower end of your tee. Most rugby tees are angled, allowing you to balance the ball so that you kick the nose of it, so you'll need to make two different cuts. Mark them out first to make sure the finished tee is even.
-
5Make a mark 9" from the bottom of the bottle directly opposite your first mark. This is going to be the high end of your tee. Look through the bottle and make your mark so that it is lined up across from the 4.5" mark.
-
6Connect your two marks with a circle around the entire bottle. This is easiest if you just connect the two marks with your marker. You'll be left with a diagonal ring around the bottle.
- Try your best to make these lines identical. It is not crucial for a quick, makeshift tee, but it will help the ball stay in place.
- Try to connect the sides with a gentle, sideways "s" shaped line, so that the highest point on the tee is just before the 9" mark.[2]
-
7Cut along your outline to make the tee. Once you've finished your lines, use the box cutter again to cut along your line, making your final tee.
- Depending on your cutting tool, the edge may be rough and jagged. If it is, simply cover the entire edge with electrical tape. This has the added benefit of making the tee easier to see as well.
-
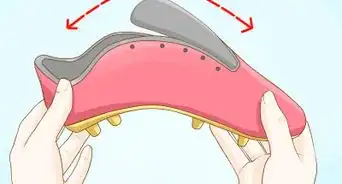
8Customize your tee to make it heavier or suit it to your needs. The basic design can be easily tweaked if you need, and requires few other tools:
- Tape 4-5 quarters to the tee to make it heavier, which will keep in place on windy days.
- Cut a gentler line if you usually kick horizontally. If you kick on the nose, simply cut the 9" mark further down, near 7-8" instead.
- Trace out the arc of a real tee and cut it into your bottle for a better tee. The "s" shaped curve of a real tee is hard to replicate, but you can study real tees and trace their shape on paper. Transfer this paper to the bottle, trace the line on the bottle, and then cut.[3]


Advertisement
Method 2
Method 2 of 2:
Improvising a Tee on the Field
-
1Use your heel to spike a divot in the ground. As long as the ground isn't bone dry, you can prop the nose of the ball in a small divot and use it as a makeshift tee. To do so, simply kick your heel into the ground, aiming with the point where the back of the shoe meets the bottom. You want to be facing the direction you're kicking when you make the divot. Then ease the nose of the ball into the ground.
- If you normally kick with a tee, you'll need to take a few practice hits to get used to the new ball placement. It is slightly lower than a tee, meaning you need to get your foot a little further under the ball to get it up.
-
2Use a practice cone. You want one of the round, low cones. While a little bit higher than a standard tee, you can balance the ball easily on the hole in the tip and use it to elevate the ball for a perfect kick.
-
3Use your other shoe. While it is not the most elegant solution, a high school team in the United States once used the opening in the top of a cleat to prop the ball up, allowing the kicker to make full contact with the ball.[4]


Advertisement
Warnings
- Be careful when cutting. Always have supervision⧼thumbs_response⧽
Advertisement
Things You'll Need
- knife to cut
- scissors to cut shape
-Step-8.webp)


References
- ↑ http://www.usatoday.com/story/gameon/2012/10/17/dartmouth-yale-water-bottle-kicking-tee/1638199/
- ↑ http://www.instructables.com/id/Build-a-Kicking-Tee-from-a-Cola-Plastic-Bottle15/?ALLSTEPS
- ↑ https://books.google.com/books?id=IIYIBAAAQBAJ&pg=PT154&lpg=PT154&dq=Kicking+Tee+plastic+bottle&source=bl&ots=6dSAUAwKdb&sig=t1cF8drkxqowPF3yBY0sI_lsOII&hl=en&sa=X&ved=0CFUQ6AEwC2oVChMIpta_3efCyAIVEE2ICh0SaQzP#v=onepage&q=Kicking%20Tee%20plastic%20bottle&f=false
- ↑ http://www.mowdenpark.com/teams/13423/match-centre/0-441346
About This Article
Advertisement


-Step-8.webp)