wikiHow is a “wiki,” similar to Wikipedia, which means that many of our articles are co-written by multiple authors. To create this article, 21 people, some anonymous, worked to edit and improve it over time.
There are 47 references cited in this article, which can be found at the bottom of the page.
This article has been viewed 31,261 times.
Learn more...
A sensory box (also called a sensory tub, container, and bin [1] ) is a storage container that is stored and filled with materials that have to do with your five senses. They are mostly used for play, experiment, learning, and sometimes even for relaxation or mediation. [2] While they are mainly targeted for infants, toddlers, and young children, teens and adults may also enjoy the sensory experience these boxes offer. Easy and fun to make, sensory boxes provide endless opportunities of experiment and fun.
Steps
Choosing Your Materials
-
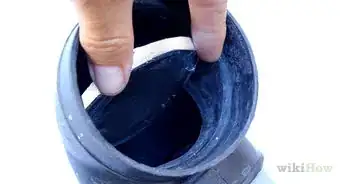
1Select a container. To make a sensory box, you'll need a container or tub where you'll be able to fill it up with a variety of items and tools for playing. Choose a container that is the right size for your group, is in good shape, and is easy to reach. The container should not have any sharp edges and should not have any holes or cracks. It should be easy to dig your hands in and explore with little to no assistance. [3]
- The size of the container really depends on how many people will be playing with the sensory box. For a classroom or group of children, a big tub that stands or mini plastic pool would be great for a sensory box. Small Tupperware and plastic tubs are suitable for one or two people. [4]
-
2Find touchable sensory objects. Textured materials are used as the filler or base of a sensory box. Find materials that have different features and are enjoyable to touch, play with, and explore. Experiment with both wet and dry textures. Your choices are endless so be creative when adding objects that encourage exploration of your sense of touch. [5]
- Some dry textures you can add to the sensory box include dry pasta, rice, popcorn kernels, nuts, flour, cotton balls, pom poms, acorns, pebbles, marbles, beads, buttons, soil, vegetable or fruit peels, leaves, and/or seashells. [6]
- Some wet textures you can add to the sensory box include water, ice cubes, snow, water beads, slime, lotion, shaving cream, cooked oatmeal, soap foam, oobleck, cooked pasta, jello, pudding, and/or whipped cream.
Advertisement -
3Discover items that have to do with your sense of smell. Sensory boxes do not always have to be about the textures and items you touch. Adding materials that have different aromas make sensory boxes a more fun and entertaining experience because it allows further exploration with your sense of smell. The smell doesn't have to be too overpowering; a simple aroma allows others to explore and discover what type of scents your nose can smell. Some ideas you might consider adding include: [7]
- Teabags
- Scented oils
- Lotion
- Light perfumes
- Cinnamon
- Pepper flakes
- Herbs
- Vinegar
- Lavender
- Baby powder
-
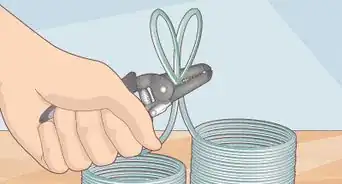
4Find items that make sounds or noises. Experiment with your sense of hearing by finding a variety of materials that make lots of sounds to explore and experiment with. Small jars, bottles, and containers with min-sized items inside can be thrown in for shaking and rattling. Spoons and other similar tools can be used for banging and whacking. Be creative and find tools that will go along with your sensory box. Some items you might want to use include: [8]
- Plastic eggs with materials inside
- Paper for crumbling
- Mini instruments (drums, cymbals, flute, etc.)
- Bells (desk bells, cowbells, jingle bells, handbells, etc.)
- Rubber bands
- Brushes
- Mini pots and pans
- Squeaky toys such as rubber ducks
-
5Choose edible items for your sensory box. If you have an infant or young toddler, you probably know how much they love putting objects in their mouth and exploring what they taste like. Instead of adding items that can be a choking hazard, add textured or simple edible items and foods that can be filled inside a sensory box. Some ideas include: [9]
- Cooked pasta (e.g spaghetti, elbows, pasta bows, etc.)
- Dry cereal (e.g Rice Krispies, Cheerios, Fruit Loops, Lucky Charms, Cornflakes, etc.)
- Dry or cooked oatmeal
- Marshmallows in different sizes, colors, and flavors
- Jello in different colors
- Whipped cream
- Yogurt
- Fresh or frozen pieces of vegetables or fruits (this may be a choking hazard for some, so keep the pieces small)
- Ice cubes (this may be a choking hazard for some, so keep the cubes small)
- Pudding in different flavors and colors
- Edible play-dough
- Breadcrumbs
-
6Find items that allow looking and exploring. Playing with a sensory box requires a lot of seeing and discovering. Small, plastic magnifying glasses and other similar tools can be used for further sighting. This is a great tool to consider adding if the sensory box has small objects such as rocks, marbles, or leaves. Magnifying glasses can be added inside the sensory box, or they can be placed outside on the sides of the sensory box. [10]


Creating a Sensory Box
-
1Choose your container. The most crucial and critical step in making a sensory box is finding the proper bin that will be used for playing and exploring. The size of the container really depends on how many people will use it. For example, you may want a deep, large container for a preschool classroom. [11] If you are creating a sensory box for one person, go with bins and tubs that are small.
- Small dishes, plastic or paper plates, dish tubs, small cardboard boxes, Tupperware containers, and foil roasting pans are great choices if you have one person playing with the sensory box. [12]
-
2Select a theme for your sensory box. While optional, a themed sensory box is more fun and engaging, especially if it's something children are interested in. They also bring bonus opportunities for further exploration and learning. You can make a themed sensory box based on what your child or group is interested in, or what's going on the world. For example, if winter is near, you might consider making a winter-themed sensory box. [13]
- Themed sensory boxes also make it easier to select items and materials for your container. If you have a hard time finding the right items for your sensory box, a certain theme can make it a little easier. [14]
- For more ideas on selecting a theme for your sensory box, scroll down to part three of this article.
-
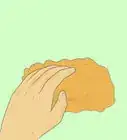
3Add a filler or base to the container. The base of your sensory box is the material that's touched and explored the most. The substance has a texture that is fun and relaxing to touch. Textured materials like oats, rice, popcorn kernels, beads, dry pasta, and dry beans make gentle sounds when they're touched and are excellent fillers for a sensory box. Wet textures like shaving cream, bubble foam, slime, ice, water, jello, whipped cream, and pudding are fun to squish and feel between your fingers. [15]
- Be creative and feel free to use what you have on hand. Most fillers and bases can be found around your house or can be found at your local Dollar Store. [16]
-
4Throw in a variety of objects and toys. Adding toys and objects encourages pretend play and further fun to the sensory box. You can throw in a few toys based on the theme of your sensory box. For example, a pond sensory box could have rubber ducks and a farm sensory box might have plastic farm animals. [17]
-
5Add instruments and tools for further exploring. Cups, spoons, jars, muffin trays, brushes, shovels, magnifying glasses, funnels, buckets, plastic knives, plastic scissors, mini cooking utensils, cookie cutters, and chopsticks are excellent tools that allow others to explore and discover sensory boxes even deeper. Different tools and instruments increase the level of play in a sensory box and are great to consider if your child doesn't enjoy touching different textures with their bare hands.
- Extra tools and instruments can increase a child's motor skills because children will be scooping, pouring, and moving objects in a sensory box. [18]
-
6Provide easy ways of cleanup. One worry that many parents and teachers have about sensory boxes is the mess that they'll cause. It is true that sensory boxes aren't the cleanest and tidiest activity to do and will cause a few messes, however, a few easy methods can prevent a giant mess in the end. Place a mat or tablecloth underneath the sensory box to keep your surface clean. Have a broom and dustpan nearby to sweep up any fallen objects. If possible, play with sensory boxes in a sink, tub, or outdoors for quick and easy clean-up. [19]
-
7Place the sensory box in an area that can be used easily. Some people place sensory boxes on the floor, while others place it on tables or desks. It all depends on what your child prefers and what type of sensory box you are using. A child might prefer to play sitting down on the floor, sitting on a chair, or play standing up. Make sure the sensory box can be accessed easily and that others can see it as well. [22]
-
8Store the sensory box for later. The great thing about sensory boxes is that they can be reused and played with another time. Close the sensory box with a tight lid and place it in a safe area where it cannot be touched or dropped. Open it again when it's ready to be played with. You may also store the base or filler into a plastic bag and pour it back into the sensory box another time. [23]
- Note that some objects in a sensory box might spoil, melt, and rot over time. Some items can only be used once. This includes some cooked foods, ice, snow, bubble foam, and other similar items. [24]


Creating a Sensory Box
-
1Create a holiday-themed sensory box. If a holiday is near, a sensory box that's themed for it makes a great activity for play and exploration. Find items that match your holiday and add them to your sensory box. Be creative! The following ideas are mainly targeted at holidays that are popular, but you can use some of these ideas as inspiration for any holiday-themed sensory box.
- Christmas sensory box: Use items that are colored green, red, yellow, and blue. Add objects that are Christmas-themed such as jingle bells, gift bows, sparkly pom-poms, and paper stars. Aromas of peppermint, holly leaves, evergreens, and cranberries can be added in for the smell. The base or filling of the sensory box could be colored a Christmas theme. [25] [26]
- Hanukkah sensory box: Use items that are colored different shades of blue and yellow. Add objects that are Hannukkah-themed such as toy dreidels, Hebrew letters, plastic candles, and a mini toy menorah. The base or filling could be colored pieces of yarn, rice, dry pasta, or marbles. [27]
- Valentines sensory box: Use items that are colored pink, red, white, and purple. Add objects that are Valentines-themed such as heart-shaped cookie cutters, gift bows, felt hearts, pom poms, and heart buttons. The base or filling could be dyed or colored red and pink such as rice, buttons, beads, dried chickpeas, shredded paper, slime, and play-dough. [28]
- Halloween sensory box: Use items that are colored orange, black, gray, dark green, or dark purple. Add objects that are Halloween-themed such as plastic spiders, mini pumpkins, cloth vampires, googly eyes, and toy snakes. The base or filling could be a related to Halloween and have a themed color such as candy corn pieces, dried black beans, orange slime, dyed dry rice, or slimy spaghetti. [29]
- St. Patrick's Day sensory box: Use items that are colored different shades of green. Add objects that are St. Patrick's-themed such as gold coins, paper clover leaves, mini green top hats, rainbow necklaces, and cloth rainbows. The base or filling could be green or gold beads, green confetti, white and green rocks, or green slime. [30]
- Thanksgiving sensory box: Use items that are colored brown, red, yellow, and orange. Add objects that are Thanksgiving-themed such as plastic toy food, cloth tepees, wooden turkeys, and autumn leaves. The base or filling could be popcorn kernels, dried beans, pinecones, green moss, or colored feathers. [31]
-
2Make a sensory box that resembles a place. Children love to explore and discover new places, and a sensory box resembling a place they've been to can promote pretend play and imagination skills. Be creative and choose a theme that your child is learning about or has been to before. Some ideas include:
- Galaxy or space themed sensory box: Use a black base or filler to resemble outer space such as dried black beans or black marbles. Add space-themed items like mini model planets, toy astronauts, aluminum foil stars, moon-shaped cookie cutters, and other similar objects. [32] [33]
- Ocean-themed sensory box: Use a blue base or filler to resemble the ocean such as water beads, hair gel, moonsand, or jello. Add ocean-themed items like seashells, toy ocean animals, pebbles, and fake plants. [34] [35]
- Farm sensory box: Use a base or filler that resembles farm life such as hay, popcorn kernels, birdseeds, or dried beans. Add farm-themed items like mini tractors, plastic farm animals, a toy barn house, and popsicle fences. [36]
- Construction zone sensory box: Use a black or white base or filler to resemble the zone such as dried black beans, pebbles, sand or rocks. Add items like mini dump trucks, road signs, plastic road cones, and toilet paper rolls for tunnels.
- Garden sensory box: Use soil or dirt to resemble the garden. Add garden-themed items like fake flowers, mini flower pots, shovels, and watering cans. Spray perfume or scented oils for a sweet flower-like smell. [37]
- Beach sensory box: Use sand to resemble the beach. Add beach-themed items like seashells, shovels, toy animals, and pebbles. Have one side of the sensory box with sand and the other side resembling the ocean using hair gel, jello, moonsand, water beads, or other similar items.
-
3Make a seasonal sensory box. Seasonal sensory boxes can be made everytime a new season arrives and can even teach children what happens during each season. Find items outside to add to your sensory box so it can be realistic and match along with the sensory box. Some ideas for a seasonal sensory box include:
- Fall or autumn sensory box: Use colors that are orange, brown, yellow, and red. Find a fall-themed base or filler like popcorn kernels, hay, birdseeds, or oats. Add items that are related to fall like pinecones, autumn leaves, sticks, and acorns. [38]
- Winter sensory box: Use colors that are white, gray, dark green, and red. Find a winter-themed base or filler like snow, shaved ice, white cotton balls, ping pong balls, white moonsand, shaving cream, or dry rice. Add items that are related to winter like paper, snowflakes, snowmen cookie cutters, mini toy igloos, and plastic penguins.
- Spring sensory box: Use colors that are green, red, yellow, pink, purple, and blue. Find a spring-themed base or filler like soil, moss, dirt, dried black beans, or birdseed. Add items that are related to spring like flowers, plastic bugs, green leaves, feathers, and rocks. [39]
- Summer sensory box: Use colors that are yellow, blue, and green. Find a summer-themed base or filler like soil, water, hair gel, bubble foam, or ice cubes. Add items that are related to summer like plants, toy animals, and paper suns. [40]
-
4Make a color themed sensory box. You can teach children different colors by having a themed sensory box after one color. Find objects around the house that are the same color and use a base or filler that matches it. You may consider making:
- Yellow sensory box: Use a yellow base or filler such as hay, yellow confetti, dry pasta, or popcorn kernels. Add items that are yellow like rubber ducks, bananas, buttons, flowers, sponges, lemons, and blocks. [41]
- Red sensory box: Use a red base or filler such as dyed dry rice or pasta, buttons, strawberry jello, strips of paper, water beads, or feathers. Add items that are red like apples, toy ladybugs, a mini firetruck, and paper hearts.
- Blue sensory box: Use a blue base or filler such as water beads, dyed rice or pasta, strips of tissue paper, or pebbles. Add items that are blue like blue blocks, popsicle sticks, cut straws, and, blueberries. [42]
- Orange sensory box: Use an orange base or filler such as confetti, tissue paper, dry pasta, sand or hair gel. Add items that are orange like buttons, orange slices, mini road cones, and mini pumpkins. [43]
- Green sensory box: Use a green base or filler such as moss, green leaves, or slime. Add items that are green like apples, pom poms, and plastic dinosaurs.
- Purple sensory box: Use a purple base or filler like lavender play-dough, purple moonsand, buttons, or beads. Add items that are purple like plastic jewelry, pom poms, lavender beans, or confetti. [44]
- Rainbow sensory box: Use a rainbow base or filler like dyed pasta, oats, rice, pom-poms, cut straws, bubble foam or shaving cream. Add items that are all different colors such as plastic toys, craft materials, and other similar tools. [45]
-
5Create an animal-themed sensory box. Learning about animals can be made more fun by creating a sensory box themed after them! Use your child's favorite animal to be themed after the sensory box, or use an animal they've discovered and learned before. Some examples you might try include:
- Insect sensory box: Use a base or filler that resembles the outside world such as soil, dirt, green water beads, brown play-dough, or moss. Add plastic bugs, magnifying glasses, rocks, flowers, and different tools for further exploration. [46]
- Dinosaur sensory box: Use a base or filler for digging such as sand, dirt, small rocks, or soil. Add stones, plastic dinosaurs, toy fossils, brushes, and leaves for a dinosaur-themed look. [47]
- Winter animal sensory box: Use a white base or filler to resemble snow such as ripped tissue paper, clear water beads, shaved ice, snow, or cotton balls. Add toy winter animals, styrofoam blocks to resemble icebergs, pebbles, and mini igloos.
- Bird sensory box: Use birdseed as your base or filler for the sensory box. Add mini toy birds, yarn, moss, and sticks to go along with the theme. [48]
- Sea creatures sensory box: Use blue hair gel, water beads, dyed rice, colored spaghetti, or shaving cream to resemble the ocean. Add toy sea creatures, seashells, and pebbles. [49]
-
6Form a sensory box themed after a book. After reading an enjoyable book, sensory boxes are a great way to reflect on the different events that happened in the story. Search for items and parts that were in the book and turn it into a sensory box. You may want the book near you while everyone explores and plays with the sensory box so they are able to understand and remember the different parts of the story.
-
7Make a one filler sensory box. While sensory boxes could be made more entertaining with plenty of different materials, they can always be simple and have one filler with lots of tools for exploring. These take less time to create and encourage creativity and motor skills. Use a base such as dry rice, pasta, oats, cereal, water beads, or slime to a sensory box. Add plenty of tools such as shovels, mixing spoons, funnels, bowls, and measuring cups to increase exploration.
-
8Create a nature sensory box. Even the simple things in nature can make a sensory box fun! Nature sensory boxes allow you and your little ones to go outside and find items to fill in their sensory box. Best of all, these sensory boxes are great for playing with outdoors. Look around and find materials that will match your nature-themed sensory box. Some ideas include:
- Flower sensory box: Gather spring flowers, flower petals soil, small rocks, a watering can, and shovels. Allow your child to dig and stick flowers to the soil. Add a bit of water for a better sensory experience.
- Acorn and pinecone sensory box: Gather acorns, pinecones, measuring cups, measuring spoons, and tongs. Allow your child to pick up acorns and pinecones and to scoop them up.
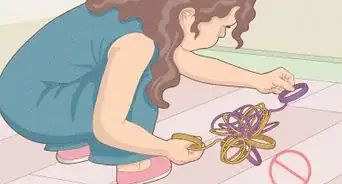
- Leaves sensory box: Gather leaves in all shapes and sizes, scissors, paint, and paint brushes. Let your child paint on the leaves or cut the leaves into pieces with the scissors. [50]
- Mud sensory box: Mud can be made by combining soil and water, or they can be scooped up after a rainy day. Add shovels, measuring cups, funnels, and toys for further fun. [51]
-
9Make a magnetic sensory box. Throw in a little bit of science into sensory boxes by making a magnetic one! Add a base or filler to a sensory box and hide mini magnets in it such as paperclips, screws, fridge magnets, and nails. Use a magnetic bar or horseshoe magnet to dig in the sensory box and find all the magnets. [52]
- You can also throw in a few objects to the sensory box that are non-magnetic. This could provide an opportunity to learn what's magnetic and what's not. [53]
-
10Create a calm down sensory box. Sensory boxes are known to be a relaxing and calming resource for those with anxiety, stress, and anger. A calm down sensory box is usually filled with relaxing objects like tangle toys, squishy balls, sensory bottles, weighted stuffed animals, putty, and other sensory toys. Calm down sensory boxes can also have printables that share relaxation techniques such as taking deep breaths. [54]
-
11Go for creative food sensory boxes. For younger children who still haven't understood the idea of how everything can't be put in your mouth, edible sensory boxes are a great activity to consider. Create a simple food sensory box using pudding, whipped cream, cooked pasta, cooked rice, breadcrumbs, edible play-dough, or jello. You can even be creative and try different methods to make an edible sensory box themed after a place. [55]
- Be cautious about the types of food you use for an edible sensory box. Many foods with small pieces can be a choking hazard for children under the age of three.


Playing with a Sensory Box
-
1Bring opportunities for learning. Sensory boxes have so many benefits and offer so many options for children to practice any skills they're learning. Magnetic letters and numbers can be added to practice phonics and mathematical skills. Themed sensory boxes can also teach different seasons, language skills, colors, shapes, animals, and objects in the world. Don't be afraid to talk to your child about what they're feeling and touching. [56]
- For example, you might ask your child "What does the shaving cream feel like? What color is it?" This encourages children to speak about their observations and sensory experience. [57]
-
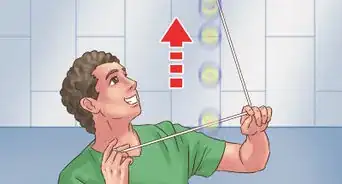
2Play 'I Spy' when exploring the sensory box. 'I Spy' is an excellent and engaging game that encourages children to look around in the sensory box and search for objects that are not visible unless explored for. Digging tools such as shovels, spoons, mini cups, and other similar items can make the game for enjoyable and entertaining.
- Be descriptive! This can increase your child's language skills. For, example, you might say "I spy a little blue duck wearing a pink bow." Use words that describe the object you are spying. Encourage your child to do the same.
-
3Scoop, move, and pick up items in the sensory box. Cup, jars, lids, caps, bottles, bowls, dishes, and trays allow your child to pick up and place items in different areas. Spoons and other similar tools increase a child's motor skills as they practice scooping and moving objects in a sensory box.
-
4Engage in imaginative or pretend play. Sensory boxes, especially themed ones, allow children to play pretend and engage in different types of imaginative activities. For example, playing with a farm animal sensory box allows children to pretend they're farmers caring for animals. Talk and discuss what your child is doing as they play. Don't be afraid to join in the fun and pretend with them!
-
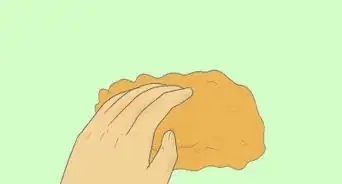
5Create different shapes and outlines. Use your fingers to trace letters, shapes, and outlines onto the base of your sensory box. Bases like bubble foam, salt, play-dough, and shaving cream allow you to create different shapes and drawings if you trace your finger on it.
-
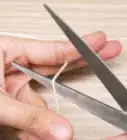
6Cut or slice certain items, if possible. Plastic knives and scissors can be used to experiment with cutting and breaking items apart. While plastic tools can't cut things like paper, they can snip play-dough, slime, and other objects that are easy to slice.
- Never add actual scissors and knives that are sharp to the sensory box. Children can seriously hurt themselves while playing and experimenting.
-
7Dig for materials inside the sensory box. Shovels and spoons bring opportunities for digging and exploring even further in a sensory box. Good bases that can be dug for include sand, dirt, soil, shaving cream, and shredded paper. Add mini items that can be searched for such as magnets, toy people, or even pretend dinosaur bones for a fossil discovery activity. Be creative! Your options are limitless.
-
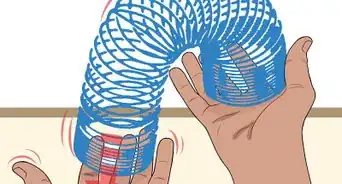
8Squish and roll different items. Bases such as slime, play-dough, putty, mud, hair gel, and other wet textures can be squished and rolled for more sensory fun. Don't be afraid to dig your hands into different textures to feel all the items in the sensory box.
- Tools like rolling pins and potato mashers can encourage squishing and rolling.
-
9Pat and shake objects in the sensory box. Patting and shaking objects increase your sensory experience because you can hear and feel the items in a sensory box. Scoop small items in jars, cups, and jugs and shake them around so they can make noises. You can also pat objects with your hands or a tool to flatten them.
- Most dry objects that are small such as dry rice, pasta, or popcorn kernels can be shaken if they're added into containers or cups. Squishy items like play-dough, slime, and putty can be pat gently.
-
10Be creative and enjoy yourself! With so many ideas, themes, and materials, sensory boxes leave endless possibilities and can always be changed around. Never feel like you need to make a sensory box exactly as instructed; You can always omit, add, and replace items in the box. Don't forget to enjoy yourself and simply let loose, after all, that's the best part when playing with a sensory box.


Community Q&A
-
QuestionWould this be good for my autistic sister?
 Community AnswerYes, I think this would be an amazing idea for your autistic sister! You should ask for her help in creating the box.
 -
QuestionI got this for my friend's autistic younger sister, and she started eating the plastic toys. Should I be concerned?
 Community AnswerYes, you should be concerned if your friend's sister is eating the plastic toys, and you should take them away from her to prevent her from eating any more.
Warnings
- Take caution of adding objects to a sensory box that are considered a choking hazard, especially for children who are under the age of three. Use edible items when making sensory boxes for infants or young toddlers. [59]⧼thumbs_response⧽
- Do not force a child to explore and touch different items in a sensory box. Not all children enjoy sensory boxes, and many hate the different textures that are placed inside. They may prefer using tools such as shovels or plastic cups to explore the sensory box.⧼thumbs_response⧽


-Step-8.webp)

References
- ↑ https://littlebinsforlittlehands.com/all-about-sensory-bins-5-things-need-know/
- ↑ https://littlebinsforlittlehands.com/all-about-sensory-bins-5-things-need-know/
- ↑ http://www.mericherry.com/2013/09/28/cardboard-sensory-boxes-for-toddlers-and-babies/
- ↑ https://www.themaven.net/kidsactivities/kidsactivities/over-200-sensory-bins-for-tactile-fun-ZeRy--BiK0KU2qYDo1Hj0A
- ↑ https://yourkidstable.com/ultimate-list-of-sensory-bin-ideas/
- ↑ https://yourkidstable.com/ultimate-list-of-sensory-bin-ideas/
- ↑ https://handsonaswegrow.com/non-touch-sensory-activities/
- ↑ https://www.prekinders.com/what-makes-sound/
- ↑ https://handsonaswegrow.com/edible-sensory-play-ideas/
- ↑ http://www.growingajeweledrose.com/2013/01/sensory-bins.html
- ↑ https://happyhooligans.ca/sensory-bins/
- ↑ https://happyhooligans.ca/sensory-bins/
- ↑ https://happyhooligans.ca/sensory-bins/
- ↑ https://happyhooligans.ca/sensory-bins/
- ↑ https://happyhooligans.ca/sensory-bins/
- ↑ http://www.growingajeweledrose.com/2013/01/sensory-bins.html
- ↑ https://mommyevolution.com/ultimate-list-of-100-sensory-bin-fillers-from-a-to-z/?utm_source=pickanytwo.net&utm_medium=referral&utm_campaign=pubexchange_module
- ↑ https://notjustcute.com/2010/03/24/a-handful-of-fun-why-sensory-play-is-important-for-preschoolers/
- ↑ https://littlebinsforlittlehands.com/how-to-clean-up-sensory-bins-kids/
- ↑ https://littlebinsforlittlehands.com/how-to-clean-up-sensory-bins-kids/
- ↑ https://littlebinsforlittlehands.com/how-to-clean-up-sensory-bins-kids/
- ↑ https://littlebinsforlittlehands.com/all-about-sensory-bins-5-things-need-know/
- ↑ https://www.giftofcuriosity.com/sensory-play/
- ↑ https://littlebinsforlittlehands.com/all-about-sensory-bins-5-things-need-know/
- ↑ http://www.paper-and-glue.com/2014/12/all-natural-christmas-sensory-bin.html?m=1
- ↑ https://www.pre-kpages.com/christmas-gift-wrap-sensory-bin/
- ↑ http://www.3dinosaurs.com/wordpress/index.php/hanukkah-sensory-bin/
- ↑ https://nurturestore.co.uk/valentine-sensory-tub
- ↑ http://www.funlittles.com/halloween-sensory-bin/
- ↑ https://livingmontessorinow.com/montessori-monday-40-plus-st-patricks-day-sensory-tubs/
- ↑ https://www.fantasticfunandlearning.com/thanksgiving-sensory-play.html
- ↑ http://sugarspiceandglitter.com/space-sensory-bin/
- ↑ http://besttoys4toddlers.com/galaxy-sensory-bin/galaxy-sensory-bin/
- ↑ https://www.notimeforflashcards.com/2013/05/ocean-sensory-tub.html
- ↑ http://www.paper-and-glue.com/2014/08/ocean-theme-weekly-home-preschool.html
- ↑ https://littlebinsforlittlehands.com/f-is-for-farm-sensory-bins-montessori-style-trays-pretend-play/
- ↑ https://www.fantasticfunandlearning.com/gardening-sensory-bins.html
- ↑ http://www.paper-and-glue.com/2014/09/fall-sensory-box.html
- ↑ https://nurturestore.co.uk/spring-sensory-play-tub-carrots
- ↑ http://www.friendshipcircle.org/blog/2016/08/15/10-awesome-sensory-bins-to-create-this-summer/
- ↑ https://theimaginationtree.com/giant-colour-themed-sensory-tub/
- ↑ https://theimaginationtree.com/20-colour-activities-for-preschoolers/
- ↑ http://www.survivingateacherssalary.com/edible-non-toxic-sensory-kinetic-sand-recipe-for-kids/
- ↑ http://www.rubberbootsandelfshoes.com/2014/05/purple-sensory-bin.html
- ↑ http://www.andnextcomesl.com/2014/07/sensory-play-guide-how-to-dye-sensory.html
- ↑ http://www.paper-and-glue.com/2015/05/insect-sensory-bin.html
- ↑ https://www.thingstoshareandremember.com/learning-about-dinosaurs-preschool-activities/
- ↑ https://www.mymundaneandmiraculouslife.com/bird-seed-sensory-bin/
- ↑ https://www.naturalbeachliving.com/under-the-sea-preschool-activities/
- ↑ https://www.adventure-in-a-box.com/autumn-sensory-bin-little-house-in-the-pumpkin/
- ↑ http://www.simplylearningkids.com/2016/05/stuck-mud-little-blue-truck-sensory-activity/
- ↑ http://www.theempowerededucatoronline.com/2014/06/sensory-fine-motor-magnet-fun-with.html/#_a5y_p=1878710
- ↑ http://www.theempowerededucatoronline.com/2014/06/sensory-fine-motor-magnet-fun-with.html/#_a5y_p=1878710
- ↑ http://www.andnextcomesl.com/2016/04/what-to-put-in-a-calm-down-kit-for-kids.html?utm_medium=social&utm_source=pinterest&utm_campaign=tailwind_tribes&utm_content=tribes
- ↑ https://handsonaswegrow.com/edible-sensory-play-ideas/
- ↑ https://www.pre-kpages.com/what-is-a-sensory-bin/
- ↑ https://www.pre-kpages.com/what-is-a-sensory-bin/
- ↑ https://happyhooligans.ca/sensory-bins/
- ↑ https://handsonaswegrow.com/edible-sensory-play-ideas/