X
This article was co-authored by wikiHow Staff. Our trained team of editors and researchers validate articles for accuracy and comprehensiveness. wikiHow's Content Management Team carefully monitors the work from our editorial staff to ensure that each article is backed by trusted research and meets our high quality standards.
This article has been viewed 30,512 times.
Learn more...
A twine ball light garland looks simple, yet sophisticated. While you can always buy one at a store, you can make one for a lot cheaper. Best of all, you can customize the balls to get the exact size and color you want. You can use these garlands to decorate your home, room, or garden for any reason or occasion!
Steps
Part 1
Part 1 of 3:
Inflating Your Balloons
-
1Get a strand of battery-operated LED lights. For a standard garland, use string lights with standard-sized bulbs (like for a Christmas tree). For a more delicate garland, use string lights with mini bulbs. They are often sold as “fairy lights".
- You can use standard lights that you plug into a wall, but keep in mind that they tend to contain more bulbs, so you'll have to make more twine balls.
- If you want a large garland with giant twine balls, consider plug-in icicle lights instead. You can stuff each icicle into each giant twine ball.
-
2Blow up several balloons to the size you want. You can use regular-sized balloons or even water balloons, but make sure that they are all the same size when you blow them up. How many you blow up depends on how many lights are on your garland. You will need 1 balloon for each light on the garland.
- You don't have to blow regular balloons up to their full size. Keep in mind that they will end up more oval or egg-shaped.
- You should still blow water balloons up with air; don't use water.
- Match the size of the balloon to the bulb. Small balloons will work better for tiny fairy lights than standard-sized balloons.
- If you are using icicle lights, you will need 1 balloon for each icicle.
Advertisement -
3Coat the balloons with petroleum jelly. While not absolutely necessary, it will make the balloons easier to remove later on. If you don't have petroleum jelly, you can also use cooking oil or baking spray.[1]
- Cover the entire balloon with petroleum jelly, except for the knotted part at the bottom.
-
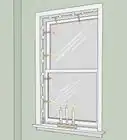
4Lay a dowel across 2 chairs or tables. You will be eventually tying your balloons to this, so make sure that it is long enough. If needed, use 2 or more dowels.
- This project can get messy, so pick an area that can get dirty or is easy to clean. For example, a linoleum floor will be easier to clean than carpet.
- Cover the floor under the dowel with newspaper or plastic sheeting. This will make cleaning up easier.


Advertisement
Part 2
Part 2 of 3:
Applying the Glue and Twine
-
1Mix together some glue, cornstarch, and warm water. The goal here is to create a thick mixture. Plan on using about 4 parts white PVC glue, 4 parts cornstarch, and 2 parts warm water.[2]
- If you don't have cornstarch, try arrowroot powder instead.
- It might be a good idea to make small batches of the mixture at a time so that it doesn't dry out too fast.
-
2Dip the twine into the glue, then wrap it around the balloon. Run the twine between your fingers as you take it out of the glue, but before you wrap it around the balloon. This will help remove the excess glue and make things less messy. Once you get the coverage you want, cut the twine and smooth the end down.[3]
- Change the direction you wrap the twine in often. Wrap it horizontally, vertically, and diagonally.
- How much you wrap is up to you; you still want to see bits of balloon through the wrapped twine.
-
3Tie the balloon to the dowel. Cut another length of twine. Tie 1 end to the end of the balloon, and the other end to the dowel. The exact height you hang the balloon from does not matter because you will be hanging the balls from varying heights anyway.
- Do not dip this twine in the glue.
- You don't have to use twine for this. You can use any spare bit of string.
-
4Repeat the process for the other balloons. Be sure to tie the balloons at varying heights. Not only will this allow you to fit more balloons onto the dowel, but it will also prevent the balloons from bumping up against each other.
- Leave enough space between each balloon so that the strings and balloons don't touch.
-
5Let the balls dry overnight. The balls (including the balloons and twine) must be completely dry before you pop them. If the twine is even the slightest bit damp, it will collapse when you pop the balloon. It can take as long as 24 or 48 hours in order for the balloons to dry.[4]
-
6Pop the balloons, then remove them from inside the balls. How you pop the balloons is up to you. You can do it with a pin or a pair of scissors. Once you have popped the balloon, carefully remove it from inside the ball. When you are done, you will have a delicate lattice-cage ball made from twine.


Advertisement
Part 3
Part 3 of 3:
Finishing the Garland
-
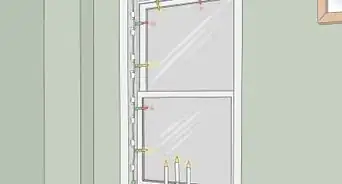
1Spray paint the balls, if desired. Take the balls into a well-ventilated area and hang them from your dowel. Shake up a can of spray paint, then apply the paint to the balls from 6 to 8 inches (15 to 20 cm) away. Once you have the balls covered, wait for them to dry.[5]
- You don't have to saturate the balls with paint. For example, if you used jute twine, you can lightly mist it with gold paint.
- How long it takes for the paint to dry will depend on the brand of paint you are using as well as the humidity. Expect to wait around 30 minutes.
-
2Add some glitter if you want a sparkly effect. Paint the balls with white school glue first, then hold the balls over a tray, and shake some glitter over them. Rotate the balls to ensure that they get evenly coated. When you are done, hang the balls onto your dowel with string so that they can dry.[6]
- Work 1 ball at a time. Don't start on the next ball until the first ball is hanging from the dowel.
- You can reuse your glue mixture from before. You can also use decoupage glue instead.
- Use a glitter color that looks nice with the balls. For example, white, iridescent glitter would look great over white balls.
-
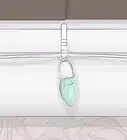
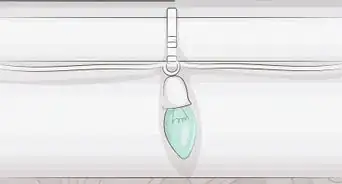
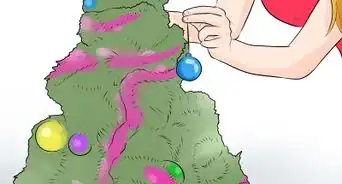
3Attach the balloons to the strand of lights. Fit a ball over a bulb on your strand of lights, then tie it to the wire with clear thread. Do this for all of the balls. Alternatively, you can slide all of the balls onto the strand, then position them over the lights.[7]
- For fairy lights, slide the balls onto the strand, then position each ball over each light.
- For icicle lights, insert each icicle into each ball, then tie the balls to the main wire with clear thread. This works best for large balls made from standard-sized balloons.
- Alternatively, attach the balloons to every other light. This is a great option if your twine balls are too wide for the space between the lights.
-
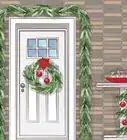
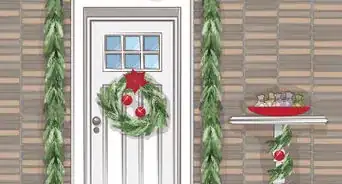
4Add some floral branches to the wire, if desired. Measure the distance between each ball, then cut some silk or plastic greenery to that measurement. Use green floral wire to secure the greenery to the garland between each ball.[8]
- This step is optional. You don't have to do it.
- This works best for standard lights. If you want to, you can wrap delicate fairy lights around the entire garland (except for the balls) for a more magical effect.
-
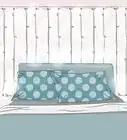
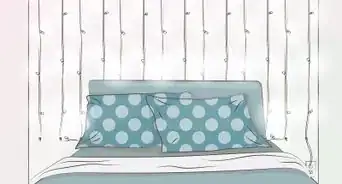
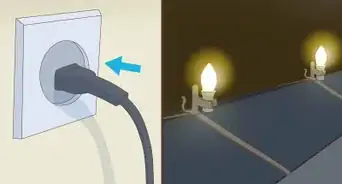
5Hang the garland as desired. You can hang these garlands wherever you want, as long as they don't get wet. If you need to, use thumb tacks or string to help secure the garland to whatever you are hanging it from. Once you have it positioned to your liking, turn the lights on.
- If you are using thumb tacks, make sure that you push the pin between the wires--don't push the pin through the wires.
- If you are using battery-operated lights, be sure to hide the battery pack behind something.


Advertisement
Warnings
- Do not leave the garland unattended, even if you are using LED lights.⧼thumbs_response⧽
- Do not let the garland get wet, or the glue will melt.⧼thumbs_response⧽
Advertisement
Things You’ll Need
- Balloons
- Twine
- Scissors
- Petroleum jelly
- Bowl or tray
- PVA glue (white school glue)
- Cornstarch
- Warm water
- Dowel
- Battery-operated lights
- Spray paint (optional)
- Glitter (optional)
- Floral greenery (optional)
References
- ↑ https://www.rocknrollbride.com/2012/01/diy-tutorial-twine-ball-light-garland/
- ↑ https://www.mommypotamus.com/decking-our-halls/
- ↑ https://www.rocknrollbride.com/2012/01/diy-tutorial-twine-ball-light-garland/
- ↑ https://www.viewalongtheway.com/2011/12/glittery-snowball-tutorial/
- ↑ https://www.rocknrollbride.com/2012/01/diy-tutorial-twine-ball-light-garland/
- ↑ https://www.mommypotamus.com/decking-our-halls/
- ↑ https://www.rocknrollbride.com/2012/01/diy-tutorial-twine-ball-light-garland/
- ↑ http://www.homeyohmy.com/diy-string-lights-garland/
- ↑ https://www.mommypotamus.com/decking-our-halls/
About This Article

wikiHow Staff
wikiHow Staff Writer
This article was co-authored by wikiHow Staff. Our trained team of editors and researchers validate articles for accuracy and comprehensiveness. wikiHow's Content Management Team carefully monitors the work from our editorial staff to ensure that each article is backed by trusted research and meets our high quality standards. This article has been viewed 30,512 times.
Co-authors: 8
Updated: February 13, 2022
Views: 30,512
Categories: Decorating for Christmas
Advertisement