This article was co-authored by wikiHow Staff. Our trained team of editors and researchers validate articles for accuracy and comprehensiveness. wikiHow's Content Management Team carefully monitors the work from our editorial staff to ensure that each article is backed by trusted research and meets our high quality standards.
There are 9 references cited in this article, which can be found at the bottom of the page.
The wikiHow Video Team also followed the article's instructions and verified that they work.
This article has been viewed 839,646 times.
Learn more...
In an electromagnet, an electric current runs through a piece of metal and creates a magnetic field. To create a simple electromagnet, you'll need a source of electricity, a conductor, and metal. Wrap insulated copper wire tightly around an iron screw or nail before connecting the wire to a battery, and watch as your new electromagnet picks up small metal objects. Remember that you're creating electricity, so be careful when working with the electromagnet to ensure you don't hurt yourself.
Steps
Wrapping the Iron with Wire
-
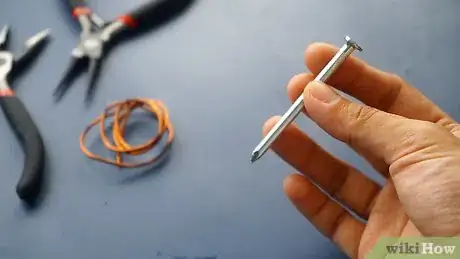
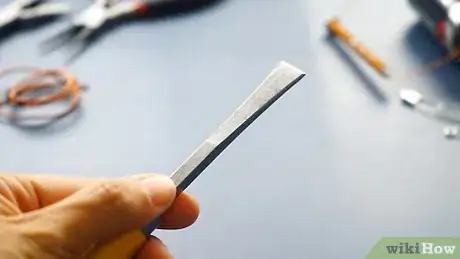
1Choose an iron nail or screw as the core. Pick out a piece of iron that you have around your home, such as a nail, screw, or bolt. Choose an iron item 3–6 inches (7.6–15.2 cm) in length so that there’s plenty of room to wrap the wire around the iron object.[1]
-
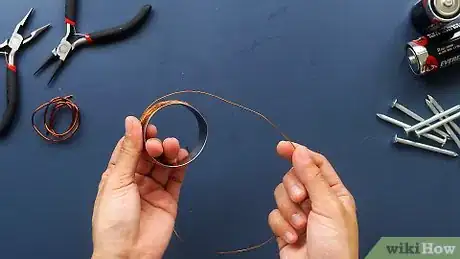
2Pull a strand of copper wire loose from the spool. Since you won't know the exact length you'll need until you wrap the iron completely, don't cut the strand of wire from the spool yet. Position the wire so that it's perpendicular to the iron core, making it easy to wrap the wire around it many times.Advertisement
-
3Leave 2–3 in (5.1–7.6 cm) of copper wire loose at the end. Before you start wrapping the wire, leave a strand of wire loose from the iron that will attach to the battery that's about 2–3 inches (5.1–7.6 cm) long.[2]
- Position the wire so that it’s perpendicular to the iron core and at one end.
-
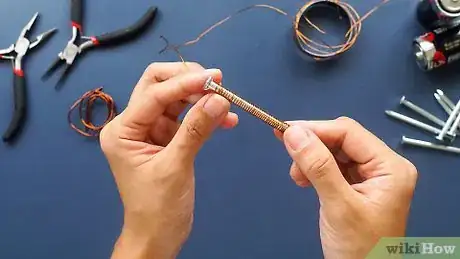
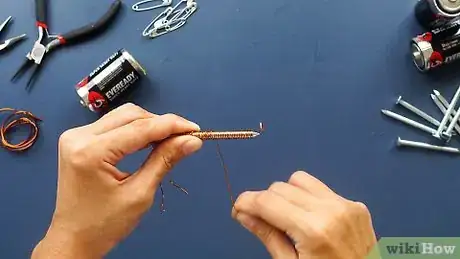
4Wrap insulated copper wire around the iron going in one direction. Create an ongoing spiral around the piece of iron to conduct the electricity. Wrap the wire in one continuous strand, going in one direction, so that there’s a strong electrical current.[3]
- It's essential that the wire is wrapped in the same direction so the electricity flows in one direction. If you wrap the wire in different directions, the electricity will flow in different directions, and you won't create a magnetic field.
-
5Push the wire close together as you’re wrapping it. Wrap the wire tightly around the iron, forming as many spirals as possible to create the best current. As you’re wrapping, use your fingers to push the loops close together. Continue wrapping and pushing the wire until you get to the end of the iron.[4]
- The more wire you use, the stronger the electrical current, so be careful and use caution when creating your magnet.
-
6Wrap the entire nail in wire. There is no certain number of wraps that you need; just be sure to wrap the entire piece of iron with wire, with the strands of wire pushed right up against each other. Once you've reached the end of the iron, you're finished wrapping.
-
7Cut the wire so that the end is roughly 2–3 inches (5.1–7.6 cm) long. Once you reach the opposite end of the iron core, use wire cutters or sharp scissors to cut off the wire from the rest of the spindle. Cut the second end so that it's as long as the first end, helping the wire tips reach the battery equally.[5]
Creating Conductible Ends
-
1Remove 1–2 cm (0.39–0.79 in) of insulation from the ends of the wires. Use wire strippers, sandpaper, or a razor to carefully scrape off the insulation from each end. This will help the wires conduct energy more easily.[6]
- As you remove the insulation, the wire will turn from the copper color of the insulation to the natural silver color of the wire.
-
2Curl the ends of the wire to create a small circle. Use your fingers to bend the ends of the wire into a very small circle, about 0.5 cm (0.20 in) in diameter. These circles will touch the center of each end of the battery.[7]
- Curling the ends of the wires helps the battery maintain good contact with the wire.
-
3Position the ends of the wires to each end of a D battery. Find a D battery, or a 1.5 volt battery, and place each end of the wire on an end of the battery so they're touching. Place pieces of electrical tape or duct tape over each wire end to hold them in place.[8]
- Position one wire end at the negative end of the battery and the other wire end at the positive end of the battery.
-
4Test out the magnet while holding the wire onto ends of the battery. Once you have a good grip on the battery with the wires, test it out! Hold the battery and iron close to a small metal object, such as a paperclip or safety pin. If the nail, screw, or bolt picks up the metal object, the magnet is working.[9]
- If the battery becomes hot, use a small towel to hold the wires to the battery.
- When you're finished using the magnet, detach the wire ends from the battery.
Increasing the Magnet's Power
-
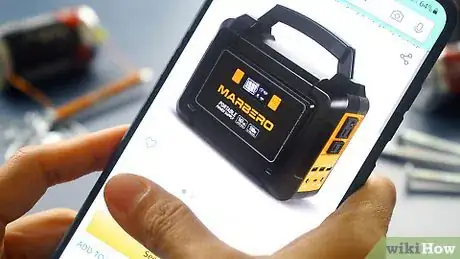
1Use a power pack instead of a single battery for more power. Power packs last longer and create a stronger electric current than a single battery. They're available at hardware stores and battery shops, and can be used just like a normal battery.[10]
- Do a little research before picking out a larger battery pack to be sure you're picking one that's safe and will work.
- The wire ends go where the positive and negative terminals are, and you can use tape to attach the wires to each end.
-
2Find a larger piece of metal to create a stronger magnetic field. Instead of using a nail, try using a metal rod that's about 1 ft (30 cm) long and 1 cm (0.39 in) in diameter. Be sure to use it with a power pack to create a stronger magnet. It'll take a lot more copper wire to go around the entire piece of metal, so start with a full spindle.[11]
- Wrap the wire tightly around the metal so that the electrical current conducts well.
- If you're using a larger piece of metal, it's only necessary to wrap the strand of metal with one layer of wire for safety reasons.
- Use electrical tape to connect the wires to each end of the battery.
-
3Add more wraps of wire to form a stronger magnet. The more coils you create, the stronger the electric current. Get a large spindle of wire and make as many wraps as you can around an iron nail or screw to create a very powerful magnet, adding several layers of wire on top of one another, if desired.[12]
- Use the small piece of iron for this, such as a nail, screw, or bolt.
- Wrap the wire in a single direction going around the piece of iron.
- Tape the ends of the wires to the battery using duct tape or electrical tape.
Community Q&A
-
QuestionWhat would happen if, instead of connecting it to a battery, I plug it into a socket? Is this a good idea?
 Community AnswerIf you're lucky, you would only blow a fuse or trip a circuit breaker. You might receive a shock or be electrocuted. Batteries supply direct current (DC). Household sockets supply alternating current (AC). Even if it were safe to do so, which it is not, plugging the magnet into AC would not give the desired effect. The north and south magnetic poles would change places with each other at a rate of 60 times per second or 60 Hz. Thus there would be no net magnetic field produced.
 -
QuestionHow do I make an electromagnet stronger?
 Community AnswerYou can do this by adding more turns to the wire around your metal, or you can add a higher voltage battery.
 -
QuestionCan I use aluminum wire instead and plug it into a socket with an adapter?
 Community AnswerAluminium does still conduct electricity so it will work, but it is not as well as copper. Do not plug anything into the mains that was not specifically designed for that.
Warnings
- Never use high voltage electricity with a large amount of current, as it can electrocute you.⧼thumbs_response⧽
- Don't try to insert the wire into a plug. This will conduct the electricity, making it at a high voltage and giving it a large current, which can produce a shock.⧼thumbs_response⧽
Things You'll Need
- Iron screw, bolt, or nail
- Insulated copper wire
- D-cell battery
- Wire cutters
- Sandpaper or razor
- Metal objects (safety pins, paper clips, etc.)
- Battery power pack (optional)
- Larger piece of metal (optional)
References
- ↑ https://education.jlab.org/qa/electromagnet.html
- ↑ https://www.youtube.com/watch?v=wX9QBwJBI_Y#t=25s
- ↑ https://www.youtube.com/watch?v=wX9QBwJBI_Y#t=28s
- ↑ https://www.youtube.com/watch?v=XKUs7Dc9pKI#t=25s
- ↑ https://www.youtube.com/watch?v=wX9QBwJBI_Y#t=53s
- ↑ https://education.jlab.org/qa/electromagnet.html
- ↑ https://www.youtube.com/watch?v=wX9QBwJBI_Y#t=55s
- ↑ https://education.jlab.org/qa/electromagnet.html
- ↑ https://www.youtube.com/watch?v=wX9QBwJBI_Y#t=1m20s
About This Article
To make an electromagnet, wrap several inches of copper wire around an iron nail, leaving 2-3 inches of wire loose on each end. Next, use wire strippers to remove some of the insulation from both ends of the wire. Then, connect the stripped ends of the wire to a D battery by wrapping one around the positive end and the other around the negative end. Then, check to see if your nail picks up metal objects! For more information on making your magnet more powerful, scroll down!
