This article was co-authored by Kpoene Kofi-Bruce. Kpoene Kofi-Bruce is a tailor, couture wedding gown designer, and the Creative Director of Mignonette Bridal and Ette the Wedding Tailor in Chicago, Illinois. With nearly two decades of experience as a wedding gown designer, small business owner, and vintage sewing enthusiast, Kpoene specializes in wedding gown design and the social history of wedding dresses. She received a BA in Creative Writing from Middlebury College and studied the business of fashion at the Fashion Institute of Technology. She is also a graduate of the Goldman Sachs 10KSB program and the Chicago Fashion Incubator and has written about wedding fashion for Jezebel, Catalyst, the Sun Times, and XO Jane.
This article has been viewed 76,023 times.
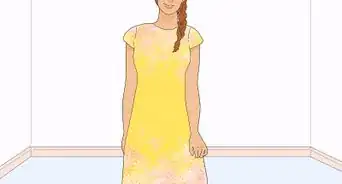
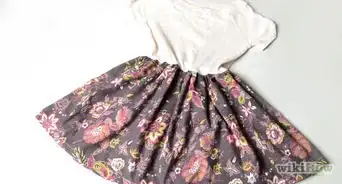
An off the shoulder dress is perfect for enjoying warm weather. The design of this type of dress is romantic and flirty as well, so it is a great style for a date. You can easily make your own off the shoulder dress without a pattern. Choose a fabric that appeals to you and then adjust the gathering and length to suit your taste.
Steps
Measuring and Cutting
-
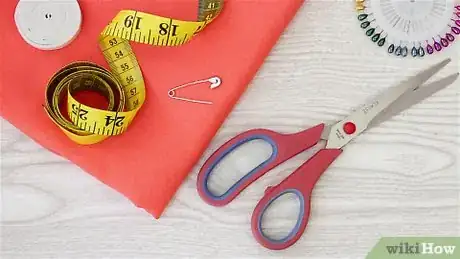
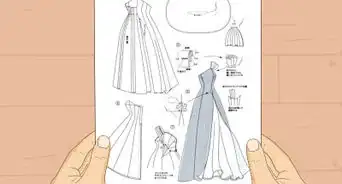
1Gather your supplies. An off the shoulder dress is fairly easy to make, but you will need some fabric and other sewing supplies before you begin. You will need:[1]
- Fabric in the color and type of your choice. A lightweight fabric is ideal for this type of dress, such as cotton, voile, jersey, or viscose rayon.[2] You will need about 3 to 5 yards (3 to 5 m), depending on the desired width and length of your dress.
- Elastic. You will need enough elastic to go around your chest and shoulders separately. Choose elastic that is about ½” (1.3 cm) to 1” (2.5 cm) wide.
- Scissors
- Measuring tape
- Pins
- Safety pin
- Sewing machine
-
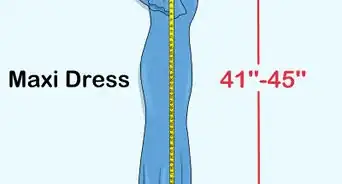
2Decide how long you want the dress to be. You can make your off the shoulder dress as long or as short as you like. To decide on a length, drape the fabric around your body so that the top edge of the fabric is going around the center of your upper bust (right around your armpits).[3] Then, mark the fabric about 2 inches (5 cm) below where you would like the dress to fall.Advertisement
-
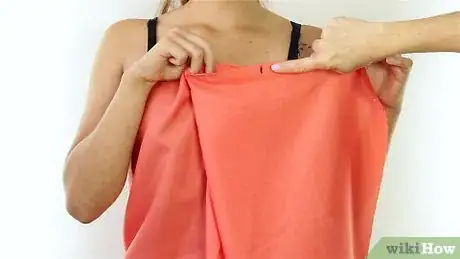
3Use draping to get the fabric width for your dress. Wrap the fabric that you will be using for the dress around your body underneath your armpits. This will help you to determine how loose or fitted you want the dress to be. Wrap the fabric around you and adjust it until it is as loose or fitted as you want it to be. Then, mark the edge of the fabric to indicate where you will need to cut the fabric.[4]
-
4Drape fabric around your shoulders. Next, you will need to determine how wide and how long to cut the shoulder piece. Drape the fabric around your shoulders and mark it to indicate the width and length of the piece.[5] This piece will need to be wide enough to easily wrap around your shoulders and long enough to extend down from the center of your chest to about the middle of your abdomen.
- If you want the piece to be slightly ruffled, then it will need to be about 1 and ½ times the width of your shoulders.[6] For example, if your shoulder measurement is 30” (76.2 cm) then your shoulder piece will need to be about 45” (114.3 cm) wide. You can also increase the ruffling by doubling or even tripling your measurement if desired.
- Make sure that the shoulder piece will be long enough to cover your chest without extending down too far.
- Add a 2” (5 cm) seam allowance to the width and length as well.
-
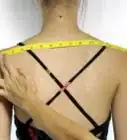
5Measure around your chest and shoulders. Next, you will need to measure around the center of your chest to determine the length of your elastic. Wrap the measuring tape so that it goes under your armpits and around your chest. Record this measurement. Then, wrap the measuring tape around your shoulders just above the line around your armpits and record this measurement as well.
- Add 2” (5 cm) to each measurement to provide seam allowance.
- Make sure you take careful measurements, especially around your chest—the bodice of the dress needs to fit perfectly for the off-shoulder part to look right.[7]
-
6Cut your elastic pieces. Use the measurements you took to cut out your two pieces of elastic. One piece will go around your chest and the other will go around your shoulders.[8]
- Make sure to add a 1” (2.5 cm) seam allowance to each piece.
-
7Cut out your fabric. Use the markings on your dress and shoulder fabric pieces to cut them out. Remember to include the 2” (5 cm) seam allowances for both pieces.
- The shoulder piece should look like a long wide strip of fabric.
Adding the Elastic
-
1Mark the fabric. Take the width of your elastic and double it, and then add ½” (1.3 cm) for a seam allowance. For example, if your elastic is ½” (1.3 cm) wide, then your measurement would be 1.5 inches (3.8 cm). Mark your dress and shoulder fabric pieces this distance from the top edge.[9]
-
2Fold over the fabric and pin in place. Next, fold the top of each piece of fabric over so that the top edge is lined up with the area you marked. Place pins along the bottom edge of the fabric to secure it in place.
- Make sure that you are folding the edge of the fabric over towards the wrong side.
- Make sure to fold over and pin the dress piece and the shoulder piece.
-
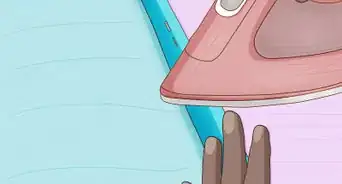
3Sew along the bottom edges of your folded fabric. Use your sewing machine to straight stitch along the bottom edge of the folded fabric. Make sure to sew about ¼” from the edge to ensure that the seam will be secure. Remove the pins as you sew.[10]
- Make sure to sew the dress piece and the shoulder piece.
-
4Insert the elastic using a safety pin. After you have sewn up the edge, you will need to insert your elastic pieces through the opening in the side of each piece. First, attach a safety pin to the end of one of the elastic pieces, and then begin working the elastic through the opening in the seam on the edge of the fabric.[11]
- The fabric will bunch up as you go, but you can adjust it after you are finished to ensure that it is evenly spaced along the elastic.
- Make sure to insert the correct elastic pieces into their corresponding pieces of fabric. For example, your shoulder elastic piece will need to go into the seam of the shoulder fabric piece.
Assembling the Dress
-
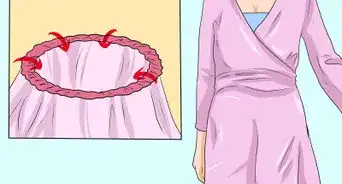
1Sew the elastic and fabric together. After you have inserted the elastic all the way through the fabric, you will need to sew the fabric and the ends of the elastic together to close the pieces. This will allow the elastic to gather the shoulder and dress pieces at the top of your dress. Sew the fabric and the ends of the elastic piece together leaving a ½” seam allowance.[12]
- Make sure to sew the fabric on the wrong side so that when you turn the pieces inside out, the seam allowance will be hidden.
-
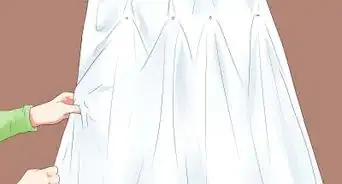
2Hem the bottom edges. After you have closed up the back of the shoulder and dress pieces, you will need to hem the bottom of the pieces. Fold and pin along the bottom edges of the shoulder and dress pieces to create a ½” seam.[13]
-
3Secure the shoulder piece to the dress piece. Next, line up the back seams of your shoulder piece and dress piece and pin the pieces together at the elastic in the front and back. When you are happy with the positioning of the pieces, stitch a line down the front and back of the elastic at the very center of the front and back to secure the pieces together. You can simply stitch up and down the width of the elastic pieces two or three times to ensure that they are secured.[14]
- Use a thread color that will blend in well with your fabric. This will help to ensure that the stitching is not as noticeable.
- Make sure that there is an even amount of shoulder piece fabric on either side of the dress piece. Otherwise, your dress may end up looking lopsided.
- Make sure to sew through both layers of the elastic and fabric.
-
4Try on your dress. After you have sewn the shoulder piece and the dress piece together, your dress is ready to wear! Try on your new dress and see how it looks.
Expert Q&A
-
QuestionHow should an off-shoulder dress fit?
 Kpoene Kofi-BruceKpoene Kofi-Bruce is a tailor, couture wedding gown designer, and the Creative Director of Mignonette Bridal and Ette the Wedding Tailor in Chicago, Illinois. With nearly two decades of experience as a wedding gown designer, small business owner, and vintage sewing enthusiast, Kpoene specializes in wedding gown design and the social history of wedding dresses. She received a BA in Creative Writing from Middlebury College and studied the business of fashion at the Fashion Institute of Technology. She is also a graduate of the Goldman Sachs 10KSB program and the Chicago Fashion Incubator and has written about wedding fashion for Jezebel, Catalyst, the Sun Times, and XO Jane.
Couture Bridal Designer The strapless bodice of the dress needs to fit your perfectly. Also, keep in mind that in an off-shoulder dress, you won't be able to move your arms very much when you wear it.
 -
QuestionHow did you join the shoulder piece and the blouse? That's my big problem, I still don't understand that part?
 ZackTop AnswererAlign the back seams of your shoulder piece and dress piece. Pin the pieces together at the elastic in the front and back. Stitch a line down the front and back of the elastic at the very center of the front and back to secure the pieces together. Make sure that there is an even amount of shoulder piece fabric on either side of the dress piece to avoid looking lopsided. Be sure to sew through both layers of the elastic and fabric.
Things You’ll Need
- Fabric in the color and type of your choice
- Elastic that is about ½” (1.3 cm) to 1” (2.5 cm) wide
- Scissors
- Measuring tape
- Pins
- Safety pin
- Sewing machine
References
- ↑ http://apairandasparediy.com/2015/05/diy-off-the-shoulder-beach-dress/
- ↑ https://byhandlondon.com/blogs/by-hand-london/113119237-draft-it-yourself-off-the-shoulder-ruffled-sundress
- ↑ http://www.ericabunker.com/2016/07/diy-off-shoulder-dress-tutorial.html
- ↑ http://apairandasparediy.com/2015/05/diy-off-the-shoulder-beach-dress/
- ↑ http://www.ericabunker.com/2016/07/diy-off-shoulder-dress-tutorial.html
- ↑ http://www.ericabunker.com/2016/07/diy-off-shoulder-dress-tutorial.html
- ↑ Kpoene Kofi-Bruce. Couture Bridal Designer. Expert Interview. 28 January 2021.
- ↑ http://apairandasparediy.com/2015/05/diy-off-the-shoulder-beach-dress/
- ↑ http://apairandasparediy.com/2015/05/diy-off-the-shoulder-beach-dress/
- ↑ http://apairandasparediy.com/2015/05/diy-off-the-shoulder-beach-dress/
- ↑ http://crazylittleprojects.com/2016/01/learn-to-sew-lesson-4-inserting-elastic.html
- ↑ http://apairandasparediy.com/2015/05/diy-off-the-shoulder-beach-dress/
- ↑ http://apairandasparediy.com/2015/05/diy-off-the-shoulder-beach-dress/
- ↑ http://apairandasparediy.com/2015/05/diy-off-the-shoulder-beach-dress/
About This Article
To make an off the shoulder dress, you’ll need a fabric of your choice, elastic, scissors, pins, measuring tape, and a sewing machine. The first thing you'll need to do is measure your chest and shoulders. Cut 2 pieces of rectangular fabric, one to your chest measurement and the other to your shoulder measurement. Then, cut a strip of elastic for each length of fabric, adding a 1-inch allowance, and sew the elastic into the top of each piece, folding the fabric over the elastic. You’ll also need to hem the bottom edge of the bottom section. Once you’ve sewn the elastic into both pieces, sew the shoulder piece on top of the other piece to form your dress. For more tips, including how to take your shoulder and chest measurements, read on!
