This article was co-authored by Archie Guerrero and by wikiHow staff writer, Eric McClure. Archie Guerrero is a Commercial and Residential Painting Specialist and the Operations Manager for DGP Painting in Austin, Texas. With a decade of experience, Archie specializes in interior and exterior painting and staining, cabinet refinishing, and wallpaper and popcorn removal. DGP Painting offers clients environmentally friendly paint materials and top-of-the-line paint products. DGP Painting has an A+ rating with the BBB and has been in Austin’s “Best of the Best.”
This article has been viewed 35,893 times.
Painting a hardwood floor is a fairly straightforward process, with a lot of room for creativity in terms of the texture and finish of your floor. To paint a hardwood floor, start by sanding the wood to remove any preexisting layers of varnish or enamel. Then, prime any unfinished wood with an oil-based primer. Once the primer has dried, you can apply your top coat with a brush or roller depending on the texture that you want. Remember to always wear a dust mask or respirator when sanding or working with oil-based primer, and consider getting a set of kneepads to save your knees while you work!
Steps
Sanding Your Floor
-
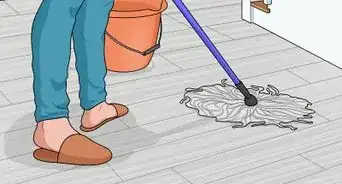
1Remove all furniture and objects from the room that you want to paint. If you’re painting the floor of a furnished room, remove any furniture or rugs. Sweep the floor with a broom and remove any dirt, dust, or debris with a dustpan.[1]
- Put pads underneath any heavy furniture items before you move them to prevent scuffing up your floors.
-
2Put on a dust mask, heavy gloves, and some kneepads. You’re going to be spending a lot of time kneeling on the floor, so get some kneepads to prevent damaging your knees.
The process of stripping finish and paint off of wood requires a lot of sanding, so wear a dust mask or respirator to prevent the inhalation of wood dust or debris. Wear some heavy gloves so that you don’t get splinters all over your hands.[2]- Cover outlets or openings with duct tape or electrical tape to keep dust and wood shavings from flying into sensitive areas.
- You can use a thick pillow instead of kneepads if you want.
Advertisement -
3Sand your floor lightly with 100-grit sandpaper. Starting at the furthest corner from the door, put a sheet of 100-grit sandpaper down on the floor. Put your hand on top of the sheet and press down before rubbing in a circular motion. Cover a section 5-6 times before moving your sandpaper to another section of the floor. Continue until you’ve sanded the entire floor.
- Even if your wood doesn’t have a varnish or enamel on it, you still need to sand it at least once to soften the wood for painting. The paint won’t dry into the porous wood if it hasn’t been lightly sanded.
- You should see the wood get visibly lighter after sanding if the wood was covered in a varnish or stain.
-
4Use an orbital or belt sander for larger areas. Rent an orbital or belt sander at your local hardware store and attach a sheet of 100-grit sandpaper to strip any larger surface areas.
Start in the corner of a room furthest from the door and turn your sander to the lowest power setting. Run the sander across your room horizontally, working towards the door until you’ve covered the entire surface.[3]- You have to buy special sheets of sandpaper to fit a belt or orbital sander.
- Even if you plan on using an orbital or belt sander, you’ll need to sand the edges near the corners and side of the wall by hand.
- If you still see a layer of finish or varnish after your first sanding, sand the entire floor a second time with 220-grit sandpaper.
-
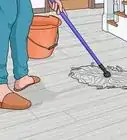
5Sweep and vacuum your floor to remove debris. Start in the same area that you started sanding from. Use a broom to sweep your entire floor. Sweep the debris into a dustpan to remove it from the room. Afterward, use a standard vacuum to pull up any remaining wood shavings or chunks of varnish.[4]
Tip: You can use a damp towel to soak up any hard-to-see wood shavings or dust for an added layer of cleaning. Use a dry tack cloth if you’re nervous about raising the wood grain or getting it wet but still want a third cleaning option.


Priming the Wood
-
1Select an oil-based primer for your floor based on the color. Priming your floor is the best way to ensure that your top coat dries evenly and properly.
For lighter paint jobs, opt for a white, oil-based primer. If you plan on painting your floor a deeper red or blue, use a gray, oil-based primer. The primer will help adhere the paint to the wood and will make sure that it stands up over time.[5]Warning: Oil-based primers are almost always toxic. Wear a dust mask or respirator while using it and open any windows in the room that you’re working in to prevent unwanted fumes from making their way into your lungs.
-
2Mix your primer and fill a paint tray. Set a drop cloth down underneath your primer and paint tray. Use a flathead screwdriver to pry the lid of your primer off and mix it with the mixing stick until the color is uniform and even. Tilt the can over a paint tray and fill it to the first hash mark with primer.[6]
- If your paint didn’t come with a mixing stick, you can use any thin object to mix it. If your screwdriver is long enough, you can use that and wipe it off after you’ve mixed the primer.
-
3Cut the trim with a nylon or natural brush. Dip your brush in the primer and use it to start cutting the edges around your walls. Hold the brush at a 45-degree angle while pressing it into the base of the junction where your wall meets your floor. Move your brush carefully as you navigate the entire perimeter of the room.[7]
- You can use a nylon or natural brush to apply your primer. It may be easier if you use an angled brush, but it’s not mandatory.
-
4Roll the remainder of your floor with a roller. Once all of the trim is primed, roll the rest of the floor with a heavy nap roller by rolling vertically across the entire surface area.
Attach your roller to the handle by sliding it on the head and roll it back and forth along the hash marks in your paint tray to load it up with primer. Roll slowly and work your way towards the door.[8]- Cover each section that you’re rolling 2-3 times by rolling over it repeatedly. This will ensure that every section of the porous wood absorbs some primer.
-
5Wait 1-2 days and then sand the floor again. Wait at least 24 hours to let your primer seep into the wood and dry. Then, use 220-grit sandpaper to sand the entire floor again.
Use the same method that you used the first time. This will smooth out any thick layers of primer to ensure that your top coat actually dries into your wood and not on top of it.[9]- Sweep the room with a broom and then vacuum it after sanding.


Adding Layers of Paint
-
1Select a latex enamel designed for floors or porches. You cannot paint a hardwood floor with standard latex paint. Instead, purchase a latex enamel that is specifically designed to be used on hardwood floors, porches, or decks. Keep in mind that whatever color you choose will thin out and become lighter as people walk on the floor over time.[10]
- Darker colors will show dirt and scuff more easily. They also make a room feel smaller by absorbing light.
- Lighter colors tend to make rooms look bigger and are easier to clean. White is a popular option for kitchens, since it’s easier to clean.
Tip: You can use an oil-based enamel if you want, but it will be harder to clean and can smell bad as it wears down. It does tend to be more resistant to wear and tear though. Keep in mind that oil-based paint tends to be toxic, so wear a dust mask or respirator when you’re painting.
-
2Tape baseboards and quarter-round with painter’s tape if you want to keep them clean. While it isn’t mandatory, you can use painter’s tape to cover quarter-round or baseboards to keep paint from dripping or splashing along any unwanted edges.
To tape a section off, line up the side of the tape with the edge that you want to keep clean. Press the tape down so that it’s perfectly on the edge and then pull the roll out 2–3 feet (0.61–0.91 m) before lining it up with the same edge. Press the tape down and run your hand along it to ensure that it’s fully adhered to the surface.[11]- Painter’s tape won’t be effective at stopping paint if you don’t press it down along the entire surface.
- Painter’s tape won’t damage your wall like normal tape, so don’t worry about the paint on the baseboard, wall, or quarter-round getting pulled off.
-
3Use a natural-bristle angle brush to cut around baseboards and walls. A roller will not reach the trim in sections of a room near a wall or baseboard.
For these hard-to-reach edges, use a natural-bristle angle brush to cut around the trim by dipping the tip of your brush in the enamel and running it carefully along the 2–3 inches (5.1–7.6 cm) next to a wall. Cover every part of a room’s trim before you continue.[12] -
4Roll the room with a roller if you want to give it a stippled finish. You can use a thin-napped roller to fill in the remainder of the room for a stippled finish. The more porous sections of wood will absorb paint from the roller at a greater rate than the firmer sections, which will leave your floor with a unique texture when you’re done.
To roll the rest of the room, cover your roller in enamel and work from the corner furthest from the door to roll each section of the floor.[13]- You can use a thick-napped roller instead if you want even more variety in your texture.
-
5Paint the rest of the room with a brush if you want a smoother look. If you want a more uniform finish, use a larger natural-bristle brush to paint the rest of your floor. Start with the section of your floor furthest from the door and paint in back-and-forth strokes. Work in the direction of your floorboards as you cover each section of the floor.[14]
- Cover each part of your floor with 3-4 strokes before moving on to a different section to ensure that it’s fully covered.
-
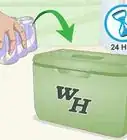
6Let your room air dry for at least 24 hours. After you’ve applied your first coat of paint, let it air dry for a full day before walking on it to apply additional coats. Avoid walking on it with thick boots or high heels even after it has dried for 24 hours to prevent damaging the first layer of paint.[15]
-
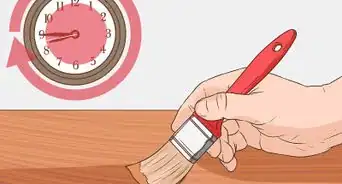
7Apply 2-3 additional coats to deepen the color of your floor as desired. The more layers of paint that you add, the deeper and richer the color will be. Wait at least 24 hours after every painting session to ensure that the previous coat has time to dry.
Wait 1 month after applying your last coat before adding any heavy furniture to the room to give it adequate time to breathe.[16]- You may not want to apply any additional layers if you’re going for a more worn-down or textured look. The more layers you add, the more uniform your paint job will be.


Things You’ll Need
- Broom
- Dustpan
- Dust mask or respirator
- Heavy gloves
- Kneepads
- Natural-bristle brush
- Paint roller
- Tray
- Oil-based primer
- Latex enamel floor or porch paint
- Painter’s tape
References
- ↑ https://www.bobvila.com/articles/how-to-paint-a-wood-floor/
- ↑ https://www.bobvila.com/articles/how-to-paint-a-wood-floor/
- ↑ https://www.bobvila.com/articles/how-to-paint-a-wood-floor/
- ↑ https://www.bobvila.com/articles/how-to-paint-a-wood-floor/
- ↑ https://www.bobvila.com/articles/how-to-paint-a-wood-floor/
- ↑ https://decoratedlife.com/painted-floors-cool-tricks-floorboards/
- ↑ https://decoratedlife.com/painted-floors-cool-tricks-floorboards/
- ↑ https://decoratedlife.com/painted-floors-cool-tricks-floorboards/
- ↑ https://decoratedlife.com/painted-floors-cool-tricks-floorboards/
- ↑ https://www.bobvila.com/articles/how-to-paint-a-wood-floor/
- ↑ https://youtu.be/0bcOTZuYeWI?t=138
- ↑ https://decoratedlife.com/painted-floors-cool-tricks-floorboards/
- ↑ https://decoratedlife.com/painted-floors-cool-tricks-floorboards/
- ↑ https://decoratedlife.com/painted-floors-cool-tricks-floorboards/
- ↑ https://decoratedlife.com/painted-floors-cool-tricks-floorboards/
- ↑ https://decoratedlife.com/painted-floors-cool-tricks-floorboards/
About This Article