This article was co-authored by Laura M. Johnson. Laura M. Johnson is a Mural Artist and the Owner of Laura Margo Murals & Custom Art in St. Paul, Minnesota. She has over five years of experience in the industry and has worked professionally across venture capital, communications, the arts, and beyond. She helps empower small and growing businesses to find their voices, share their stories, and grow their impact. Laura received her Master of Business Administration from the University of Minnesota - Carlson School of Management, and her Bachelors in Journalism and Communication Studies with a minor in Fine Arts from the University of Oregon.
There are 11 references cited in this article, which can be found at the bottom of the page.
This article has been viewed 19,667 times.
Breathe new life into your old home with a fresh coat of paint. It sounds as easy as opening a can of paint and brushing it on, but there's more to consider when you're painting stone. That doesn't mean you can't paint over stone walls, foundations or chimneys that clash with the new siding or furniture. You can successfully paint any stone surface by preparing it properly through cleaning and priming and by adding eye-catching coats of paint with your sprayer or roller.
Steps
Preparing the Surface
-
1Brush the stone to make it as clean as possible. Use a wire brush to remove any dirt and make the surface you're painting nice and smooth. A good brushing will also remove any mineral deposits that may make your paint job look lumpy and uneven. [1]
- Depending on the type of stone, you might need to use sandpaper or a wire brush to loosen dirt or any small, loose stone fragments.
-
2Wash the surface to remove grease. Grease can show up anywhere, especially in the kitchen. After you've brushed away any large pieces of dirt, scrub the stone with a nylon brush or a sponge. Use a mild cleaning formula such as dish detergent mixed with water.[2] Rinse the wall with clean water to remove any remaining debris.[3]
- While cleaning, check the masonry for cracks or other damage. You may have to make repairs before painting. Don't just paint over problematic areas.[4]
- You don’t want to leave any soapy residue, so it's usually a good idea to do a few rinses to make sure all soap is all washed off.
- If you are able to bring the stone outside, you might also consider using a power washer that is intended for cleaning.
- Ideally, you should wait around 24 hours for the water to dry, especially if the stone is porous before you attempt to prime it; otherwise you’ll risk trapping water within the stone, which can cause mold and mildew to grow.
Advertisement -
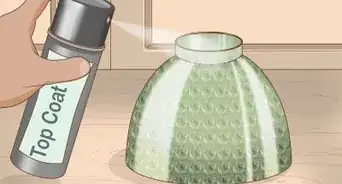
3Spread primer on dry stone. Primer is a sticky type of paint that's often dull in color. It's made stick to surfaces so your top coat of paint goes on smoothly.[5] Use either a sprayer or a roller brush to apply primer evenly over the surface you plan to paint. Sprayers are faster than brushes and can reach into uneven surfaces brushes miss. They also take longer to set up and clean. Brushes are slower, but it's easier to apply primer evenly with them.[6]
- Choose a primer specifically made for the stone that you have to be sure your paint sticks properly.[7]
- In some cases, it might be necessary to apply a couple of layers of primer.
-
4Let the primer cure. The primer needs to be completely dry before you start painting. Once it's dry, check to see if it's covering the stone well or if you need to add a second coat. If you have to add more primer, concentrate on the areas where the stone isn't as well-covered.[8]
-
5Clean your tools. If you need to use the same tools to paint that you used for priming, you have to remove any residual primer from them. Cleaning is necessary if you aren't using them so that the primer doesn't dry and make them unusable.


Painting the First Coat
-
1Choose your painting tools. Different tools are better for different types of stone surfaces. Special masonry rollers are designed to be extra fluffy so that they get into the deepest nooks and crannies. Some stone may be so rough that you need to use a sponge dipped in paint.[9]
- If you're painting indoors, be sure to protect your floors and furniture from drips by putting down dropcloths.[10]
-
2Use paint that's intended for masonry. Stone draws moisture from the ground and the atmosphere.[11] Avoid most oil-based paints. They trap dampness, damage stone surfaces and fail quickly because they don't allow moisture to escape.[12]
- Lime, mineral and high-end acrylic paints are good choices because they are breathable and let moisture out.[13]
-
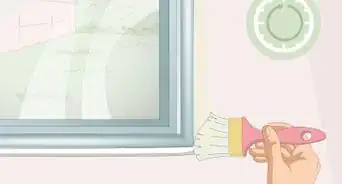
3Paint with even strokes. Start painting at the top and work your way down. Dip your brush in the paint again if it starts getting streaky. You want the paint to be applied thoroughly to the primer. When you're finished, check for any spots you missed and touch them up with a small amount of paint.[14]
- Use a ladder or scaffolding to reach high places so that every surface is covered.
- Wear old clothes and a dust mask to protect you from fumes while you paint.


Curing the Paint
-
1Wait patiently for the paint to dry. The paint has to be completely cured before you start another project or you risk damaging the top coat. Many types of paint take up to 30 days to fully cure. By that time, the excess water in the paint has evaporated and the paint is hard.[15]
- Properly cured paint is very hard and unlikely to chip.
-
2Apply a second coat. You may need to go over the first coat of paint again to cover any spots you missed the first time. A second coat of paint also makes the paint job last longer.[16] Use the same type of paint as before so that the color is uniform and it cures in the same way.
- A second coat of paint deepens the color of your home so that it stands out.
-
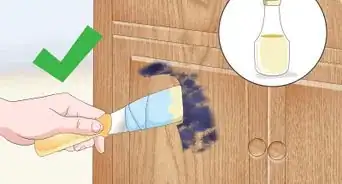
3Clean up when you're finished. After the second coat has cured, look around for any stray droplets of paint. It's best to wait until after all of your painting is complete so that you're not cleaning up more than once. Gentle cleaning solvents and a scraping tool like a razor can lift paint from many surfaces.[17]
- Wrap an old rag around the blade of a putty knife to make a scraping tool that won't scratch surfaces like granite countertops.[18]


Expert Q&A
-
QuestionDo I need to prime stone before painting?
 Laura M. JohnsonLaura M. Johnson is a Mural Artist and the Owner of Laura Margo Murals & Custom Art in St. Paul, Minnesota. She has over five years of experience in the industry and has worked professionally across venture capital, communications, the arts, and beyond. She helps empower small and growing businesses to find their voices, share their stories, and grow their impact. Laura received her Master of Business Administration from the University of Minnesota - Carlson School of Management, and her Bachelors in Journalism and Communication Studies with a minor in Fine Arts from the University of Oregon.
Mural ArtistAbsolutely! Priming is an essential step when painting any surface, as primer acts like a glue that binds the paint to the surface.


References
- ↑ https://abeautifulmess.com/2015/10/how-to-paint-brick-and-stone.html
- ↑ https://www.goodhousekeeping.com/home/cleaning/tips/a20505/dont-use-vinegar-cleaning/
- ↑ https://abeautifulmess.com/2015/10/how-to-paint-brick-and-stone.html
- ↑ https://www.thisoldhouse.com/ideas/all-about-exterior-paint
- ↑ https://www.familyhandyman.com/painting/painting-how-to-choose-and-use-primers/
- ↑ https://thecraftsmanblog.com/brushing-vs-spraying-paint-which-is-best/
- ↑ https://abeautifulmess.com/2015/10/how-to-paint-brick-and-stone.html
- ↑ https://www.familyhandyman.com/painting/painting-how-to-choose-and-use-primers/
- ↑ https://abeautifulmess.com/2015/10/how-to-paint-brick-and-stone.html
- ↑ https://abeautifulmess.com/2015/10/how-to-paint-brick-and-stone.html
- ↑ https://www.nps.gov/tps/how-to-preserve/briefs/1-cleaning-water-repellent.htm
- ↑ https://www.thisoldhouse.com/ideas/all-about-exterior-paint
- ↑ https://www.thisoldhouse.com/ideas/all-about-exterior-paint
- ↑ https://www.bobvila.com/articles/how-to-paint-brick/
- ↑ http://www.recreateddesigns.com/2017/07/paint-curing-what-happens/
- ↑ https://www.sharperimpressionspainting.com/recent-projects/why-two-coats-of-paint-are-better-than-one
- ↑ https://www.bobvila.com/slideshow/how-to-remove-paint-from-everything-48451#how-to-remove-paint-from-tiles
- ↑ https://www.bobvila.com/slideshow/how-to-remove-paint-from-everything-48451#how-to-remove-paint-from-tiles
About This Article