wikiHow is a “wiki,” similar to Wikipedia, which means that many of our articles are co-written by multiple authors. To create this article, 16 people, some anonymous, worked to edit and improve it over time.
wikiHow marks an article as reader-approved once it receives enough positive feedback. In this case, 95% of readers who voted found the article helpful, earning it our reader-approved status.
This article has been viewed 246,647 times.
Learn more...
At their simplest, pastels are simply sticks of pigment held together with different binders. While using them is called "painting," due to the effect created by a pastel when it is rubbed on paper, painting with pastels requires very specific techniques that are quite different from traditional painting. Not all pastels have the same properties, so to learn how to paint with pastels you need learn about the different qualities of the pastels and the types of paper to use with them.
Steps
Acquiring Materials
-
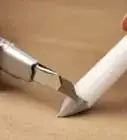
1Decide which type of pastels you would like to use. Pastels come in several forms, oil pastels, hard pastels, soft pastels, and pastel pencils, and each has distinctive properties.
- Oil pastels are pastels with wax and inert oil as added ingredients.
-
2Learn about the types of paper you use for pastel painting. Pastel paper comes in a variety of different textures and weights but is usually rougher than the paper used for acrylic or watercolor painting. This is because pastel does not like to stick to a completely smooth surface.
- Pastel paper also comes in different colors, as pastels are great for working on colored paper because of the density and saturation of their color.
- Pastel paper is sometimes manufactured with a "laid" effect, meaning the grain on one side is made of closely spaced lines and the opposite side has a slightly mottled surface. Yet another type of pastel painting paper is very close to a carborundum (wet 'n dry) or a coarse sandpaper. These can be fun types of paper to experiment with.
Advertisement -
3Purchase pastels and pastel paper at your local art supply store. If you are unsure which type you would like to use, try purchasing a few pieces of each type of pastel and paper, then figure out what you like, and don't like, about each through experimentation.
- While not used interchangeably, soft pastels, hard pastels, and pastel pencils can be used in combination with each other in the same painting. Oil pastels, on the other hand, can be difficult to blend with the other types of pastels. Keep this in mind when purchasing your pastels.[1]


Experimenting With Your Materials
-
1Study the qualities of each of your materials. Oil pastels, hard pastels, soft pastels, and pastel pencils all have different properties that you should explore through experimentation.
- Run each type of pastel across a piece of paper. Notice how the lines they make are distinctive.
- Pick up a pastel pencil and notice that not only does it resemble a traditional graphite pencil, the stroke it creates is detailed like a traditional pencil.
- Handle a soft pastel pencil and feel its softer consistency. When pulling it across a piece of paper notice how much of it's pigments are transferred depending on the pressure you apply to it.
- Apply a hard pastel to a piece of paper. Play with how you draw it across the paper. Use it on its end and then on its side. Notice how the lines created differ. Press firmly then softly and see how these lines differ as well.
-
2Experiment with how the types of pastels can interact with each other. Try blending the colors together but also try to create clean and distinctive lines on top of other colors.
- This kind of experimentation will help you build the skills you need to create a painting.
-
3Experiment with the paper you have acquired. If you are using loose pieces of paper, it can be helpful to tape it down with masking tape, so that you are not constantly having to hold it in place.
- Study the "tooth" of pastel paper. "Tooth" indicates how much pastel pigment the paper is able to hold. Paper with more tooth allows more pastel to adhere to the paper. Paper that is too smooth is difficult to use if you plan to paint several layers on it.
- Learn about how the paper's color affects the mood of your painting. Dark red paper adds a warmer glow, while paler paper colors give a softer, more subdued effect.

Painting with Pastels
-
1Plan out your painting by lightly sketching it on your paper first with a graphite pencil. Draw general figures, objects and buildings first. This is the time to decide where each major element should go in your drawing.
-
2Lay down the main areas of color. Look at your sketch and choose the main color, which is going to be the largest area of your painting.
- Paint with a light touch as you block in shapes and forms preliminarily. Once you are sure that the image is laid out correctly, use harder and more definite lines.
- To keep an area lighter, apply white pastel over that spot before applying the color. If it is still too dark, scrape it down with a scraper and repaint.
-
3Build up additional layers of color. Fill in with heavier, darker strokes once you have finished blocking your picture or design.
-
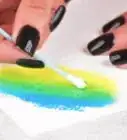
4Blend your colors, layering different pastel colors to get the effect you are looking for. Add in tiny swirls of color, making sure to texture in the correct direction but making your painting strokes are random.
- Mix colors and add detailed texture using strokes of a pastel pencil.
-
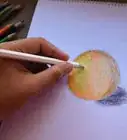
5Finish blending colors by using your fingers, dampened color shapers, or sharpened blenders. This can add the final, polished details that will really make your painting look great.
- Add fine color detail by picking up small amounts of pastel on the tip of a blender. Using a finer tool allows you to add in tiny details, like the light in an eye, more easily than by using even a pastel pencil.
- Create softer edges by using a rounded, white eraser to blend. Simply drag the color out in gentle curves, making the lines fade over the paper.
- You can also blend by using discarded packing peanuts. Packing peanuts allow you to save your fingertips while giving you the ability to lightly blend your colors. Using a packing pellet to blend pastel colors also prevents you from scraping your fingers on a rough-surfaced paper.
-
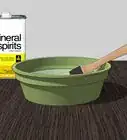
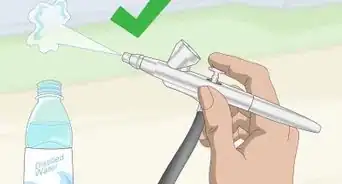
6Fix the image you have created with fixative. Unlike traditional liquid paints, pastels will always be subject to damage and blending if the surface is touched. To stop this, fixative can be purchased at your local art supply store.
- Alternatively, you can put your pastel painting under glass in a frame. This will keep your image safe from accidental disruption.
-
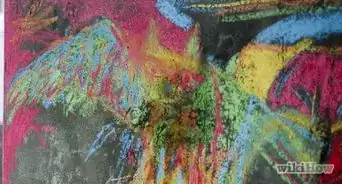
7Enjoy your work of art!

Community Q&A
-
QuestionDo you use soft or oil pastel?
 Community AnswerBoth soft and oil pastels are great choices--it's just a matter of personal preference. Try both to find what works best for you and your current project.
 -
QuestionAre soft pastels fade-resistant, and can I use hairspray to seal my pastel art work?
 Community AnswerThe quality of your soft pastels will determine whether they will or won't fade. And, yes, you can use hairspray to seal your work.
 -
QuestionCan I use an ordinary paper for this?Community AnswerYou can, but quality won't be as good as you would get by painting on special paper.
Warnings
- Be cautious about blowing pastel dust off the paper in an enclosed space, as the dust can be toxic and can get into your lungs. Wear a face mask or blow dust off outside.⧼thumbs_response⧽
Things You'll Need
- Pastels
- Paper or sketchbook
- Drawing pencils
- Blending tools
- Fixative--optional

References
About This Article
Before you paint with pastels, sketch out the major elements of your painting with a graphite pencil. Then, lightly paint in the biggest shapes and forms. After that, go back and use heavier, darker strokes to build up layers of color. Additionally, enhance your painting by layering different pastels to get special color effects, or adding swirls of pastels to create texture. You can also blend colors with your fingers or a white eraser to get polished-looking details before you preserve your finished artwork under glass, or with a fixative. For tips on how to choose the right type of pastels and paper for your painting, keep reading!