This article was co-authored by Rebecca Schweiger and by wikiHow staff writer, Jessica Gibson. Rebecca Schweiger is a Professional Artist, Published Author, and the Founder of The Art Studio NY, New York City's #1-rated art school and global online art studio. Celebrated by TV networks, press, and celebrities including NBC, ABC, E!, Time Out New York, The Kardashians, and Big Bang Theory's Jim Parsons, Rebecca specializes in creating abstract artwork and teaching studio art classes. Her art studios provide 100+ weekly, beginner-friendly drawing and painting art classes to people around the globe. With more than 22 years of art experience, she is the author of Release Your Creativity: Discover Your Inner Artist with 15 Simple Painting Projects, and her artwork has been exhibited in more than 50 museums and galleries around the world. Rebecca holds a BFA in Painting from Boston University's School for the Arts and has participated in acclaimed artist residencies worldwide.
There are 9 references cited in this article, which can be found at the bottom of the page.
This article has been viewed 56,687 times.
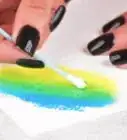
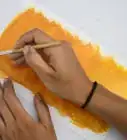
Blending stumps are an invaluable tool for most artists. These simple stumps of tightly rolled paper will allow you to blend charcoal or graphite. You can blend different values, smudge the material, shade light values, or deepen the dark values in your drawings. These inexpensive tools are easy to maintain since you only need to scrape them against sandpaper to clean or sharpen them.
Steps
Trying Different Techniques
-
1Rub the side or tip of the stump to blend and smooth out your drawing. Using a blending stump is a great way to make a sketch or drawing look more polished. Take a rough charcoal or graphite sketch and spend a few minutes rubbing the blending stick across it. Start by blending areas of light value with the side or tip of the stump before working into darker values. Blending the material will make your sketching lines disappear so the drawing looks softer.[1]
- For example, try drawing a ball and sketch it as though the light is hitting it from one side so the opposite side is darker. Then use the stump to blend the values so the ball looks smooth and even.
-
2Dab the tip of the blending stump to make detailed smudges. If you just want to soften a portion of your drawing, push the tip of the blending stump into the charcoal or graphite to gently smudge the material.[2] [3]
- For example, if you're drawing an eye, smudge the iris so it doesn't appear sharp or lined.
Variation: Create streaks or patterns by dragging the blending stump from the charcoal or graphite away from it. This will make the charcoal or graphite smear in any direction you like.
Advertisement -
3Layer the graphite or charcoal with a stump to shade your image. Sketch an image on your paper and use a little more graphite or charcoal than you usually would. Then take the blending stump and rub it over the material so the stump picks it up. Rub the stump along your drawing where you'd like to create depth. Rub the stump in more of your material and apply it to your image.[4]
- For example, if you're drawing someone smiling with their mouth open, you might use the blending stump to create an even layer of darkness inside the mouth. Then use the stump to add darker layers near the corners of the mouth.
-
4Draw with a dirty blending stump instead of a pencil or charcoal. Instead of smudging or blending charcoal or graphite that's already on your paper, work with a dirty blending stump on clean paper. The dirty stump is already loaded with charcoal or graphite, so it will transfer the material to clean paper.[5]
- For example, if you'd like to draw a wispy cloud or a shadow, use the blending stump as though it were your charcoal or pencil. Rub as firmly as you like to get a slightly darker image.
-
5Rub the stump over charcoal to make a completely dark space. If you're using charcoal or graphite to draw something that appears black, you'll notice tiny points of the white paper are still visible. Take the blending stump and gently rub over the charcoal or graphite. The stump will move the material so it fills in the very tiny gaps in the paper.[6]
- If you still see bits of white, you might need to add more charcoal or graphite before spreading it again with the blending stump.

Maintaining Your Blending Stumps
-
1Wipe the blending stump on scrap paper to remove excess graphite. You'll probably notice that your blending stump will turn dark and start holding the graphite or charcoal from your drawing. To prevent it from dropping onto your paper, rub the blending stump on a spare sheet of paper occasionally.[7]
- The excess graphite or charcoal will transfer to the scrap paper instead of your drawing.
-
2Rub the blending stump against sandpaper to clean it. Once you've been using a blending stump for a while, it will become very dark as it's loaded with charcoal or graphite. Remove the dirty outer layer of the blending stump by scraping it against a coarse piece or block of sandpaper. Keep scraping and turning it until a new layer of paper is revealed.[8]
- The coarse sandpaper will cause the blending stump to fray as you clean it. For less fraying, use finer sandpaper. Keep in mind that you won't be able to clean the blending stump as easily with the smoother sandpaper.
Tip: Try using a nail file if you need to lightly clean your blending stump. A nail file can be easier to handle than a sheet of sandpaper.
-
3Clip fraying ends with a nail clipper. The ends and side of the blending stump may fray the more you use it and sharpen it. To remove the fraying ends, take a pair of nail clippers and trim the paper close to the blending stump.[9]
- If you prefer, use a craft blade to slice off the fraying ends. Always use caution when using a craft blade and hold the blending stump steady so you don't cut yourself.
-
4Use different blending stumps according to your project. If you rely on just 1 blending stump, it will become dirty faster and wear out quickly. Instead, alternate between 2 or 3 blending stumps that you designate for different uses.
- For example, use 1 blending stump for dark values. Since you won't be concerned about smudging lighter areas with it, you also don't have to worry about keeping it clean. Then use a different stump for your light values.
-
5Sharpen the tip of the stump with a craft knife. Over time, the tip of the blending stump will become dull and might even flatten out. To restore the tip, get out a cutting mat and point the tip of the stump down onto the mat. Carefully cut just the end of the tip as though you were trying to sharpen a pencil.[10]
- Always cut away from you so you don't accidentally cut yourself.


Expert Q&A
-
QuestionDo you really need blending stumps?
 Rebecca SchweigerRebecca Schweiger is a Professional Artist, Published Author, and the Founder of The Art Studio NY, New York City's #1-rated art school and global online art studio. Celebrated by TV networks, press, and celebrities including NBC, ABC, E!, Time Out New York, The Kardashians, and Big Bang Theory's Jim Parsons, Rebecca specializes in creating abstract artwork and teaching studio art classes. Her art studios provide 100+ weekly, beginner-friendly drawing and painting art classes to people around the globe. With more than 22 years of art experience, she is the author of Release Your Creativity: Discover Your Inner Artist with 15 Simple Painting Projects, and her artwork has been exhibited in more than 50 museums and galleries around the world. Rebecca holds a BFA in Painting from Boston University's School for the Arts and has participated in acclaimed artist residencies worldwide.
Professional Artist & Art School FounderAlthough you don't need them, a blending stump is a terrific tool for drawing for beginners and artists at any level! -
QuestionCan you use a blending stump with colored pencils?Rebecca SchweigerRebecca Schweiger is a Professional Artist, Published Author, and the Founder of The Art Studio NY, New York City's #1-rated art school and global online art studio. Celebrated by TV networks, press, and celebrities including NBC, ABC, E!, Time Out New York, The Kardashians, and Big Bang Theory's Jim Parsons, Rebecca specializes in creating abstract artwork and teaching studio art classes. Her art studios provide 100+ weekly, beginner-friendly drawing and painting art classes to people around the globe. With more than 22 years of art experience, she is the author of Release Your Creativity: Discover Your Inner Artist with 15 Simple Painting Projects, and her artwork has been exhibited in more than 50 museums and galleries around the world. Rebecca holds a BFA in Painting from Boston University's School for the Arts and has participated in acclaimed artist residencies worldwide.
Professional Artist & Art School FounderFor sure! Just gently press your blending stump onto your paper and it will smooth out and blend the colored pencil as needed as you would with a drawing pencil.. -
QuestionIs size #8 the largest? I would love a 1 inch size blending stump!
 Community AnswerYou can make your own, by rolling up paper tightly and even shape it using sandpaper. You don’t use glue, just tape up one end to secure it.
References
- ↑ https://youtu.be/zHiaJMf7m9Y?t=33
- ↑ https://youtu.be/Iw3RYSKpYjg?t=291
- ↑ Rebecca Schweiger. Professional Artist & Art School Founder. Expert Interview. 19 November 2021.
- ↑ https://keetonsonline.wordpress.com/2017/07/10/blending-stumps-vs-tortillons-and-other-tools-to-blend-like-a-pro/
- ↑ https://youtu.be/zHiaJMf7m9Y?t=63
- ↑ https://youtu.be/zHiaJMf7m9Y?t=36
- ↑ https://youtu.be/shb07jyr68I?t=249
- ↑ http://rapidfireart.com/2015/05/08/detailed-guide-how-to-use-a-blending-stump/
- ↑ http://rapidfireart.com/2015/05/08/detailed-guide-how-to-use-a-blending-stump/
About This Article