This article was co-authored by Mitchell Newman. Mitchell Newman is the Principal at Habitar Design and its sister company Stratagem Construction in Chicago, Illinois. He has 20 years of experience in construction, interior design and real estate development.
There are 8 references cited in this article, which can be found at the bottom of the page.
This article has been viewed 177,135 times.
Whether you're completely redoing the interior of your home or just want to change the style of your molding, painting a door frame is a quick and easy project. Start by removing the door from its hinges, then use a dropcloth and a few strips of painter's tape to protect surrounding surfaces. After cleaning and sanding the frame, you can repaint it in your preferred shade and delight in the new energy it adds to the room.
Steps
Protecting Your Work Area
-
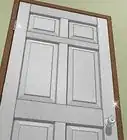
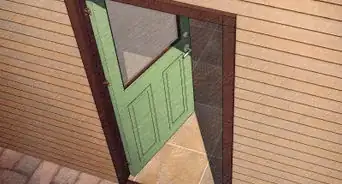
1Take the door off the hinges. Take hold of the door from either side and lift up on it forcefully to slide it free from the attached wall hinges. Set the door aside where it won't be at risk of being damaged or getting paint on it.
- If you plan on painting the door the same color as the frame, simply leave it where it is.
-
2Cover the door with a sheet of plastic if you can't remove it. Drape the plastic over the top of the door and smooth it out to eliminate all wrinkles and folds. Leave the door propped open all the way to expose as much of the frame as possible.
- Make sure the sheet you're using is long enough to reach all the way to the floor.
- It's usually okay to paint around doors that are particularly heavy or have complicated hinging systems, as long as you're careful.
Advertisement -
3Put down a protective covering over the floor of your workspace. A plastic or canvas dropcloth will work best, as you'll be able to position it exactly where you need it. Arrange the covering so that it skirts either side of the door frame. No part of the underlying floor should be exposed.[1]
- A few sheets of newspaper can also serve as a makeshift floor cover if you don't have anything more durable on hand.
- If you're worried about paint bleeding through, use a second dropcloth or slide a layer of thick cardboard beneath the one you already have in place.
-
4Line the area around the door with painter's tape. Be sure to apply the tape not just to the wall, but to all exposed hinges and latches, as well. Painter's tape will enable you to work freely without having to worry about paint ending up where it doesn't belong.[2]
- Purchase a 3-4 inch (7.6-10.2 cm) roll of painter's tape if you're worried about making a mess. The wider the tape, the more room for error you'll have.


Cleaning and Sanding the Frame
-
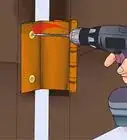
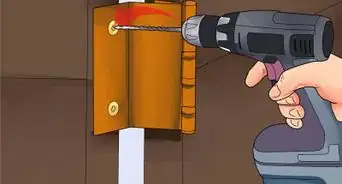
1Make any necessary repairs to the frame itself. Older door frames that have seen a lot of use may need a little restoration in order to look their best. Fill small chips and gouges with wood putty or spackling, and use a line of caulk to seal gaps between the frame and the wall. Consider replacing any sections that are loose or broken.[3]
- Painting over a damaged door frame will only change its color, not its general condition.
-
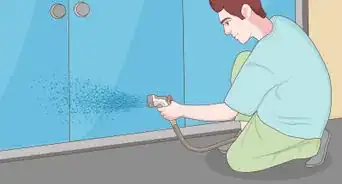
2Clean the door frame with grease-cutting soap. Fill a small bucket with soapy water and use a sponge to scrub the frame from top to bottom. A thorough cleaning will help lift away any lingering dirt or stains that might show through or prevent the new coat of paint from taking hold.[4]
- For best results, use a non-sudsy detergent like Dirtex or Spic & Span that won't leave behind a sticky residue.
- Rinse the frame with a damp cloth or sponge when you're finished cleaning to remove all traces of detergent.
-
3Pat the frame dry with a clean towel. Be sure to go over every part of the frame where you'll be applying paint. When you're done, perform a quick touch test to make sure you haven't missed any wet spots. The frame needs to be completely dry before you move on to sanding.
- A microfiber towel will be your best bet if you want to work quickly, as they absorb more moisture than regular cotton towels.
-
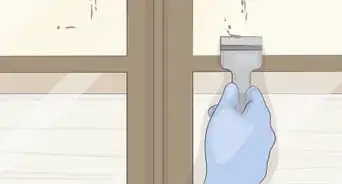
4Sand the entire frame with a high-grit sandpaper. Run the sandpaper lightly over the surface of the frame on all sides. There's no need to be too forceful—the idea is not to actually take off the existing paint, but just to scuff it up enough for the new color to stick. A frame that's already been painted should have a dull appearance by the time you're finished.[5]
- Unpainted door frames won't typically require sanding. However, giving them a few light sweeps may help improve the paint's ability to adhere.
- Use 100-grit sandpaper or higher to avoid scraping up the wood underneath the paint.
- A sanding block with squared edges can come in handy for getting into cracks and crevices that are inaccessible with an ordinary square of sandpaper.[6]
-
5Wipe the frame clean with a damp cloth. Go over the frame one more time to pick up any dust or debris generated by sanding. If left behind, it could interfere with the adhesion of the new paint. Once you've got the frame looking spotless, allow it to dry to the touch.
- You could also use a clean brush or shop vacuum to remove heavier dust deposits prior to the final wipedown.


Applying Paint
-
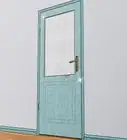
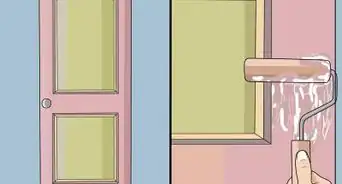
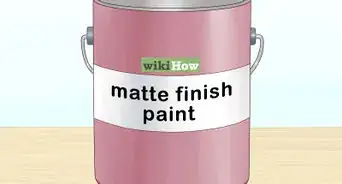
1Pick out a semi-gloss paint in the desired shade. Select a latex-based interior paint designed specifically for use on trim. The slight sheen provided by a glossier paint will better showcase the updated frame by helping it stand out from the walls.[7]
- If the door frame you're painting opens to the outside, go with an exterior trim paint instead.[8]
- Latex-based paints are also easier to maintain than matte and eggshell paints. A quick wipedown with a damp cloth every 2-3 months will ordinarily be enough to keep them clean.
-
2Use a handheld brush. You'll be able to paint with greater precision and efficiency with a brush than with a roller, which is best reserved for broad, flat surfaces. Many home improvement experts recommend using a brush with an angled tip to make it easier to work the new color into tight spaces.[9]
- In order to achieve the cleanest finish, a good rule of thumb is to use a brush no wider than the surface you're painting.
- Holding your brush by the metal band just beneath the bristles rather than lower down on the handle will give you even more control over your paint placement.
-
3Start painting in the upper inside corner of the frame. Angle the tip of your brush so that it's aligned with the corner and begin moving down the frame with long, sweeping strokes. Continue painting until you reach the bottom of the interior surface, then repeat on the opposite side.
- To prevent excess paint from globbing in the corners, work the paint in using the tip of your brush, then gently feather it back out again.[10]
- Painting with a linear up-and-down motion makes it possible to cover more surface area and use less paint than brushing back and forth widthwise.
-
4Work your way to the outside of the frame. After coating the inside of the frame, move outward and paint the jambs, or the outer face that's visible when the door is closed. Once again, go from top to bottom, aiming for full coverage. Don't forget to do both sides.[11]
- Overlap your strokes by 0.5–1 inch (1.3–2.5 cm) to avoid leaving seams or thin patches.
- Keep an eye out for missed spots, as these may be noticeable to those passing through the door frame.
-
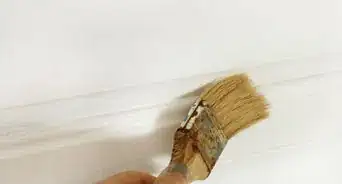
5Paint across the top of the frame. Drag your brush from one end of the frame to the other overhead. Be careful not to apply the paint too thick while painting the top of the frame, or it could drip down on you.
- When painting tall door frames with a high clearance, pull up a stepladder so you can work more comfortably and with a better eye for detail.
-
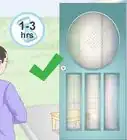
6Let the paint dry to the touch before applying a second coat. This may take anywhere from 1-4 hours, depending on the type of paint you're using. In the meantime, keep clear of the frame to avoid rubbing off the fresh base coat.[12]
- Press the pad of your finger into the paint every few hours to see how it's coming along. If it feels slightly tacky, it most likely needs another couple hours.
-
7Brush on additional coats if necessary. Most interior frames will only need 1-2 coats to look their best. Exterior frames may benefit from an extra coat to protect them against exposure to the elements. Paint follow-up coats the same way you did the base coat, using long, smooth strokes and moving from the inside out.
- After applying your topcoat, allow it to dry for at least 24 hours. Like you did with the previous coats, perform a touch test so you'll know when it's okay to rehang the door.[13]
- It can take up to 2 weeks for new paint to cure completely and become resistant to dirt, smudges, and scratches, but it will be okay to put your door back up after a full day of drying.
-
8Hang the door back up if you removed it. Once the paint is dry, replace the door by lining up the 2 sets of hinges and lowering it into place. Open and close the door a few times to make sure it tracks correctly. If it does, congratulate yourself on a job well done and enjoy the new and improved look of your door frame!
- Ask someone nearby to lend you hand if you're having trouble getting the door back on its hinges yourself.
- Avoid handling the painted sections of the door as much as possible until it has had a week or 2 to cure. Use only the knob or handle to open and close the door during this time.


Expert Q&A
-
QuestionHow do you prepare a door frame for painting?
 Mitchell NewmanMitchell Newman is the Principal at Habitar Design and its sister company Stratagem Construction in Chicago, Illinois. He has 20 years of experience in construction, interior design and real estate development.
Construction ProfessionalTo prepare a door frame for painting, lightly sand it, just enough to rough up the surface. Otherwise, the paint might not adhere well.
Warnings
- If you're not confident in your ability to paint a door frame yourself, consider hiring a professional painter to ensure that the job gets done right.⧼thumbs_response⧽
Things You'll Need
- Latex-based semi-gloss paint for interior trim
- Handheld paint brush
- Painter's tape
- Wood putty, spackling, or caulk (for minor repairs)
- Grease-cutting detergent
- High-grit sandpaper
- Sanding block (optional)
- Plastic sheeting
- Dropcloth or tarp
- Cloth or sponge
- Clean, dry towel


References
- ↑ https://rainonatinroof.com/painting-101-how-to-paint-trim-and-doors/
- ↑ https://rainonatinroof.com/painting-101-how-to-paint-trim-and-doors/
- ↑ https://www.familyhandyman.com/painting/how-to-prepare-wood-trim-for-a-smooth-paint-job/view-all/
- ↑ https://www.familyhandyman.com/painting/how-to-prepare-wood-trim-for-a-smooth-paint-job/view-all/
- ↑ https://www.thisoldhouse.com/how-to/how-to-paint-doors-windows-and-walls
- ↑ https://www.familyhandyman.com/painting/how-to-prepare-wood-trim-for-a-smooth-paint-job/view-all/
- ↑ https://rainonatinroof.com/painting-101-how-to-paint-trim-and-doors/
- ↑ https://www.consumerreports.org/exterior-paints/best-exterior-paint-for-doors-and-trim/
- ↑ https://www.youtube.com/watch?v=2deY1R_Yjv4&feature=youtu.be&t=24
- ↑ https://www.youtube.com/watch?v=8WAKVd-27u0&feature=youtu.be&t=165
- ↑ https://rainonatinroof.com/painting-101-how-to-paint-trim-and-doors/
- ↑ https://www.bobvila.com/articles/how-long-does-it-take-paint-to-dry/
- ↑ https://www.familyhandyman.com/painting/tips/trim-painting-tips-for-smooth-and-perfect-results/view-all/
About This Article

Before you paint a door frame, remove the door from its hinges and sand down the frame using a high grade sandpaper. Then, use a paintbrush to paint the frame with a latex-based paint, which will make the frame stand out against the walls. Begin painting in the upper inside corner of the frame and work downwards in long strokes. Next, move on to finish the jams and paint along the top. If you need to apply a second coat of paint, let the first coat dry before doing so. For tips on how to protect your work area and what to do if you can't remove the door, read on!