This article was co-authored by Mark Spelman. Mark Spelman is a General Contractor based in Austin, Texas. With over 30 years of construction experience, Mark specializes in constructing interiors, project management, and project estimation. He has been a construction professional since 1987.
This article has been viewed 40,462 times.
Painting a garage floor essentially involves the same steps as painting any other interior surface in your house: first priming and then painting the surface area. However, since it is a floor, you definitely have to plan an exit strategy so you don’t trap yourself in the middle of a whole lot of wet paint. And since it is the garage floor, extra care must be taken to clean it beforehand so no chemical stains or other blemishes show through the final coat.
Steps
Cleaning the Floor
-
1Start with a basic clean-up.[1] Wipe up any liquids (such as automotive fluids or any other chemicals) with a cloth. Then clear the floor of dry debris. Sweep up any dust or solids with a broom.[2]
- If your concrete floor is brand new, extensive cleaning shouldn’t be necessary. However, you must wait at least 45 days after the concrete is poured before it has cured enough to be painted.
-
2Spray the concrete with cleaner. For best results, use a degreaser on the floor and then an all-purpose cleaner. Spray it over the whole floor, using generous amounts over noticeable stains. Let it sit for at least ten minutes. For heavy stains, let it soak for twenty.[3]
- Laundry detergent and TSP (trisodium phosphate) can also be used as cleaner.[4] Do not combine different products, though, since their ingredients may cause harmful chemical reactions.
Advertisement -
3Scrub the floor. Allow the cleaner enough time to sit, but not enough to dry. While the floor is still wet, scrub the concrete with a stiff-bristled brush or broom. Use non-metal bristles, since metal ones may scratch up the concrete.[5]
- If stains persist despite heavy scrubbing, spray with more cleaner and repeat as needed.
-
4Rinse the floor. Attach a high-pressure nozzle to your garden hose. Spray the entire floor, working from the inside outward. Wash away any traces of cleaner and debris.[6] Once you are finished, mop or squeegee the extra water out of the garage. Allow the floor to air-dry before proceeding.
- Alternately, use a power washer. Some models enable you to mix cleaners with water, which would allow you to use it instead of a spray bottle when applying cleaner.[7]
-
5Repair cracks. Before you prime your floor, inspect it for any imperfections.[8] Apply a synthetic concrete/mortar compound over any thin cracks. For wider cracks, use a concrete patch. If the they are especially deep, apply the new concrete in layers, allowing each to dry before adding the next.[9]
- Skim extra concrete off the top before it dries to keep the surface area smooth and level.


Priming the Concrete
-
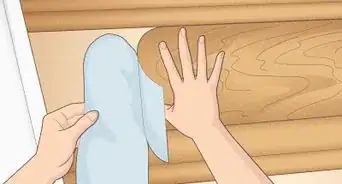
1Protect other surface areas. Line the bottoms of your walls with painter’s tape where they meet the floor. Layer painter’s paper, plastic sheeting, dropcloth, newspapers, or some other protective covering over the walls. Safeguard them from any splashes of primer or paint.
-
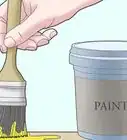
2Mix your primer. Expect the ingredients in your primer to separate as it settled after being sealed. Use a paint stirrer to recombine them. Stir vigorously until it is evenly mixed again.[10]
-
3Prime the edges of your floor first. Pick a corner to start from. Pour some primer into a tray or bucket. Then use a paintbrush to apply it along the floor, where it meets the wall. Create a border that is roughly 2 to 3 inches thick (5 to 7.5 cm) along all four sides of your floor.[11]
- This technique is often referred to as “cutting in.”
- You may have to cut in around pipes or other objects so make sure to brush a wide enough area out.
-
4Switch to your paint roller. Once the border has been primed, pour more primer into a paint tray. Screw an extension pole into the base of a paint roller so you don’t have to work on your knees. Roll the roller in the tray to load it with primer, and begin rolling the primer on the floor, starting in a back corner of the garage.[12]
- When you start, apply more primer directly over your border, rather than starting right beside it.
- Cover a length of floor about 3 feet (0.9 m) long and 2 feet wide (1.2 m long and 0.6 m wide) at a time before freshening the roller with more primer. Continue using this pattern for the entire surface.
- When you begin rolling again, overlap the previous length by a little bit to ensure there isn’t a gap between the two.
-
5Coat the whole floor. Keep rolling lengths of primer over the floor until the entire surface is treated.[13] As you go, be aware of your exit strategy so you don’t back yourself into a corner. Starting from the back of the garage, work your way from left to right. Then back up toward the open garage door, and work your way from left to right again. Repeat until you finally exit the garage.
- Once you are done, refer to the primer’s directions to find out how long it need to dry. Some may recommend four hours. Others may recommend longer. If you are unable to paint the floor on the same day, don't worry. Just be sure to do so within the next 30 days. After that long, you would need to prime the floor again.[14]


Painting the Primed Floor
-
1Read the paint's instructions regarding weather. Once your floor is primed, refer to your paint's directions before you begin painting. Be aware that temperatures and humidity can impact the paint before, during, and after application. Save yourself the trouble of having to redo your floors because the first coat was applied in less than ideal conditions.[15]
-
2Mix and pour the paint. Expect the paint’s color to be inconsistent when you first open it. Use a paint stirrer to mix it until the color is perfectly even. After that, pour some into a paint tray or bucket.[16]
- When choosing a paint, decide between latex acrylic or epoxy.[17] Be sure to buy paint specifically designed for concrete. To save money in the short-term, pick latex acrylic, which will last about two years before needing a new coat. For a paint job that will last longer and resist more damage, use epoxy, which will last about four years.[18]
- If you are unsure of how much paint to buy, kits are available for standard-sized garages (1-car, 2-car, etc.). Be sure to buy paint specifically designed for concrete. Alternately, measure the square footage and ask staff at the store how much you will need, or use an online paint calculator to determine this yourself.
-
3Cut in. Start off the same way you applied the primer. Choose a corner to be your starting point. Use a brush to paint a strip roughly 2 to 3 inches (5 to 7.5 cm) wide along the edges of the floor.[19]
-
4Paint the floor strip by strip. Again, simply use the same process as priming. Fill your paint tray with paint. Using a roller with an extension pole, paint the floor on strip at a time. Starting in a back corner, cover the freshly painted border with a length of paint roughly 4 feet (1 m) long by 2 feet wide (1.2 m long by 0.6 m wide). Freshen your roller with more paint and paint another strip that slightly overlaps the first.[20]
- As before, start at the back of the garage and work from side to side before moving backward toward the garage door.
-
5Add color flakes if you like. Consider adding vinyl chips to liven up the floor's base coat with complement colors. If you decide to do so, empty the chips from their packaging into a bucket or similar container before you start painting. Keep the bucket handy as you paint. Once you have a sizable area covered, toss handfuls of chips into the air over it so they can settle at random into the drying paint. Be sure to do this no later than ten minutes after the paint was applied, so the chips can stick to the wet coat.[21]
- Always toss the chips upward, rather than directly at the floor. This will help to disperse over a wider area, instead of in clumps.
- Before you begin painting, do a test run with your chips once your primer has dried. Be sure that you have have enough to cover the entire floor. Also, practice your tosses so you don't end up using all your flakes before the end due to poor dispersal.
- If you plan on doing a second coat of paint, wait until then before applying your flakes.
- If flakes are added, then you’ll need to apply a sealer to the floor. This will prevent the flakes from coming loose.
-
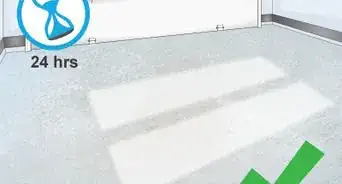
6Apply a second coat if desired. Give the first coat 24 hours to dry. After that, give it a gander and determine whether you want to apply a second coat. If you do, simply repeat the process. If not, feel free to begin walking over the first coat as long as it no longer feels tacky, but give it another week before parking your car or other heavy machinery inside.[22]
- If you do a second coat, be aware that many experts recommend applying second coats in a perpendicular fashion to the first. For example, if you rolled from the back of the garage toward the door, you should then roll from one side of the garage to the other during the second coat.
- However, the confines of your garage might not allow you to do this so easily. In this case, just apply the second coat in the same exact fashion as the first.
- Keep in mind that a second coat of paint will take much longer to dry than the first coat.


Things You’ll Need
- Cloth(s)
- Stiff-bristled, non-metal broom
- Dustpan
- Cleaner
- Spray bottle
- Garden hose
- High-pressure nozzle
- Mop or squeegee
- Painter’s tape
- Protective covering for other surfaces
- Primer
- Paint stirrer
- Paint trays
- Paint rollers
- Paint brushes
- Extension pole
- Paint

References
- ↑ Patrick Coye. Painting Specialist. Expert Interview. 22 July 2020.
- ↑ http://www.behr.com/consumer/how-to/floor-coating/how-to-prepare-and-coat-a-garage-floor
- ↑ http://www.behr.com/consumer/how-to/floor-coating/how-to-prepare-and-coat-a-garage-floor
- ↑ http://www.cleanandscentsible.com/2014/07/paint-garage-floor.html
- ↑ http://www.behr.com/consumer/how-to/floor-coating/how-to-prepare-and-coat-a-garage-floor
- ↑ http://www.behr.com/consumer/how-to/floor-coating/how-to-prepare-and-coat-a-garage-floor
- ↑ http://www.cleanandscentsible.com/2014/07/paint-garage-floor.html
- ↑ Patrick Coye. Painting Specialist. Expert Interview. 22 July 2020.
- ↑ http://www.cleanandscentsible.com/2014/07/paint-garage-floor.html
- ↑ http://www.behr.com/consumer/how-to/floor-coating/how-to-prepare-and-coat-a-garage-floor
- ↑ http://www.behr.com/consumer/how-to/floor-coating/how-to-prepare-and-coat-a-garage-floor
- ↑ http://www.behr.com/consumer/how-to/floor-coating/how-to-prepare-and-coat-a-garage-floor
- ↑ http://www.behr.com/consumer/how-to/floor-coating/how-to-prepare-and-coat-a-garage-floor
- ↑ http://www.cleanandscentsible.com/2014/07/paint-garage-floor.html
- ↑ http://allgaragefloors.com/epoxy-application-mistakes/
- ↑ http://www.behr.com/consumer/how-to/floor-coating/how-to-prepare-and-coat-a-garage-floor
- ↑ Patrick Coye. Painting Specialist. Expert Interview. 22 July 2020.
- ↑ http://www.cleanandscentsible.com/2014/07/paint-garage-floor.html
- ↑ http://www.behr.com/consumer/how-to/floor-coating/how-to-prepare-and-coat-a-garage-floor
- ↑ http://www.behr.com/consumer/how-to/floor-coating/how-to-prepare-and-coat-a-garage-floor
- ↑ http://allgaragefloors.com/color-flakes-epoxy/
- ↑ http://www.cleanandscentsible.com/2014/07/paint-garage-floor.html
About This Article

To paint a garage floor, start by degreasing and cleaning the surface, repairing any cracks, and lining the bottom of the walls where they meet the floor with painter’s tape. Next, prime the floor so the paint will adhere better. Once the primer is dry, prepare to apply your paint. You can choose a latex acrylic, which will last about 2 years, or an epoxy, which can last 4 years. Then, pick a corner to start and work strip by strip from one end of the garage to the other. After 24 hours, decide if you want to deepen the color with a second coat. To learn how to add color flakes to your garage floor, keep reading!