This article was co-authored by Jeanine Hattas Wilson. Jeanine Hattas Wilson is a Professional Painter and the President of Hattas Public Murals, Inc. With nearly 20 years of experience, Jeanine specializes in creating, overseeing, designing, and painting murals. Jeanine holds a BA in Advertising from Marquette University and a Studio Painting Minor from The Milwaukee Institute of Art & Design. She has studied at The Atelier Artien in Paris, France, Los Angeles Academy of Figurative Art, and under renowned artists such as Robert Liberace, Michael Siegel, and William Cochran. To date, Hattas Public Murals has painted nearly 5,000 commissioned works of art in homes and commercial and public spaces.
There are 16 references cited in this article, which can be found at the bottom of the page.
This article has been viewed 55,762 times.
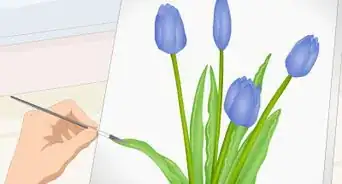
Painting a detailed rose may seem tricky at first, but with patience and practice, anyone can create a beautiful flower. To create a rose, you will need white paint and a primary color. Load both colors onto opposite ends of a paintbrush to make vibrant petals. If blending colors this way isn't an option, paint the rose's basic shape, then layer additional colors to outline the petals. Both techniques are easy to learn and can help you create professional-looking roses.
Steps
Using a Double Loaded Paint Brush
-
1Load blending gel onto a flat brush with blending gel to combine colors. Dampen a flat, mid-sized paintbrush in water before dipping it into the gel. Spread the gel over the paper in the shape of a rough circle.[1]
- Blending gel is not strictly necessary, but applying it as an undercoat will keep the paint wet for a longer period of time.
- Use the same paintbrush for the entire rose. The correct size is between 6 and 8, which is printed on the brush's handle. Clean the brush in water before using it to paint.
-
2Paint a circle in the rose's primary color. Choose the color of acrylic paint you wish the rose to be, lay some paint on a palette, then load up your brush. Use a flat, mid-sized brush you have available to draw a rough circle. The circle doesn't have to be perfect. Make it as big as you want the rose to be.[2]
- The color you use in this step will be the color of the finished rose. For example, use red for a red rose, pink for a pink rose, or yellow for a yellow rose.
- Use a wide brush to fill in the circle if you wish. Choose a shade that is slightly darker than the rose's primary color.
Advertisement -
3Double-load a brush with your main color and white. Switch to a wide, flat, medium-sized paintbrush if you aren't already using one. Dip a corner of the brush into your main color, getting it about ⅔ full. Then, carefully dip the clean corner into the white paint. Blend the colors by stroking the brush back and forth on a palette a few times.[3]
- If you don't have a palette to work with, blend the colors on a scrap piece of paper. Repeat dipping and stroking the brush as needed to coat it, but make sure you have 2 distinct colors on it before you paint.
- If you are working with the same brush you used to make the circle, be sure to clean the brush in water first.
-
4Create a series of rounded strokes along the edge of the circle. Position the brush over the upper edge of the circle. Hold the brush vertically with the side loaded with white paint above the side loaded with the rose's main color. Paint an upside-down “U” shape along the circle's perimeter, but wiggle your brush up and down to make the outer edge wavy. To complete the rose's outer petals, make 3 or 4 more of these strokes to form a circle.[4]
- Press firmly as you paint to apply the colors evenly. Load your brush and blend the colors again if needed.
- Overlap the strokes slightly. Avoid leaving blank space between them.
- The length of the stroke you use changes the overall appearance of the rose. For example, making the strokes wavy causes the petals to look more uneven and natural.[5]
-
5Make another circle using curved, wavy strokes. Load up your brush with the same colors you used before, then position it about 1⁄2 in (1.3 cm) below the edge of the outer petals. Orient the brush so the bristles coated with white paint are closer to the rose's outer edge. Drag the paintbrush around the circle the same way you did when creating the outer layer of petals. Make about 4 petals for the inner layer.[6]
- When this is done correctly, you will be able to see the main color of the previous layer. It will be partially visible above the white edge of the inner layer of petals.
- The curves do not need to spaced or sized evenly. Make them wavy like the outer petals by moving your brush up and down as you paint.
-
6Paint an inner layer of petals by making 3 comma-shaped curves. To create this third layer, orient the brush vertically. Push the bristles flat, then drag the brush around the inside of the flower. Position these petals over the last layer, overlapping the rose's primary color on those petals.[7]
- Load your brush with the rose's color and white like you did for the other petals.
- These curves might be slightly larger than the rest of the curves. To create thin lines, hold the brush more vertically instead of allowing the bristles to lay flat against the paper.
-
7Add the final petal inside the flower with a wavy stroke. Load your brush with the same colors you have been using. Hold the brush vertically near the tail end of the inner petal. To finish this petal, drag the brush diagonally down, then back around to the center.[8]
- To make the stroke more detailed, paint a wavy line. Begin the line with the brush upright, then flatten it as you move to the side. Wiggle the brush up and down slightly to create a shape like a scallop shell.
-
8Create comma-shaped lines to close the inner petal. After double loading your brush, position the edge with white paint underneath the side of the innermost petal. Paint a line diagonally down, then curve it back inwards about halfway between the surrounding petals. Repeat this on the other side.[9]
- When completing these U-shaped strokes, start with the tip or chiseled edge of the brush, then position the brush so it is flat horizontally as you drag it down.
- The third layer may not be necessary, but it adds more depth to your rose if you have the space for it. Evaluate the way your rose looks to determine whether or not to include it.
-
9Add more curves between the petals to create additional details. A great place for extra petals is underneath the innermost petals. Hold the brush vertically, keeping the side loaded with white paint above the side loaded with the rose's main color. Drag the brush diagonally down, then sweep it back towards the rose's center. Position these petals about halfway between the other petals.[10]
- These petals are generally very thin and curve around the U-shaped stroke you made earlier.
- Add small petals on the outside of the rose or in other areas. Use a smaller brush as needed to finish your design.
-
10Let the paint dry and add more details as needed. Your rose is mostly done at this point. Give the paint about 30 minutes to dry. In the meantime, take a look at your work and identify any changes you wish to make. Paint over any parts of the rose you need to alter before the paint dries.[11]
- Add additional details as needed. For example, dab gold paint onto the rose's center to detail pollen. Alternatively, double load your brush with light and dark green paint, then use it to add leaves.


Making a Rose through Layering
-
1Draw a circle with a light color of paint. Load a flat, mid-sized paintbrush with paint in a light shade of your main color. Apply the paint to paper, creating a basic circle. It doesn't have to be even and may, in fact, look like a lumpy cloud.[12]
- For example, use a very light pink if you wish to make a pink rose. The light shade will provide a base, but you will end up painting over most of it with darker shades.
-
2Spread more paint to outline the curved shape of the petals. Dip the flat brush back in the light shade of paint, then use it to finish your basic outline. In particular, try to outline where you plan on placing the petals. For instance, make shorter, pronounced U-shaped curves along one side of the circle's upper edge. Progress into longer, shallower lumps along the opposite lower edge.[13]
- Another way to do this is by pencil. If you're good at sketching, forgo the paint circle and draw the petals. Then, follow up with a light coat of paint to give them definition.
-
3Color in the outer curves with a darker shade of paint. Use either the medium flat brush or switch to a smaller pointed brush. Load about half of the brush with a darker shade of the rose's primary color, then use it to fill in some of the outline. The best place to add the darker shade is along the inner edges of the petals. This creates the appearance of shadows on the petals.[14]
- Apply the darker paint in curves along the petal lumps in your outline. Try placing tighter curves along the rose's upper edge and looser curves along the lower edge.
- Try placing each curve of dark paint at a slightly different level so their tails do not connect. You will be able to see the basic outline of each petal forming from the contrasting shades.
-
4Paint over the outer part of the remaining petals with darker paint. Paint the inner part the same way you did the outer part using the same brush as before. Apply the darker shade of paint in rough U-shaped curves to delineate each petal. Gradually fill in the unpainted space between the petals.[15]
- As a general rule, fill ⅔ of the rose with short curves similar to the uppermost ones. Fill in the remaining ⅓ with longer curves like the lower ones.
- Note that the curves need to gradually become tighter as you get nearer to the center of the rose.
-
5Apply white paint to the outer edge of each petal. Clean your brush, then sideload it again with the paint. Use a smaller brush for more precision. Spread the white paint along the outer edge of each petal. Keep the light coloring opposite of the darker sections.[16]
- The white paint is used to mimic light falling on the petals. It also contrasts against the primary color, giving your rose more definition.
-
6Draw a swirl in the center of the rose. After washing your brush, load it with the darker shade of the rose's primary color. Directly in the center of the rose, draw a spiral by making a series of tight circles. Expand the circles as you move outwards towards the nearby petals.
- The spiral usually curves upwards in most roses, but depending on how you painted the surrounding petals, you can change its direction.
-
7Let the paint dry for 30 minutes when you're done painting. Make sure you're satisfied with your work before you set it aside. Continue adding white or darker shades of the rose's primary color to give the rose more definition.[17] Try adding more white and dark streaks as needed to create contrast.
-
8Wash the rose with the original color shade if desired. With a clean brush, apply very small amounts of the underlying shade of your rose's primary color. Paint over the entire rose with a very thin, even layer of paint. When this is done correctly, it washes out the other colors, making them look more evenly blended.[18]
- This step can be difficult and it isn't necessary. If you like your rose as it is, leave it alone. Adding too much paint covers up the rose's details.


Expert Q&A
-
QuestionHow do you paint a realistic rose?
 Jeanine Hattas WilsonJeanine Hattas Wilson is a Professional Painter and the President of Hattas Public Murals, Inc. With nearly 20 years of experience, Jeanine specializes in creating, overseeing, designing, and painting murals. Jeanine holds a BA in Advertising from Marquette University and a Studio Painting Minor from The Milwaukee Institute of Art & Design. She has studied at The Atelier Artien in Paris, France, Los Angeles Academy of Figurative Art, and under renowned artists such as Robert Liberace, Michael Siegel, and William Cochran. To date, Hattas Public Murals has painted nearly 5,000 commissioned works of art in homes and commercial and public spaces.
Professional PainterStart with big areas of color, creating big shapes with big brushes. Once your base shape is down, grab some smaller brushes and transition into the details.
Things You'll Need
Using a Double Loaded Paint Brush
- Flat paint brush
- A main color of paint
- White paint
- Painting palette
- Water
- Paper towels
- Flat surface
- Blending gel (optional)
Making a Rose through Layering
- Flat paint brush
- A light shade of main color paint
- A darker shade of main color paint
- White paint
- Painting palette
- Water
- Paper towels
- Flat surface
References
- ↑ https://www.youtube.com/watch?v=1h1Hp73DCyk&feature=youtu.be&t=104
- ↑ https://www.youtube.com/watch?v=-34fbYNH8XE&feature=youtu.be&t=41
- ↑ https://www.youtube.com/watch?v=s9Ap6vbzWbg&feature=youtu.be&t=119
- ↑ https://www.youtube.com/watch?v=_I30vXriR-w&feature=youtu.be&t=45
- ↑ Jeanine Hattas Wilson. Professional Painter. Expert Interview. 11 May 2021.
- ↑ https://www.youtube.com/watch?v=_I30vXriR-w&feature=youtu.be&t=89
- ↑ https://www.youtube.com/watch?v=_I30vXriR-w&feature=youtu.be&t=123
- ↑ https://www.youtube.com/watch?v=_I30vXriR-w&feature=youtu.be&t=169
- ↑ https://www.youtube.com/watch?v=_I30vXriR-w&feature=youtu.be&t=196
- ↑ https://www.youtube.com/watch?v=_I30vXriR-w&feature=youtu.be&t=245
- ↑ Jeanine Hattas Wilson. Professional Painter. Expert Interview. 11 May 2021.
- ↑ https://www.youtube.com/watch?v=-34fbYNH8XE&feature=youtu.be&t=45
- ↑ https://www.youtube.com/watch?v=wdZ9gSgR3kc&feature=youtu.be&t=145
- ↑ https://www.youtube.com/watch?v=wdZ9gSgR3kc&feature=youtu.be&t=173
- ↑ https://www.youtube.com/watch?v=-34fbYNH8XE&feature=youtu.be&t=78
- ↑ https://www.youtube.com/watch?v=-34fbYNH8XE&feature=youtu.be&t=87
- ↑ Jeanine Hattas Wilson. Professional Painter. Expert Interview. 11 May 2021.
- ↑ https://www.youtube.com/watch?v=wdZ9gSgR3kc&feature=youtu.be&t=249
About This Article

To paint a rose, start by painting a circle using the color you want your rose to be. Then, double-load your brush with the main color and some white paint, and paint a series of rounded, wavy strokes around the circle, which will be the rose's outer petals. Next, paint another series of rounded, wavy strokes coming off the circle, but make these ones shorter so they fall inside the first ring of strokes. Finally, repeat the process one more time to make the inner petals, and then paint a final petal over the center of the rose. To learn how to paint a rose using layering, scroll down!