This article was co-authored by wikiHow Staff. Our trained team of editors and researchers validate articles for accuracy and comprehensiveness. wikiHow's Content Management Team carefully monitors the work from our editorial staff to ensure that each article is backed by trusted research and meets our high quality standards.
This article has been viewed 39,642 times.
Learn more...
Painting an RC body can add customization to your vehicle while making it look brand new again. A glossy paint job also helps your RC vehicle stand out from other vehicles in collections or competitions. If you've never spray painted an RC body before, it may seem difficult. As long as you've got the right spray painting materials and work with precision, though, painting your RC vehicle can be fun and stress-free.
Steps
Cleaning and Masking the Car Body
-
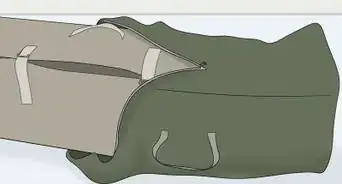
1Strip off the existing paint if you’re using an old RC body. While you can paint an old RC body, you will need to remove the paint first. Spray or coat your RC body in a chemical paint stripper made for polycarbonate lexan. Leave the stripping chemical on the RC body for the time directed on the cleaner's instructions (usually 3-12 hours). Scrape off the paint using a sponge or washcloth, then dry the RC body off with a dry cloth.
- Read the stripping chemical's instructions carefully to ensure your safety while using it.
-
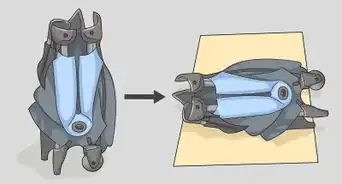
2Trim the body to your vehicle’s specifications if you purchased a new RC body. Trimming the body after you've painted it runs the risk of risk of damaging your paint. Place the new body over your existing vehicle chassis to test its fit. Note which areas are too large or brush up against the wheels, and trim these areas with a sharp knife or pair of scissors.
- Curved bi-scissors are best for making smooth, precise cuts on RC car body.
- Sand the RC body down if the edges are rough or jagged after trimming.
Advertisement -
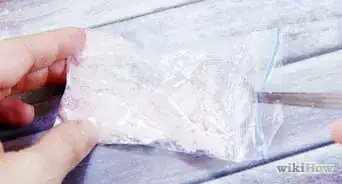
3Wash your RC vehicle body before you start painting. Use a non-abrasive dish soap and water to wash the RC body thoroughly. Make sure to target any dust and debris so your paint coats are as smooth as possible.
- Dry your RC body off with a soft, lint-free cloth before painting it.
-
4Draw your design with a marker over the RC body, if making a complex design. This will serve as a blueprint for you while you're applying masking tape and painting your car. Use a permanent marker so that the lines don't rub off while you paint.
- If you're just applying a new coat of paint, you do not need to draw your design beforehand.
- Keep your design simple so it is easy to paint, especially if this is your first time painting an RC car.
-
5Use masking tape to cover the parts you're not painting. Cover the areas of the design you will not be painting the first color with masking tape. Cut out different pieces of masking tape for each color so you can remove them as you progress through your painting job. Press the masking tape down firmly to prevent jagged edges.[1]
- Always paint darkest to lightest so that the darker colors don't accidentally cover the lighter ones.
- Do not rip out the masking tape unevenly. Cut it with a sharp knife or pair of scissors so it can cover your design cleanly.


Applying the First Coat
-
1Choose a spray paint made for polycarbonate lexan on your RC vehicle. Generic spray paint will not last as long on your RC body and may fade unevenly. Avoid mixing different brands of spray paint, which can result in splotchy or uneven colors.[2]
- You can purchase spray paint for polycarbonate lexan online or at most craft stores.
-
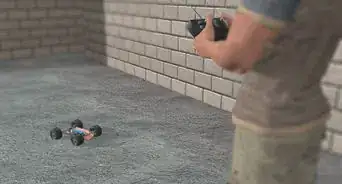
2Paint your car in a ventilated area, preferably outdoors. Wear safety goggles and a disposable respirator mask to protect your face and mouth while painting the vehicle. If you're painting your RC body in a garage or shed, open all windows and doors and position yourself as close to the open area as possible.
- Read the spray paint directions and warnings to use it safely.
- If you feel nauseated or lightheaded, stop painting and exit the area immediately. Call poison control for further instructions.[3]
-
3Hold the can 2–3 inches (5.1–7.6 cm) away from the RC body. Keep the can at a distance to avoid making your coat too heavy. Several inches or centimeters is usually enough distance to avoid blotchy areas.[4]
-
4Spray the RC body from one end to the other. As you spray, keep the paint can moving. Spraying too long in one spot can result in an uneven paint coat. Inspect your coats and retouch any faint or blotchy areas as needed after you've covered the entire body.


Adding More Coats, Colors, and Decals
-
1Apply additional coats for a darker or richer color. Don't worry if your first coat is paler than you want it to be. Most colors will need 2-3 coats for a full color. Add as many coats as needed to achieve the color that you want.
-
2Let each coat dry before you apply additional coats. The amount of time the spray paint will take to dry depends on the brand—it can take anywhere from 20 minutes to an hour. When your paint coat has finished drying, it should turn from glossy to dull.
- Use a hairdryer to speed up the drying process from an hour to a few minutes. Turn the hairdryer setting to "cool," position it 2–3 inches (5.1–7.6 cm) away from the RC body, and keep it moving at all times.
-
3Move on to another color after you have finished with the first. When the last coat is dry, remove the masking tape covering the area you plan to paint a different color. Start painting that area of the RC body just as you painted the first color. Continue painting your RC body and removing the masking tape until you have completely painted the vehicle.[5]
-
4Add decals to the RC body after the last color has dried. Decals are great for adding designs that are too complicated for masking tape. Place your decals carefully on the vehicle body to prevent smudging your paint job.[6]
- You might add, for example, racing stripes, flames, skulls and crossbones, swirls, animals, or your/your RC car's name.
-
5Finish your RC paint job with a clear coat of spray paint. To keep your spray paint or decals from peeling off and to give your RC vehicle a glossy sheen, spray a thin, clear spray paint over the body. Let your last paint coat dry for 30 minutes to an hour before you play with your RC vehicle.
- Purchase a clear spray paint that is also made for polycarbonate lexan.


Things You'll Need
- Dish soap
- Water
- Soft cloth
- Sharp knife or scissors
- Marker
- Masking tape
- Lexan spray paint
- Goggles
- Respirator mask
- Decals (optional)
- Hairdryer (optional)


References
- ↑ http://www.tested.com/tech/concepts/464661-how-get-started-hobby-rc-body-painting-your-vehicles/
- ↑ http://rctruckstop.com/2012/05/24/how-to-paint-a-simple-multicolor-body/
- ↑ https://www.osha.gov/dts/maritime/sltc/ships/surfaceprep/spray_painting.html
- ↑ https://www.bigsquidrc.com/bashers-basics-how-to-paint-a-rc-body/
- ↑ http://www.tested.com/tech/concepts/464661-how-get-started-hobby-rc-body-painting-your-vehicles/
- ↑ https://www.youtube.com/watch?v=7vlh0W0Apm0&feature=youtu.be&t=539
About This Article