This article was co-authored by Victoria Sprung and by wikiHow staff writer, Hunter Rising. Victoria Sprung is a Professional Photographer and the Founder of Sprung Photo, a wedding photography studio based in Chicago, Illinois. She has over 13 years of professional photography experience and has photographed over 550 weddings. She has been chosen for Wedding Wire's "Couple’s Choice" Award eight years in a row and The Knot's "Best of Weddings" award five years in a row. Her work has been featured in People Magazine, Time Out Chicago, Chicago Magazine, the Chicago Reader, Rangefinder, The Chicago Sun-Times, and Pop Sugar.
There are 9 references cited in this article, which can be found at the bottom of the page.
This article has been viewed 14,891 times.
Taking a clear picture of the Sun can be challenging because it’s so far away, but you can easily photograph it with the right equipment. A DSLR camera works best during the day while phone cameras can take great photos of sunrise and sunset. If you want the Sun to look larger in your photograph, you can attach a camera to a telescope to zoom in. With a little bit of practice, you’ll be able to take pictures of the Sun at any time of day!
Steps
Using a DSLR Camera
-
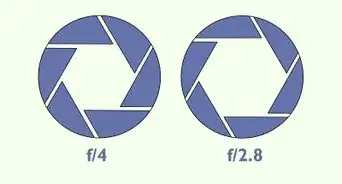
1Get a camera lens with a 300-600mm focal length. Focal length refers to the angle of view and the magnification of your picture. Pick a lens that has a focal length between 300-600mm so the sun appears the largest in your photograph.
- Check local camera shops to see if you can rent a lens instead of buying one.
- Make sure to use a lens made for your camera brand. Lenses for different brands may not fit onto every camera.
-
2Put a solar filter sheet over your camera lens. Solar filters help protect your camera sensor and reduce the amount of lens flare in your final picture. Cut the piece of solar filter slightly larger than the diameter of your lens. Use tape to secure the filter to the end of your camera lens.
- Solar filters can be purchased online.
- Don’t use the solar filter if it has punctures or scratches since light might be able to get through and cause damage.
Advertisement -
3Set your camera on a tripod.[1] Take the slide off of the top head of the tripod by pressing the release button. Use the screw on the bottom of the slide and the mounting hole on the bottom of your camera to secure it in place. Extend the legs of the tripod and make sure it’s sitting on level ground. Push the slide back into the slot on top of the camera to finish mounting it.[2]
- Always take the slide off of the tripod before mounting the camera. That way, it’s easier to do without damaging any of your gear.
- See if you can rent a tripod from a camera store or your local library so you don’t have to buy one.
-
4Point the lens toward the Sun until you can see it on the screen. Use the handle on the tripod head to change where your camera is aiming. Keep moving the handle around until you see the Sun on the live-view screen on your camera. Once you find the right angle, tighten the tripod head so it doesn’t move around.
- Avoid looking through the manual viewfinder so you don’t damage your vision.
Tip: Look at your camera’s shadow to help determine if it’s pointed near the right place. When the shadow looks like the shape of your camera, the lens should almost be pointed directly at the Sun.
-
5Focus your camera manually before taking a picture. Spin the focus ring on your camera lens until the Sun in your live-view is round and has crisp edges. Press the shutter button on top of your camera to take a picture. After you take the first picture, slightly adjust the tripod if you need to before taking another.
- The Sun will look white when you take your picture, so you’ll have to change its color in editing software if you want it to look yellow or orange.


Photographing Sunrise and Sunset with a Phone Camera
-
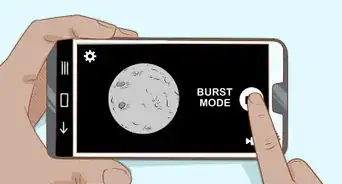
1Download a camera app that lets you control the focus and exposure. Many stock camera apps don’t allow you to manually change many of the settings. Look for a camera in your app store that lets you manually adjust focus, exposure, and white balance so you have total control over how your photo turns out.[3]
- Some camera apps you can use for iPhone or Android are Open Camera, Camera Zoom, and Camera+.
-
2Arrive 30 minutes before the sunset or sunrise time in your area. Find the exact time of day when the sunrise and sunset happen in your area. Whenever you want to take your picture, arrive 30 minutes before the time listed so you have time to set up and take multiple photographs.[4]
- You can look up your local sunrise and sunset times here: https://www.timeanddate.com/sun/.
Tip: Don’t forget to check the weather for the days you’re planning on taking your photos. Fog and a few clouds could add interesting composition to your photos, but they may make it more difficult to capture a clear picture.
-
3Take your picture before as the Sun is over or under the horizon. While you’re taking a photo of the sunrise or sunset, you only have about 15 minutes to capture the sun above the horizon. After that, your phone cannot capture the sun or colors as well. Set up your shot as the sun is right above the horizon before taking your photo.[5]
- Put your phone on a tripod if you want your camera to stay steadier.
- Lens flare will happen in your photograph. Use the lens flare as an artistic touch in your composition.


Shooting Pictures through a Telescope
-
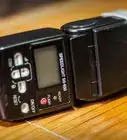
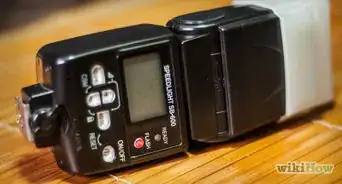
1Screw a T-ring onto the lens mount of a DSLR camera. T-rings are used to attach your camera to a telescope so you can take pictures of stars and planets. Remove the cap covering the sensor on your camera. Screw in the base of the T-ring in place over the sensor until it locks in place. Attach the cylindrical T-ring adaptor to the camera by screwing it in over the T-ring.[6]
- T-rings can be purchased online or at specialty camera stores.
- Make sure to get a T-ring that matches your camera brand. Rings are not interchangeable between different brands.
- Keep your camera turned off so the sensor doesn’t get damaged.
-
2Attach the camera to the end of a telescope. Unscrew the eyepiece from your telescope, and slide in the T-ring adaptor. Tighten the screw to secure the T-ring and your camera to the telescope so it doesn’t fall out.[7]
- Since the camera is a little heavy, it may adjust the level of your telescope. Be sure to tighten the telescope on the stand so the angle doesn’t change.
-
3Cover the end of your telescope with a solar filter. Solar filters help protect your camera from getting damaged by the Sun and reduces the amount of lens flare. Cut out a circular piece of solar film the same size as the diameter of your telescope. Hold the film in place so the shiny side is facing the Sun. Use tape to hold the filter in place while you take your photos.[8]
- Solar filters can be purchased online.
- Check the filter for any holes and scratches since they could let light through.
-
4Point your telescope at the Sun and take the picture. Aim your telescope so it’s pointed directly at the Sun. Use the live-view screen on your camera to make adjustments and place the Sun in the center of the frame. When you’re pointed at the Sun, press the shutter button on your camera to take the picture.[9]
- Look at the shadow of your camera while adjusting the angle. When the shadow is either a circle or the shape of your camera, the Sun will be close to centered in your frame.
Tip: Place a piece of cardboard on top of your telescope so you can look at your camera while you’re in the shade. Cut out a hole in the cardboard the same diameter as your telescope. Feed the cardboard over the lens onto the middle of your telescope.


Expert Q&A
-
QuestionWhy do I need a tripod to take a photo of the sun?
 Victoria SprungVictoria Sprung is a Professional Photographer and the Founder of Sprung Photo, a wedding photography studio based in Chicago, Illinois. She has over 13 years of professional photography experience and has photographed over 550 weddings. She has been chosen for Wedding Wire's "Couple’s Choice" Award eight years in a row and The Knot's "Best of Weddings" award five years in a row. Her work has been featured in People Magazine, Time Out Chicago, Chicago Magazine, the Chicago Reader, Rangefinder, The Chicago Sun-Times, and Pop Sugar.
Professional PhotographerYou're photographing something that's really far away, so any small movement during the shot can throw the composition off. It may be blurry, or you may entirely miss what you're shooting at. The tripod will keep your camera stable and keep it from moving around while you take your shot!
Warnings
- Don’t look directly at the sun through your camera’s viewfinder.⧼thumbs_response⧽
- If you want to take photographs of a solar eclipse, take necessary precautions first to avoid damaging your eyesight.⧼thumbs_response⧽
Things You’ll Need
Using a DSLR Camera
- DSLR camera
- Solar filter sheet
- Tripod
Photographing Sunrise and Sunset with a Phone Camera
- Smartphone
- Tripod (optional)
Shooting Pictures through a Telescope
- T-ring and adaptor
- Telescope
- Solar filter sheet
- Cardboard


References
- ↑ Victoria Sprung. Professional Photographer. Expert Interview. 14 April 2020.
- ↑ https://youtu.be/7IcZad__KUM?t=10
- ↑ https://youtu.be/MCUhGfXIjEI?t=47
- ↑ https://www.timeanddate.com/worldclock/sunset-sunrise-photography.html
- ↑ https://youtu.be/MCUhGfXIjEI?t=109
- ↑ https://youtu.be/iPgwSKpxBqM?t=124
- ↑ https://youtu.be/iPgwSKpxBqM?t=173
- ↑ https://youtu.be/iPgwSKpxBqM?t=53
- ↑ https://youtu.be/iPgwSKpxBqM?t=490
About This Article