X
wikiHow is a “wiki,” similar to Wikipedia, which means that many of our articles are co-written by multiple authors. To create this article, 155 people, some anonymous, worked to edit and improve it over time.
This article has been viewed 1,142,973 times.
Learn more...
Self-piercing is cheap and easy, but can be incredibly dangerous if you don't know what you're doing. Although seeking professional help is always recommended, certain places are safer to self-pierce than others; the lips is one of them. If you want to pierce your own lip, then you have to be very careful about getting the proper equipment, following the proper technique, and keeping everything sanitary.
Steps
-
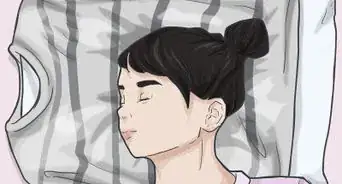
1Before you do anything, make sure you decide if you really want to pierce your lip. While the hole can close up, it entails a lot of pain to get it done. If you don't handle pain easily, piercing your lip is not for you.
-
2Use the appropriate equipment. Mainly the proper piercing needle. professional needles are to be use used. Sewing needles are for fabric, not your skin![1]Advertisement
-
3Clean your needle. This is very important. You don't know where any of these needles have been. If you have a packaged pro needle, then it has probably already been safely cleaned in an autoclave, so no worries.[2]
- Be sure to clean your jewelry properly, too. Though some caution was probably taken in manufacturing it, you can never be too careful.
-
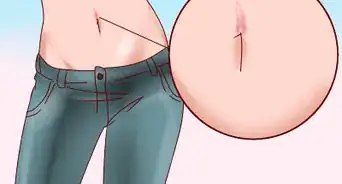
4Prepare to pierce your lip: Dry your inner lip with a dry tissue or cloth so you don't salivate all over your piercing hand. First mark where you want to pierce so you know where to put the needle. Then make sure the area you're in is very clean; not sitting at some grungy bathroom sink. Have your supplies ready, laid out on a clean tissue. Don't get any unnecessary germs on them.
-
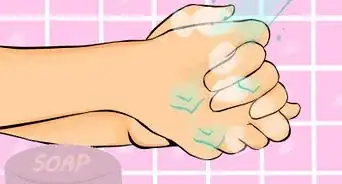
5Wear clean vinyl/rubber gloves. Once your gloves are on, be sure to not touch anything but the needle and clamp.[3]
-
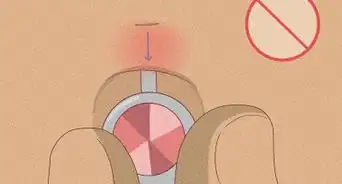
6Start from the inside of the lip: Going through muscle tissue on the inside of your mouth is a lot easier than getting through the skin first and then going through the muscle layer. If you pierce it from the outside, it'll hurt more, as your epidermis will feel it, and it doesn't hurt quite as much from the inside, but is a bit more difficult, to be honest. Hold the area you're ready to pierce, and push through the first layer of muscle with your needle, and make sure you get halfway through your lip on the first push, that way you should be through the muscle layer on the inside and only have to do the skin on the outside, which is easier. Again, be sure this is where you want to pierce, and have it ready at a good angle. Instead of forcing the needle through, push your lip into the needle. This will reduce the pain, and will make the whole process go smoother. Another way is to put your finger behind your lip, where the needle will come out, and push, while pushing in the needle at the same time. The pressure will keep you from feeling as much pain, and will make it thinner and easier to pierce through. Also a good reason to have a clamp not only for good grip is to reduce pain and make it easier for you to pierce.[4]
-
7Follow-through: For pro hollow needles, simply slip your jewelry into the end, and pull the needle out pulling the jewelry through the hole. Voilà![5]
-
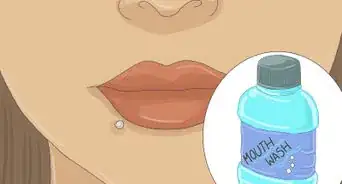
8Go show off your new lip piercing to all your friends! But, don't stop there! Be sure to clean it well, and don't take the jewelry out early unless you absolutely need to (i.e. your parents force you, your job makes you, school makes you. Don't take it out just because. That's the easiest way to get an infection. A good, effective and easy way to keep your piercing healing properly is saline solution. This is simply 8 oz. distilled water with about 1/4 tsp. of non-iodized sea salt. Do not touch the piercing unless you are cleaning it. Using alcohol-free mouthwash and avoiding spicy foods will help the healing. Let it completely heal in its own time. Some take longer than others.
-
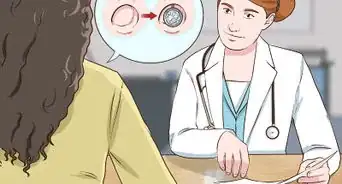
9For about three weeks there will be a discharge from your new piercing. That's good, and shows your body is healing properly. Watch out for yellow or greenish discharge. That's usually a sign of infection, in this case do not take out the jewelry because it will trap the infection inside the skin. You should take it to a shop and get professional help. You may see this discharge the first day or two after you pierce it, but afterward it may be infected; so again, keep clean! Avoid drinking alcohol, smoking and swimming pools for a few weeks to a few months after piercing it. The usual healing time is about 2 months, but most find it heals in a month and a half.
-
10Finished.


Advertisement
Community Q&A
-
QuestionHow long will the pain last?
 Community AnswerThe pain duration is dependent on your body. Everyone is different. For most people the pain goes away in about 7-10 days.
 -
QuestionAre there any major veins/arteries in my bottom lip?
 Community AnswerNo, your lips are tissue, muscle, and capillaries. You can't bleed to death by piercing your lip. It's similar to piercing your ear, but there's muscle in your lip.
 -
QuestionShould the location of the piercing be just below the lip line?
 Community AnswerYes, it's best to pit it just below the lip line. Or, have just a little space in between the piercing and the lip but any more space then that would not look right.
Advertisement
Warnings
- There should be little to no blood. If you get more than a few drops of blood in all, it is possible that something has gone wrong. If serious bleeding occurs, seek help immediately!! Or, you could possibly just hit a vein. If it's scaring you, seek medical attention.⧼thumbs_response⧽
- If it does get infected, do not take out the piercing. Otherwise it may heal and seal the infection inside you. Instead, see a doctor immediately.⧼thumbs_response⧽
- Don't expect it to run as smoothly and quickly as professionally done piercings. Because you're doing it on your own, you should be slow and precise, which can be painful.⧼thumbs_response⧽
- It's still a good idea to have it done professionally if you can afford it.⧼thumbs_response⧽
- Never use a microwave oven to sterilize needles/jewelry as they are made of metal.⧼thumbs_response⧽
- Again, this is your own responsibility. Only do this if you are absolutely determined to get your lip pierced, and you shouldn't really go behind your parents' backs. They'll eventually find out.⧼thumbs_response⧽
- Never let a friend pierce your lip for you. It's better to do it yourself, so you know exactly what feels right, go at your own pace, etc. If something were to go wrong, your friend could be in serious trouble - and not just by your parents (teenagers). If you start salivating rapidly tilt your head back don't let go of the needle or move the needle have a friend wipe it away especially if your wearing gloves the spit makes it hard to grip your lip (if not using clamp)⧼thumbs_response⧽
Advertisement
Things You'll Need
- Sterilized hollow needle
- Stud or hoop ring
- Cleaning supplies
- Rubber/vinyl gloves
- Clean napkin or cloth
- Alcohol and bleach (sterilizer)
- Oragel medication
- Boiled water (part of sterilizer)
- Something to hold on to in case of pain
- Clamp (optional, not needed)
- Mirror and a clean sink or counter


References
- ↑ http://beautyhows.com/lip-piercing/how-to-pierce-your-lip-painlessly-at-home-needles-kits-and-gauge/
- ↑ https://www.reference.com/food/long-should-something-boiled-sterilize-68c73c6113b06cda
- ↑ https://www.thermofisher.com/ge/en/home/references/gibco-cell-culture-basics/aseptic-technique.html
- ↑ http://beautyhows.com/lip-piercing/how-to-pierce-your-lip-painlessly-at-home-needles-kits-and-gauge/
- ↑ https://www.youtube.com/watch?v=7uubF99aBvk
About This Article
Advertisement