X
wikiHow is a “wiki,” similar to Wikipedia, which means that many of our articles are co-written by multiple authors. To create this article, 30 people, some anonymous, worked to edit and improve it over time.
This article has been viewed 302,950 times.
Learn more...
A simple guide for Ubuntu (and other snap supported Linux distributions) for installing Minecraft. The first method is aimed at users of Ubuntu 16.04 and above. The second method covers Ubuntu 14.04, and the third covers other non-Ubuntu distributions.
The guide will install Minecraft, the Java Runtime Environment and setup a desktop launcher all at once. It's very simple, and takes only a few minutes.
Steps
Method 1
Method 1 of 2:
Graphical Interface Method
-
1Open Ubuntu Software Store. Minecraft is available as a 'Snap' in the graphical software store "Ubuntu Software. Launch Ubuntu Software from the activities menu in 17.10 and above, or from the dash in 16.04.
-
2Search for Minecraft. Press the magnifying glass icon in the top right, then search for 'minecraft'. You may need to scroll down the list to find the correct entry.Advertisement
-
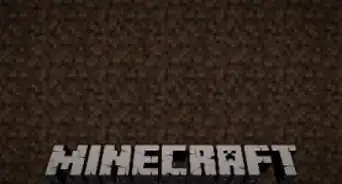
3View Minecraft. Click the "Minecraft" entry with the familiar dirt-block icon to check you have the right application
-
4Install Minecraft. Click the 'Install' button underneath the dirt block. The installation will begin. This will only take a few moments to download and install Minecraft and Java and setup the icon. You may be prompted to enter your password, as this is changing software on your computer.
-
5Wait while the install is completed.
-
6Play Minecraft. Once Minecraft has finished installing, you can launch it directly from Ubuntu Software by clicking the "Launch" button.
-
7Launch Minecraft. Once installed you will find Minecraft in the apps launcher.
-
8Login to Minecraft. Use your existing Minecraft or Mojang credentials to login to Minecraft and play!


Advertisement
Method 2
Method 2 of 2:
Terminal Method
-
1
-
2Update the package list. The first command refreshes the list of packages available. Type sudo apt-get update. Enter your password if prompted.
-
3Install snapd. In order to install snaps, you need to install the "Snap Daemon" which manages the installation & upgrades of snaps. In Ubuntu 14.04 it needs installing manually. In later releases of Ubuntu (from 16.04 onwards) it's already installed. Type sudo apt-get install snapd. Enter your password if prompted. Press "Y" when asked if you want to continue.
-
4Install Minecraft. Finally, in the terminal, type sudo snap install minecraft which will install the Minecraft snap. Once finished, close the terminal window.
-
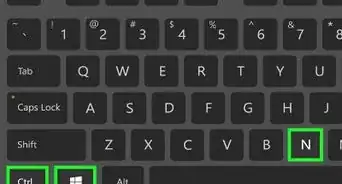
5Launch Minecraft. Click the Ubuntu button (or press the 'Super/Windows' key on the keyboard) and search for Minecraft. Click the familiar Minecraft icon when found.


Advertisement
Community Q&A
-
QuestionAre mods supported? If so, how do I install the mod loader and mods?
 Community AnswerOf course mods are supported. I recommend you check out Technic Launcher, it's a very convenient way to play Minecraft with mods.
 -
QuestionWhat if I can't see the "Mark as Execute" button in Properties?
 Anuj_Kumar1Community AnswerIn "Properties," you need to switch to the "Permissions" tab. Under "Permissions" you will find "Allow executing file as program." Make sure you check mark the option.
 -
QuestionWhat do I do if I get a "command not found" message when I type sudo apt-add-repository?
 Community AnswerYou must first do: sudo apt install software-properties-common and then press "Y" and enter when asked.
Advertisement


About This Article
Advertisement