This article was co-authored by Nate Savage. Nate Savage is a professional guitarist with over 16 years of experience teaching guitar to students around the world. His YouTube channel, Guitareo, has over 450,000 subscribers.
This article has been viewed 65,718 times.
If you are interested in learning a new instrument, playing the acoustic guitar is a great choice. With some basic knowledge of the mechanics of the guitar, you can be playing your favorite songs in no time. Guitars are versatile instruments, and though they are difficult to master, anyone can start playing a few songs with only a few hours of practice.
Steps
Getting Comfortable with the Guitar
-
1Choose your guitar. Although you already know that you want to learn on an acoustic guitar, there are still other things to take into consideration. Look for the best size and price for your lifestyle. Avoid buying budget acoustic guitars, as they are typically made poorly and are very difficult to play. Typically, look for guitars that cost, at least, $300. These are better quality and have a better sound than cheap guitars.
- Find a guitar with low action. The action is the distance from the strings to the neck of the guitar. A high action means you have to press down harder on the strings which can be painful and difficult for beginners. Finding a guitar with low action will make it easier and more comfortable to play.
- Always buy wooden acoustic guitars. Although you can sometimes find acoustic guitars that are made of composite material, their sound isn’t as good as classic wood acoustics.
- Avoid a ¾ size guitar, even if you or your hands seem very small. The sound this size of guitar creates is not as good as a full size, and with practice, even a very small person or child can play a full-sized guitar.
- If you are left-handed, be sure to purchase a special left-handed guitar. Otherwise, the strings will all be in reverse order for you.
- Don’t be afraid to use an old or used guitar instead of buying new. As long as the guitar is in good condition and makes a good sound, there is no problem playing a used instrument. Many people think they sound better, even.[1]
-
2Learn the anatomy of your guitar. Before you start playing, it is important that you understand all the basic parts of a guitar. While the "body," the big rounded base of the guitar, is obvious, knowing the other parts makes playing much easier.
- The neck of the guitar is the long narrow part of the guitar where you can find the strings. It is on the bottom, with the fingerboard (or sometimes called the fretboard) on top. The flat place you hold the strings to is the fingerboard.
- The headstock is the wooden piece at the end of the neck where the tuners are located. This is where the strings end.
- The fret wires are thin metal strips that go across the fingerboard. A fret is a space between two fret wires. The first fret is the one closest to the headstock, and they count up as you move towards the body of the guitar.
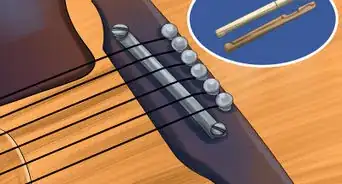
- The bridge is the small metal or plastic bit on the body of the guitar that the strings are attached to. Right next to the soundhole. This is where you begin if you need to put new strings on your guitar.
Advertisement -
3Know the strings. The thickest, lowest-sounding string is low-E. This is the 6th string. Then, moving away from low-E, the strings go A, D, G, B, and high-E. You can remember these strings with the mnemonic, "Eddie Ate Dynamite, Good Bye Eddie."
- Note how the highest string, the thick E, is the 6th string. The strings on the guitar count upwards, meaning the bottom string (the thinnest one) is the 1st string.
-
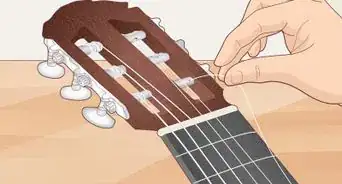
4Tune your guitar. Before you start to play, you need to make sure your guitar is in tune. If it is not, then your music won’t sound good. Even if you buy a brand new guitar, you should always make sure it is in tune.
- To tune the guitar, twist the tuner knobs on the headboard. These work to make a string tighter or looser, which changes the sound.
- Always start tuning your guitar from the lowest note and work your way to the highest. Because the thicker a string is, the less likely it will go out of tune, you should always start with low-E. Buy an electric tuner to help you find the right notes. These work by listening to the sound a string makes and telling you if the note is flat or sharp.
- Without a tuner, you can tune your guitar using a piano or keyboard. These instruments stay in tune for many years and are a reliable way to match the tone. Play the same key on the piano as the string you are trying to tune, and twist the tuner until the plucked string makes the same sound as the piano key. Humming along may help.
-
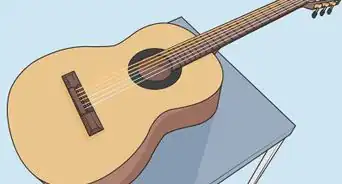
5Set the guitar up so you can play comfortably, with a relaxed shoulder, elbow, and wrist. Once you’ve got your guitar all settled, put your body in the right position for playing. If you are just beginning, you will probably find it easier to sit rather than stand and play.
- Rest the guitar on your strumming knee. If you are right-handed, this will be your right knee. You may find it helpful to raise your toes off the ground a bit to get the guitar at the right height.
- Hold the neck of the guitar so that it rests on your thumb and your fingers wrap around to the top of the fingerboard.
- Keep your shoulders, elbows, and wrists relaxed. Your elbow should be in towards your body.


Learning Chords and Notes
-
1Learn to read the notes on the guitar, where each fret is a simple half-step up. If you are on the 3rd fret of the top string, a G, then the 4th fret is a G#. The 5th is then an A, and so on through the notes A-G#. Although having a note chart is helpful, you can learn some basic notes by paying attention to the strings and frets.
- To play an A, put your finger on the 3rd string, 2nd fret.
- To play a B, put your finger on the 5th string, 2nd fret.
- To play a C, put your finger on the 5th string, 3rd fret.
- To play a D, put your finger on the 5th string, 5th fret.
- To play an E, put your finger on the 4th string, 2nd fret.
- To play an F, put your index finger on the 6th string, 1st fret.
- To play a G, put your finger on the 6th string, 3rd fret.
- Once you've memorized these crucial notes, work on memorizing the entire fretboard.
-
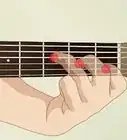
2Learn C major. Play a C major chord by putting your index finger on the B string in the first chord, your middle finger on the D string on the second fret, and your ring finger on the A string on the third fret.
-
3Learn A major. Play an A major chord by putting your index finger on the D string on the second fret, your middle finger on the G string on the second fret, and your ring finger on the B string on the second fret. You will have to stagger your fingers a bit because they will all be playing on the same fret.
-
4Play a G major chord. Put your middle finger on the A string on the second fret, your ring finger on the low-E string on the third fret, and your pinky on the high-E string on the third fret.
-
5Play an E major chord. Put your index finger on the G string on the first fret, your middle finger on the A string on the second fret, and your ring finger on the D string on the second fret.
-
6Learn the D major chord. Play a D major chord by putting your index finger on the G string on the second fret, your middle finger on the high-E string on the second fret, and your ring finger on B string on the third fret.
Putting the Basics Together
-
1Learn how to strum. When you know how to hold the strings to make notes and chords, the next step is to get your strumming down. Strumming is basic and can be done in a multitude of ways. Essentially, run your strumming hand quickly over the strings and over the hollow space to create sound. You can use your fingertips, fingernails, or a guitar pick to strum, but most people find it easiest to start with a pick..
- There are many different strumming patterns, but two of the most basic are running your hand back and forth over the strings at a fast pace or running them in one direction only.
- If you are playing a chord, don’t feel obligated to strum all of the strings. Instead, you can choose to strum only the strings which you need to play the chord.
- Don’t worry about getting your strumming pattern fixated until you can play chords accurately. It is better to be slow and strumming to start and play accurate chords, than to strum quickly but have your fingers in the wrong place or playing notes poorly.
- Plucking strings is when you pick at individual strings and is generally a little more difficult for beginners. Reserve plucking for a time after you’ve already developed basic strumming skills.
-
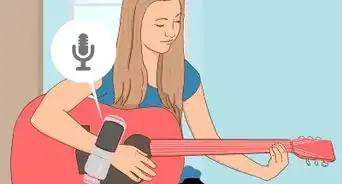
2Use a metronome to help you get the perfect rhythm. Rhythm comes with practice and is very difficult to get at first. When you are first learning chords, you will likely have to pause multiple times to put your fingers in the right position, which is fine. Over time though, develop rhythm with your strumming to give your music a better sound. Using a metronome ensures you always practice perfectly on time.
-
3Play along to recorded songs to learn from the best. Although putting together chords and strumming in a timely manner can take some time to master, the best way to practice both is to play songs that you know. Many beginning guitar books offer children's songs to start, but you can learn popular songs as well.
- Check out this collection of 10 beginner songs on Wikihow.
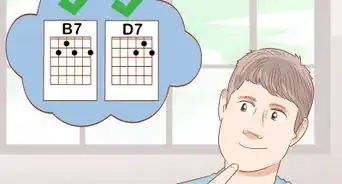
- Search online for “guitar tabs” to get the music to play your favorite guitar songs. These will tell you the chord that needs to be played, and on some sites, you will be shown how to play that specific chord as well.
-
4Practice daily to grow skills the fastest. By far the most important thing you can do when learning how to play the guitar is to practice on a regular basis. This will help you to become accustomed to the shape your hands must take, strumming and rhythm, and learning new songs. Remember that 20-30 minutes every day is a much better way to learn than playing three hours, but only on Saturdays. Try out some more lessons as you learn:
- Play Lead Guitar
- Play Rhythm Guitar
- Play the Blues
Community Q&A
-
QuestionDoes the color of the guitar matter?
 Raga RagaCommunity AnswerNot at all. The sound is produced from the strings of the guitar, and it makes no difference to what color the guitar is.
 -
QuestionMy left pinky and ring finger are double jointed. Can I still play the guitar? Are there methods for fixing them?
 Community AnswerYou can still play the guitar, however, you may find fingerings difficult at first. Developing finger strength is extremely important, so you will want to do guitar fingering exercises more than other guitar players to increase your ability to control the joints in your fingers.
 -
QuestionWhat is the minor scale?
 Community AnswerScales are patterns of whole and half steps. A half step is the distance from one fret to the next, and a whole step is the distances between one fret and the pitch two frets away. The pattern of whole and half steps for natural minor scales is whole step, half step, whole step, whole step, half step, whole step, whole step.


References
About This Article

It can take a lot of work to master playing the acoustic guitar, but if you take the time to practice the basics, you can get the hang of it! Hold the guitar so the body is sitting on your strumming knee, which is your right knee if you’re right-handed. Hold the neck of the guitar with your opposite hand so the weight of the neck is resting on your thumb, with your fingers wrapped up to the fingerboard. This will help you stay comfortable and relaxed as you practice the different notes and chords. Keep reading for tips from our Guitar co-author on how to play a few simple chords!