This article was co-authored by wikiHow Staff. Our trained team of editors and researchers validate articles for accuracy and comprehensiveness. wikiHow's Content Management Team carefully monitors the work from our editorial staff to ensure that each article is backed by trusted research and meets our high quality standards.
This article has been viewed 58,831 times.
Learn more...
Did you know that cloudy, roughed-up acrylic can be sanded down to a shine? If you didn’t, you’re in for a treat. Polished acrylic looks crisp, shiny, and smooth. You can even flame-polish your acrylic to give it a texture resembling glass. In this article, we’ll walk you through both options so that you can choose the solution that makes sense to you. Read on to learn how to polish your acrylic.
Steps
Sanding Down Your Acrylic
-
1Cut out a piece of 180-grit sandpaper. Place a sanding block in the corner of a sheet of sandpaper and trace an outline around the block with a pencil. Add an extra 0.5 inches (1.3 cm) to the bottom of the outline so you can place that bit of sandpaper into the sanding block. Then, take a utility knife and cut along the outline.[1]
- You will have to repeat this process for the 320-360 and 600-grit sandpaper.
-
2Attach the 180-grit sandpaper to the sanding block. Open the bottom of the sanding block to create a gap where the extra sandpaper goes and slide the paper in. The sandpaper should fit tightly on the block, meaning there shouldn't be any airspace between the paper and the sanding block.[2]
- The coarse side of the sandpaper should be facing away from the sanding block.
- You can pick up a foam or rubber sanding block at your local hardware store or order one online.
Advertisement -
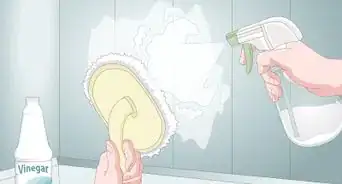
3Spray the edges of the acrylic with a spray bottle. Use lukewarm water and spray evenly, making sure to wet every part of the acrylic piece. Make sure to re-spray the acrylic as you switch sandpapers.[3]
- Wet-sanding is what allows you to polish the acrylic and make it look shiny and new. If you forget to use water, you could damage the acrylic and make it unusable.
-
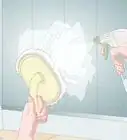
4Smooth the edges of the acrylic with 180-grit sandpaper. Vigorously rub the sandpaper into the acrylic to straighten out the edges and smooth the material. This sets the table for the higher-grit sandpapers to polish up the acrylic and give it that shine you're looking for.[4]
- To get a feel for sanding acrylic, practice on extra scraps that are left over from your project.
-
5Change to 320-360-grit sandpaper to get a polished finish. Once you've cut out pieces of finer sandpaper and attached them to the sanding block, wet-sand the edges of the acrylic to finish the job properly. When the acrylic starts to have a greater shine to it, you know the 320-360-grit sandpaper has done its job. If you keep sanding and don't see the acrylic get shinier, that's when it's time to move on to a higher grit of sandpaper.[5]
- Take breaks in between sanding so your hand doesn't cramp.
-
6Finish sanding with 600-grit paper to give the acrylic a lasting shine. Using a higher grit of sandpaper will make the acrylic shine even more than it already did. Sanding acrylic takes time, so don't get frustrated if the material doesn't get polished right away.[6]
- The higher the grit of the sandpaper, the finer it is.


Flame Polishing Your Acrylic
-
1Purchase a propane torch to give the acrylic a glass-like finish. You can pick up a torch at your local hardware or home improvement store. You can also order a torch online. Propane torches are not ridiculously expensive and have many other uses around the house. You can get a good propane torch for fewer than 50 dollars.[7]
- Other uses for the torch include melting snow and ice on outdoor staircases and walkways, starting fires, and removing old sealant on windows.
-
2Practice using a propane torch on left over acrylic scraps. There are bound to be some extra pieces of acrylic lying around no matter what you're using the material for, so put the left-over pieces to good use by trying out the propane torch on them. This allows you to get a feel for how to handle the torch and lets you make mistakes without damaging the acrylic that's actually a part of your project.[8]
- If you don't have any excess acrylic, go out and buy some for this specific purpose.
-
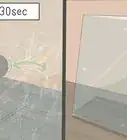
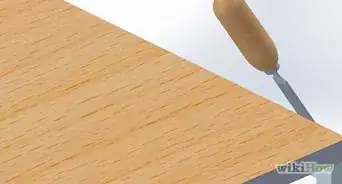
3Pass the propane torch quickly over the edges of the acrylic. If you move the torch too slowly, the acrylic will melt or burn and the material will be ruined. To be as safe as possible, make a pass with the torch and allow the edge to cool to the point where you can touch it with your hand. This helps you avoid burning the acrylic.[9]
- It usually takes a couple of minutes for the acrylic to cool off after it's been torched, so wait at least that long before touching it.
-
4Go over the acrylic edges again to finish the job. It should only take 2-3 passes at most to get a quality finish, and each pass should take no longer than a few seconds. When the acrylic looks like glass, that's when you know the job is done.[10]
- Remember to allow the edges to cool before making a second and third pass over the acrylic. If you re-torch the acrylic too quickly, the material could melt or burn.


Things You'll Need
Sanding Down Your Acrylic
- 180, 320-360, and 600-grit water-proof sandpaper
- Extra pieces of acrylic
- Sanding block made of rubber or foam
- Spray bottle filled with water
- Utility knife
- Pencil
Flame Polishing Your Acrylic
- Propane torch
- Extra pieces of acrylic


References
- ↑ http://www.bcae1.com/plexi.htm
- ↑ http://www.corallore.com/buffing-acrylic/
- ↑ http://www.pmma.dk/acryl_polering.aspx?Lang=en-GB
- ↑ http://www.bcae1.com/plexi.htm
- ↑ http://www.bcae1.com/plexi.htm
- ↑ http://www.bcae1.com/plexi.htm
- ↑ http://www.pmma.dk/acryl_polering.aspx?Lang=en-GB
- ↑ http://www.bcae1.com/plexi.htm
- ↑ http://www.pmma.dk/acryl_polering.aspx?Lang=en-GB
About This Article