This article was co-authored by wikiHow staff writer, Sophia Latorre. Sophia Latorre is a Content Manager on the wikiHow team. Before joining wikiHow, Sophia worked as a technical editor and was published in six International Energy Agency (IEA) Wind Annual Reports. Now, she writes, edits, and reviews articles for the wikiHow Content Team, working to make the content as helpful as possible for readers worldwide. Sophia holds a BA in English from Colorado State University.
This article has been viewed 38,505 times.
Learn more...
Polyurethane can bring out a beautiful color in your hardwood floor, in addition to protecting it from heat and scratches. Start by choosing a type of polyurethane (oil or water-based) as well as a finish (matte or glossy), and make sure your work area is well-ventilated. Then, prep your floor by sanding and cleaning it. You can then apply three coats of polyurethane to your floor, allowing each coat to dry, then sanding it and cleaning the floor in between coats. With a little time and effort, your floor will have a smooth and flawless finish!
Steps
Choosing a Type and Finish
-
1Choose water-based polyurethane for a faster drying time. Water-based polyurethane looks milky in the can but dries to a clear finish. It also has a low odor and dries more quickly than oil-based polyurethane. If you're hoping to complete this project in one day, water-based polyurethane is the way to go.[1]
-
2Select oil-based polyurethane to add a deeper hue to the existing wood. Oil-based polyurethane adds a warmer color to your natural floor and tends to yellow over time. It also has a strong odor and takes longer to dry than water-based polyurethane. However, you may be able to apply fewer coats to the floor if you select an oil-based polyurethane.[2]Advertisement
-
3Pick a matte or glossy polyurethane finish. You can pick from matte, semi-glossy, or satin finishes of polyurethane. If you're unsure what you'd like best, test out all three varieties on scrap pieces of wood to see how they look when dry. Keep in mind that glossier surfaces show fingerprints and other marks more than matte finishes.[3]
-
4Ensure you have a well-ventilated work area. Polyurethane is a strong substance. Make sure to open as many windows as possible and use window fans to suck the air from inside to outside. You may also wish to wear a ventilation mask, protective eyewear, and gloves.[4]


Prepping Your Floor
-
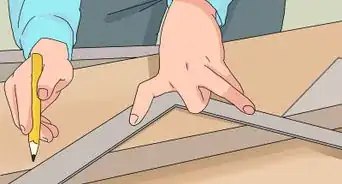
1Sand the floor, if needed. Unless you are starting with a brand-new, pre-sanded floor, it's important that you sand the floor three times, with three different levels of sandpaper, to remove imperfections and smooth the surface. Begin with 36-grit sandpaper, followed by 60-grit, and finish with 100-grit sandpaper. Pay special attention to the edges and corners of the room.[5]
-
2Vacuum the floor thoroughly. Use a commercial-grade vacuum to remove all the dust and debris from the floor. Your household vacuum likely isn't strong enough to get the job done, so consider renting a commercial machine for this project. Be sure to vacuum the edges and corners of the room as well.[6]
-
3Wipe down the surface with mineral spirits. Use mineral spirits to clean the surface of the floor and remove all remaining debris and dust. Apply the mineral spirits to a clean cloth and wipe down the entire floor, paying special attention to cracks, edges, and corners. Allow it to dry fully before coating the surface in polyurethane.[7]
- You can find mineral spirits at hardware stores, home improvement stores, and superstores in your area.
-
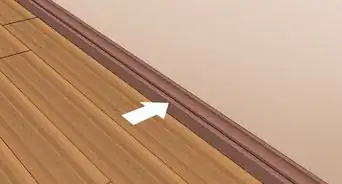
4Apply masking tape to protect your baseboards. To prevent you from accidentally brushing polyurethane on your baseboards, you need to mask them. You can use newspaper in conjunction with masking tape, or use masking tape alone to cover your baseboards.[8]


Applying Polyurethane
-
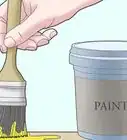
1Stir the polyurethane and pour it into a paint tray. Use a paint stirrer to thoroughly stir the polyurethane. The better you stir it, the less chance you have of ending up with bubbles on your floor. Don't shake the can of polyurethane, however, as this introduces more bubbles into the product. When you're finished stirring, pour the polyurethane into a paint tray.[9]
-
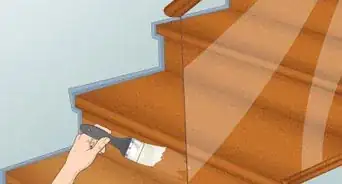
2Use a brush or painter's pad to apply a thin layer of polyurethane. An 8 to 12 inch (20 to 31 cm) bristle brush is a good choice for this project. Avoid using lamb's wool pads, which collect dirt easily. Use long, even strokes to apply a thin coat of the polyurethane to the floor.[10]
- Avoid “flooding” the area with polyurethane -- you want a thin coat.
- Avoid going over the same spot multiple times, as this causes bubbles and imperfections.
-
3Start at the farthest corner from the entrance to the room. To avoid stepping on the surfaces you've already applied polyurethane to, it's important to start in the farthest corner from the entrance to the room and work your way toward the door. Aim to apply the polyurethane quickly, working from one end of the room to the other.[11]
-
4Allow the coat to dry completely. Read the directions on the package to find out how long the polyurethane you're using takes to dry. Typically, you'll be able to sand and apply another coat within 4 to 8 hours, though some varieties may take up to 12 hours to dry.[12]
-
5Sand down bubbles or uneven patches. Once the floor is dry, use 220-grit sandpaper to sand down imperfections. Make sure you sand along the lines of the natural grain, rather than against the grain. For smaller troublesome spots, use 320- or 400-grit sandpaper.[13]
-
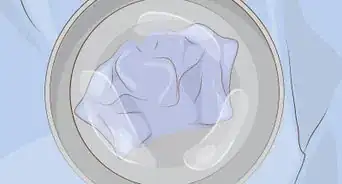
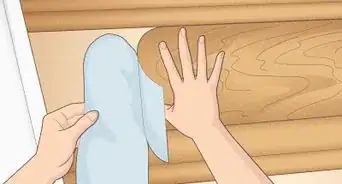
6Wipe down the floor with a clean cloth. Clean water-based polyurethane with mild soap and water. Use mineral spirits or paint thinner to clean oil-based polyurethane. Apply the cleaner with a soft cloth and wipe it dry when finished.[14]
-
7Thin the polyurethane and pour it into a paint tray. For the second coat, you should thin the polyurethane so that it is less likely to create bubbles. Combine 10 parts polyurethane with 1 part mineral spirits (for oil-based polyurethane) or 1 part water (for water-based polyurethane) in a clean can and stir it thoroughly. Then, pour it into a paint tray.[15]
-
8Apply a coat of thinned polyurethane. You will likely notice that some spots have a thicker layer of polyurethane on them than others. To ensure you have an even coat and seal, apply a thinned coat of polyurethane to the entire floor using the same method as before.[16]
-
9Allow the polyurethane to dry. Again, you'll need to wait until this coat is dry before moving on. Refer back to the instructions included with the polyurethane to determine the drying time. Don't rush this step, or your floor can get gummed up or ruined.[17]
-
10Use an abrasive pad to even out the surface. Steel wool, grade 0000, works well for this. Use the fine steel wool to go over the entire surface of the floor, to remove imperfections as well as ensure the entire coating is even and level.[18]
-
11Clean the floor to remove dust. Using the same method as before, wipe down the floor to remove dust or debris. Allow the floor to dry fully before adding the final coat of polyurethane.[19]
-
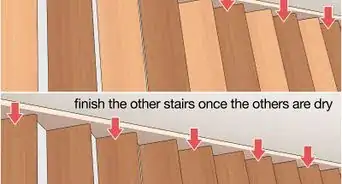
12Add a final coat of polyurethane. Use full-strength polyurethane for the final coat. Avoid cleaning or sanding this coat of polyurethane. Instead, stay out of the room until it has set completely.[20]
-
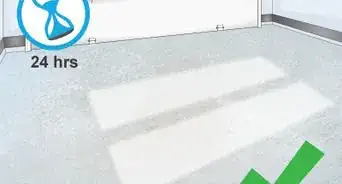
13Let the final coat dry for 24 hours. You shouldn't walk on the floor for 24 hours after applying the final coat. Don't replace your furniture for 72 hours and wait at least 1 week before cleaning the floor or arranging rugs on it.[21]


Things You'll Need
- Polyurethane
- Window fans
- Ventilation mask
- Protective eyewear
- Gloves
- Commercial vacuum
- Masking tape
- Newspaper
- Paint stirrer
- Paint trays
- Bristle brush (8 to 12 inch or 20 to 31 cm) or painter's pad
- Sandpaper, 36-, 60-, 100-, 220-, 320-, and 400-grit
- Steel wool, grade 0000 (extra-fine)
- Mineral spirits
- Mild soap
- Water
- Clean cloths

-Step-19.webp)
References
- ↑ https://www.familyhandyman.com/floor/water-based-vs-oil-based-polyurethane-floor-finish/view-all/
- ↑ https://www.familyhandyman.com/floor/water-based-vs-oil-based-polyurethane-floor-finish/view-all/
- ↑ http://www.diyonline.com/servlet/GIB_BaseT/diylib_article.html?session.docid=332
- ↑ http://www.doityourself.com/stry/applying-polyurethane-to-hardwood-flooring
- ↑ http://woodfloordoctor.com/_how_tos/particlesshort/bubbles.shtml
- ↑ http://woodfloordoctor.com/_how_tos/particlesshort/bubbles.shtml
- ↑ http://woodfloordoctor.com/_how_tos/particlesshort/bubbles.shtml
- ↑ http://www.doityourself.com/stry/applying-polyurethane-to-hardwood-flooring
- ↑ http://living.thebump.com/apply-polyurethane-hardwood-floors-bubbles-14258.html
- ↑ http://woodfloordoctor.com/_how_tos/particlesshort/bubbles.shtml
- ↑ http://living.thebump.com/apply-polyurethane-hardwood-floors-bubbles-14258.html
- ↑ http://www.diyonline.com/servlet/GIB_BaseT/diylib_article.html?session.docid=332
- ↑ http://living.thebump.com/apply-polyurethane-hardwood-floors-bubbles-14258.html
- ↑ http://woodfloordoctor.com/_how_tos/particlesshort/bubbles.shtml
- ↑ http://living.thebump.com/apply-polyurethane-hardwood-floors-bubbles-14258.html
- ↑ http://www.diyonline.com/servlet/GIB_BaseT/diylib_article.html?session.docid=332
- ↑ http://woodfloordoctor.com/_how_tos/particlesshort/bubbles.shtml
- ↑ http://www.diyonline.com/servlet/GIB_BaseT/diylib_article.html?session.docid=332
- ↑ http://living.thebump.com/apply-polyurethane-hardwood-floors-bubbles-14258.html
- ↑ http://living.thebump.com/apply-polyurethane-hardwood-floors-bubbles-14258.html
- ↑ http://living.thebump.com/apply-polyurethane-hardwood-floors-bubbles-14258.html
About This Article