This article was co-authored by wikiHow staff writer, Kyle Hall. Kyle Hall works on the content team at wikiHow. He helps manage our team of editors and creates content for a variety of wikiHow projects. Kyle continually looks for new ways to improve the content at wikiHow and make it more helpful and enjoyable for readers. He graduated from Eckerd College in 2015, where he majored in Political Science.
There are 14 references cited in this article, which can be found at the bottom of the page.
This article has been viewed 130,776 times.
Learn more...
Printing images onto metal can make them more dimensional and long-lasting. If you own an inkjet printer, you can easily print images onto metal at home. If you don't own an inkjet printer, you can still transfer images onto metal using a few simple tools.
Steps
Using an Inkjet Printer
-
1Buy a roll of aluminum flashing. Flashing is really thin sheet metal, which is perfect for feeding through an inkjet printer that’s designed for paper. Look for the thinnest aluminum flashing you can find — the thinner, the better.[1]
- Try to find flashing that's less than 0.01 inches (0.025 cm) thick.
- You can find aluminum flashing online or at your local hardware store.
-
2Use tin snips to cut the aluminum flashing to the size you want. First, figure out how big you want your print to be. Keep in mind that the piece of flashing can’t be larger than the feed on your inkjet printer. Then, use measuring tape and a straightedge to measure and draw lines where you need to cut the flashing. Cut along the lines with the tin snips until the flashing is cut to size.[2]Advertisement
-
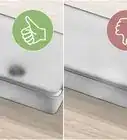
3Sand the surface of the flashing with 600-grit sandpaper. You need to sand the flashing before printing onto it to remove the protective top coat. Otherwise, the ink from the printer won’t stick. Use a sanding block or random orbital sander so you don’t leave scratches on the flashing. You only need to sand the side you’re going to print onto.[3]
- Going over the surface of the flashing with the sander a few times should be enough to remove the top coat.
- Sand your flashing outside if possible so the leftover dusty residue doesn’t get everywhere in your home.
-
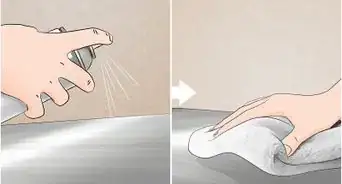
4Clean the surface of the flashing with a commercial cleaner. Any kind of cleaner that eliminates stains and grease will work. You just want to make sure you get off all the grease residue on the aluminum flashing before you send it through the printer. Otherwise, your print may not come out correctly.[4]
- Try using a Mr. Clean Magic Eraser or a sponge with dish detergent and water.
-
5Cover the surface of the flashing with an inkjet precoat. The inkjet pre-coat will help the ink adhere to the aluminum flashing when you print on it. To apply the precoat, tape the back of the flashing to a flat surface using double-sided tape. Then, pour a liberal amount of precoat in a line across the top edge of the flashing. Use a straightedge or coating bar to slowly scrape the coating down across the whole surface of the flashing.[5]
- When you’re finished, there should be a smooth, even layer of inkjet precoat over the side of the flashing you’re going to print on.
- You can find inkjet precoat online or at your local art supply store.
-
6Attach the flashing to a piece of paper that fits in your printer's feed. This is important because it will allow the flashing to travel through the printer feed just like a regular piece of paper would. Lay the flashing flat on a piece of paper and tape the edges to the paper using masking tape. If the flashing is the same size as the paper, you'll need to curl the tape over the edges of the paper.[6]
- Make sure the side of the flashing you want to print onto is facing up.
-
7Prepare your print job on a computer. Create a document with the image you want to print onto the flashing. If the piece of flashing you’re using is smaller than your inkjet printer’s feed, you’ll need to position the image in the document so it’s in the right spot to be printed onto the flashing.[7]
- For example, if the flashing is attached to the bottom right corner of the piece of paper you’ll be sending through your printer, you’ll need to move the image to the bottom right corner of the document on the computer.
-
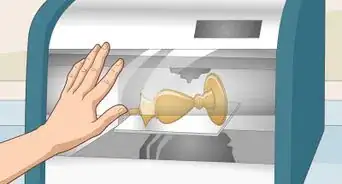
8Load the flashing into the printer feed. Treat the flashing like you would a regular sheet of paper. Make sure the side you sanded and precoated is the side the printer will print onto. If you’re not sure, run a test sheet of paper through the printer first to find out.
-
9Print your image onto the aluminum flashing. First, make sure your inkjet printer is loaded with regular ink cartridges. Then, press the print button on your computer. After the flashing runs through the printer, remove it and let the ink dry.


Transferring a Print to Metal
-
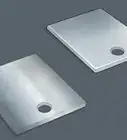
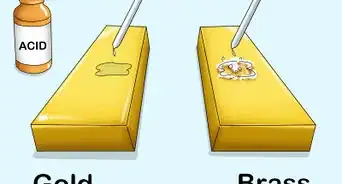
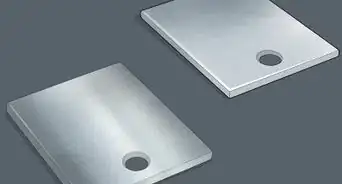
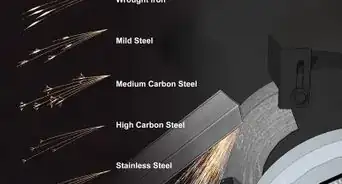
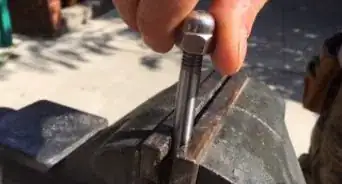
1Cut out a piece of sheet metal using a pair of tin snips. Any kind of sheet metal will work, including aluminum, brass, and copper. Cut the sheet metal so it’s the same size as you want the print to be. Use measuring tape and a straightedge to measure and mark the sheet metal. Then, cut along the lines you marked with the tin snips. [8]
-
2Print out the design you want to use with a toner-based laser printer. You can use a color or black and white design. Print your design so it’s the size you want it to be on the metal sheet. Make sure it’s not bigger than the metal sheet or it won’t fit.[9]
-
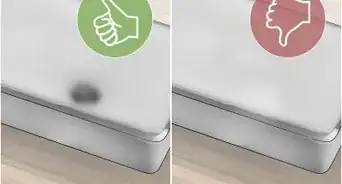
3Sand the surface of the sheet metal with 600-grit sandpaper. Sanding the surface of the sheet metal will remove its protective coating so the ink in your image is able to adhere to it. Use a sanding block or random orbital spinner so you don’t create scratches in the metal with the sandpaper.[10]
- Go over the sheet metal with sandpaper several times to fully remove the top coat.
- Do your sanding outside if possible so you make less of a mess.
-
4Cut out your design so it fits over the metal sheet. When you lay your cut-out design over the metal sheet, there shouldn’t be any paper hanging over the edges of the metal. If there is, cut off the excess with scissors.[11]
-
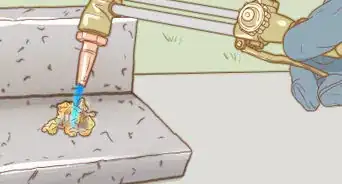
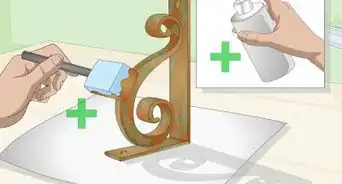
5Brush a thin layer of acrylic polyurethane over the surface of the metal. Acrylic polyurethane will help the ink from your design adhere to the sheet metal. Use a small paintbrush to apply the acrylic polyurethane over the side of the metal you want to transfer your design onto.[12]
- You can find acrylic polyurethane online or at your local hardware store.
-
6Press your design face down onto the wet piece of sheet metal. Lay your design down on the metal slowly so you don’t get any air bubbles. Work from the center of the design out to the edges.[13]
- You can also use a rolling pin to press your design onto the sheet metal.
-
7Leave your design on the sheet metal for 1 hour. After an hour, the acrylic polyurethane should be dry. If it still feels wet, leave your design on for another hour.[14]
-
8Rub the back of your design with a water-soaked paper towel. Rub the paper with short, gentle strokes. As you rub with the soaked paper towel, you should notice the paper your design was printed on starting to peel away, revealing your design on the sheet metal beneath it. Continue rubbing until all of the paper is gone and you’re just left with your design printed on the sheet metal.[15]
- If the paper isn't coming off, try rubbing harder with the paper towel.


Community Q&A
Did you know you can get answers researched by wikiHow Staff?
Unlock staff-researched answers by supporting wikiHow
-
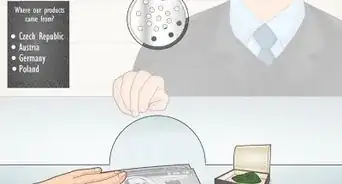
QuestionHow do you print on aluminum?
 wikiHow Staff EditorThis answer was written by one of our trained team of researchers who validated it for accuracy and comprehensiveness.
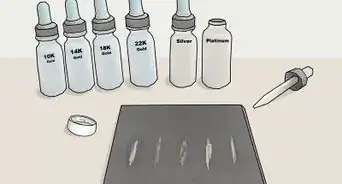
Staff AnswerwikiHow Staff EditorStaff AnswerOne easy way to do it is to get printable aluminum sheets that are designed to work with a standard inkjet printer. Alternatively, you’d need to make a transfer from an mirrored inkjet printout on paper, using special transfer dyes.
Support wikiHow by unlocking this staff-researched answer.
-
QuestionHow do you print 3D metal?wikiHow Staff EditorThis answer was written by one of our trained team of researchers who validated it for accuracy and comprehensiveness.
Staff AnswerwikiHow Staff EditorStaff AnswerYou’ll need a specialized 3D printer that can reach high enough temperatures to melt or cut through metal. Unfortunately, these printers are expensive and not easily available for home use.Support wikiHow by unlocking this staff-researched answer.
-
QuestionAre metal prints worth it?wikiHow Staff EditorThis answer was written by one of our trained team of researchers who validated it for accuracy and comprehensiveness.
Staff AnswerwikiHow Staff EditorStaff AnswerIt depends on your needs! Metal prints are very expensive, so you might opt for canvas or another less pricey option if you’re on a budget. Plus, metal printing really only works with vivid, high-contrast images. However, if you need something really durable, metal printing is a good bet. These prints are fade-proof, scratch resistant, and easy to clean.Support wikiHow by unlocking this staff-researched answer.
Things You’ll Need
Using an Inkjet Printer
- Inkjet printer
- Roll of aluminum flashing
- Tin snips
- 600-grit sandpaper
- Commercial stain and grease remover
- Inkjet precoat
- Straightedge
- Double-sided tape
Transferring a Print to Metal
- Sheet metal
- Tin snips
- 600-grit sandpaper
- Paper
- Printer
- Acrylic polyurethane
- Paintbrush
- Paper towels
References
- ↑ https://www.youtube.com/watch?v=jkN0wQSXHQo&feature=youtu.be&t=10
- ↑ https://www.familyhandyman.com/tools/how-to-use-tin-snips-to-cut-sheet-metal/view-all/
- ↑ https://www.overclockers.com/how-to-paint-steel-aluminum-plastic-and-acrylic/
- ↑ https://www.youtube.com/watch?v=jkN0wQSXHQo&feature=youtu.be&t=66
- ↑ https://www.youtube.com/watch?v=jkN0wQSXHQo&feature=youtu.be&t=83
- ↑ https://www.youtube.com/watch?v=jkN0wQSXHQo&feature=youtu.be&t=145
- ↑ https://www.youtube.com/watch?v=jkN0wQSXHQo&feature=youtu.be&t=162
- ↑ https://www.youtube.com/watch?v=FfmI5pM4PSA&feature=youtu.be&t=31
- ↑ https://www.youtube.com/watch?v=FfmI5pM4PSA&feature=youtu.be&t=41
- ↑ https://www.overclockers.com/how-to-paint-steel-aluminum-plastic-and-acrylic/
- ↑ https://www.youtube.com/watch?v=FfmI5pM4PSA&feature=youtu.be&t=77
- ↑ https://www.youtube.com/watch?v=FfmI5pM4PSA&feature=youtu.be&t=85
- ↑ https://www.youtube.com/watch?v=FfmI5pM4PSA&feature=youtu.be&t=95
- ↑ https://www.youtube.com/watch?v=FfmI5pM4PSA&feature=youtu.be&t=116
- ↑ https://www.youtube.com/watch?v=FfmI5pM4PSA&feature=youtu.be&t=121
About This Article

To transfer a print to metal, start by cutting out a piece of sheet metal and sanding the surface with 600-grit sandpaper. Then, print off a design using a toner-based laser printer, and cut it out so it will fit over the sheet metal. Next, apply a thin layer of acrylic polyurethane to the surface of the sheet metal to help the ink from your design adhere to it, and press your design face down onto it. Finally, let your design sit for 1 hour before rubbing the paper off with a water-soaked paper towel. To learn how to print on metal using an inkjet printer, read on!