This article was co-authored by wikiHow staff writer, Luke Smith, MFA. Luke Smith is a wikiHow Staff Writer. He's worked for literary agents, publishing houses, and with many authors, and his writing has been featured in a number of literary magazines. Now, Luke writes for the content team at wikiHow and hopes to help readers expand both their skillsets and the bounds of their curiosity. Luke earned his MFA from the University of Montana.
There are 8 references cited in this article, which can be found at the bottom of the page.
This article has been viewed 2,506 times.
Learn more...
If you have one string of turtles, chances are you want more. The good news is that these darling succulents are pretty easy and even eager to be propagated—meaning they grow like nobody’s business, whether or not you really want them to. But easy as it is, your string of turtles still needs a little hand-holding when the time comes for offshooting. That’s why we’ve put together and easy guide to help you propagate your string of turtles, keep it healthy, and remedy any ailments it might encounter.
Things You Should Know
- Trim cuttings from your string of turtles’ vines about 3–4 inches (7.6–10.2 cm) in length, with a few leaf nodes intact.
- Place the cuttings in a small container of water or fresh potting soil that’s 1 part perlite, 1 part coco peat.
- Pot and repot your pothos in a clay pot with well-draining soil.
- Water your string of turtles when the soil is dry, and keep it in a warm room with indirect sunlight.
Steps
Propagating in Water
-
1Fill a small container with water and cover it with plastic wrap. Use lukewarm water, and leave a little space between the surface of the water and the lip of the container, about 1 inch (2.5 cm). Then, poke 3-4 evenly-spaced holes into the plastic wrap, into which you’ll insert the propagated cuttings.
- Make sure the holes are well-spaced in the water, at least about 1 inch (2.5 cm) apart.
-
2Cut off a 3–4 inches (7.6–10.2 cm) section of the vine. Use a clean pair of scissors or garden clippers, and make sure the vine has at least 1 leaf node (the point on the stem from which a leaf grows). Remove the leaves along the lower 2 inches (5.1 cm)-part of the vine (the section closest to the base of the plant).[1] Cut 3-4 sections, so that you have more than one chance for a successful propagation.Advertisement
-
3Place the cuttings in the water. Thread the cuttings through the holes in the plastic wrap, so that at least one leaf node is underwater, and the leaves are resting on top of the plastic. This will prop the cuttings up in a natural position for root growth.[2]
-
4Keep cuttings in indirect light for 3-4 weeks. Leave the cuttings on a counter or table that receives bright but indirect sunlight.[3] Monitor and keep the water level above the bottom of the cuttings, and make sure the cuttings stay upright in the container, with their bottoms underneath the water.
- “Bright, indirect light” refers to any spot where the string of turtles may get dappled sunlight, or sunlight filtered through curtains or blinds.[4]
-
5Pot the cutting when the roots are about 3 inches (7.6 cm) long. Remove the cuttings from the water, and place them in a small clay pot (about 5–7 inches (13–18 cm) in diameter) with drainage holes. Bury the roots just under the soil in a well-draining potting mix, and keep the soil moist.[5]


Propagating in Soil
-
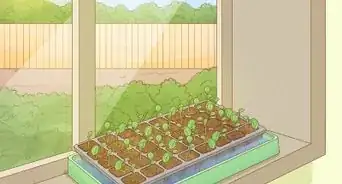
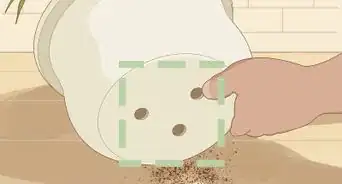
1Prepare a small pot with soil mixture. Use a small container about 3 inches (7.6 cm) in diameter, and fill it with 1 part perlite and 1 part coco peat. Then, mist the potting mixture with water until it’s thoroughly damp.[6]
- Use a clay pot, ideally. Clay pots are porous, and so they allow some excess water to drain through their walls, regulating the plant’s water intake.[7]
-
2Cut off a section of vine about 2–3 inches (5.1–7.6 cm) long. Use a pair of sterilized scissors or garden clippers to cut off an end section of a healthy vine. Make sure the vine has about 2-3 leaf nodes, to give it a better chance of propagating.[8]
- At this point, you can dip the entire cutting into water, then coat it in rooting hormone powder to encourage root production and reduce the potential of disease.
-
3Plant the cutting in the potting mix. Make a hole with your finger in the soil (about up to your first knuckle) and place the cutting inside. Ensure that at least 1 leaf node is beneath the soil, then gently fill the hole and tamp the soil around the base of the cutting. Dampen the soil with water, and place the pot in bright but indirect sunlight, and, optionally, on a heated growing mat.[9]
- As when you propagate almost any succulent, you can also bury individual leaves in the same manner in order to propagate your string of turtles.[10] Follow the same process you would when propagating a vine cutting in soil.
-
4Repot after 3-4 weeks. After about a month, or after your propagated succulent cutting has gained about 3 inches (7.6 cm) of new growth, repot it into a 5–7 inches (13–18 cm)-diameter pot, with drainage holes and well-draining potting mix. Place the roots just beneath the soil, and keep the soil moist.[11]


Caring for String of Turtles
-
1Water your string of turtles when the top of the soil is dry. Place your finger into the soil up to the first knuckle. If the soil is dry, saturate it with water until it’s damp, but not pooling. Repeat this every 2-3 weeks, or every week or so if the leaves begin to shrivel, which indicates underwatering.[12]
- String of turtles are succulents, which means they can store plenty of water within themselves, and are prone to overwatering.[13] Water your succulents sparingly!
-
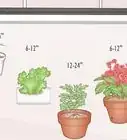
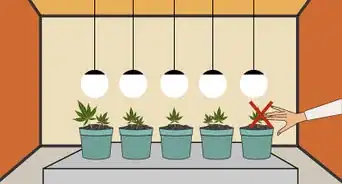
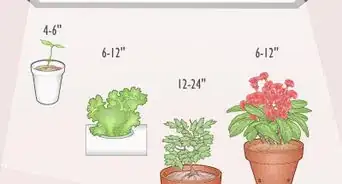
2Keep your string of turtles in bright but indirect sunlight. Peperomias typically enjoy moderate-high amounts of ambient light, but can burn under direct sunlight.[14] Place your string of turtles on a high shelf (but no higher than head-height) so they can comfortably cascade their vines out of direct sunlight.
- If your string of turtles is variegated (has bright streaks of yellow or white in its leaves), you can maintain and encourage this pleasant patterning by placing it in brighter locations than you might usually, but still out of direct sunlight.
-
3Mist your string of turtles and keep it at around 68–75 °F (20–24 °C). String of turtles originate from tropical forests, and so prefer warm, humid environments. Care for this succulent by giving it a few spritz a day with aspray bottle, or run a humidifier in the same room.[15] Set the thermostat to room temperature (68–72 °F (20–22 °C)), and try to keep this temperature consistent, as fluctuating temperatures can stress the plant.[16]
-
4Add liquid fertilizer or succulent food to the pot every few weeks. Liquid plant fertilizer will keep your string of turtle’s leaves healthy and round. Use a pump or two (or however much the packaging instructions indicate) of liquid fertilizer once every year or so to provide plenty of nutrition.[17]
- Watch for drooping leaves, as these can be signs of overfertilizing. If this occurs, stop fertilizing until the string of turtles bounces back.
-
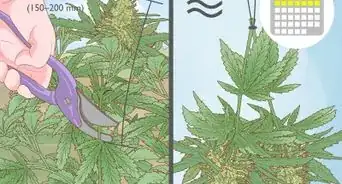
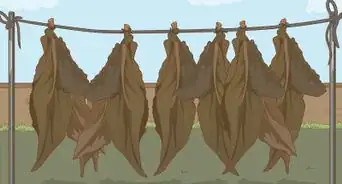
5Prune off dead or damaged leaves and vines. String of turtles are delightful for their low-maintenance disposition, but do require some hands-on care. If you see dead, discolored, or damaged leaves or vines, prune them off with sterilized scissors or garden trimmers, which also promotes new, healthy growth.[18]
- Also prune off excess growth—these plants are hardy and spread easily, so don’t hesitate to cut them back to your preferred size.
- Avoid removing more than a third of the plant at a time, as this could overwhelm and kill the plant.
-
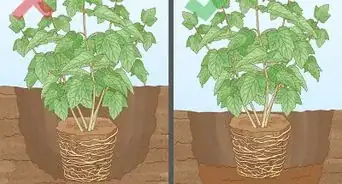
6Repot your string of turtles once a year. Carefully tip the pot until the plant slides out. Then, gently remove any clinging dirt from the plant’s roots, and place the string of turtles into a new, similarly sized pot (or about 2 inches (5.1 cm) larger). Fill the pot beforehand with new potting mix (1 part perlite, 2 parts peat, 1 part compost). Position the plant’s roots just beneath the surface of the mix.[19] Water the soil until it’s moist but not flooded.
- Repotting isn’t a requirement, since string of turtles have shallow roots and prefer snug pots, but repot your plant about once a year anyway to refresh soil nutrients and to give a flourishing string of turtles a little more space to grow.


Common Problems
-
1Over and underwatering An overwatered string of turtles will develop bumpy or wilting leaves. In this case, refrain from watering until the soil is completely dry, then saturate the soil and let the water drain out the bottom onto a tray. An underwatered plant will develop curled or wrinkled leaves. In this case, simply water the soil until it’s moist but not pooling.[20]
- Overwatered plants can also develop root rot, or a type of fungus that thrives in damp soils. The leaves will droop and become discolored, and the plant will deteriorate quickly. Repot the plant, trimming off any dead or shriveled roots, and apply a fungicide, though understand that recovery is rare in string of turtles.
-
2Sun damage A string of turtles placed in direct sunlight or a too-bright environment will develop faded, yellowed, or even red leaves. Move the plant to a dimmer portion of your home, into indirect or filtered sunlight.[21]
-
3Pests and insects Like most houseplants, string of turtles are susceptible to a range of pests, like spider mites, mealybugs, or white flies. Monitor your plant for signs of insects, use a spray bottle to spritz the plant with a houseplant insecticide, or a solution of 1 gallon (3.8 L) warm water, 1 teaspoon (4.9 mL) of castile soap, and 4 tablespoons (59 mL) of neem oil.


References
- ↑ https://www.allaboutgardening.com/string-of-turtles/
- ↑ https://www.allaboutgardening.com/string-of-turtles/
- ↑ https://www.urbanorganicyield.com/string-of-turtles/
- ↑ https://anaturalcuriosity.org/houseplant-care-what-is-bright-indirect-light/
- ↑ https://www.urbanorganicyield.com/string-of-turtles/
- ↑ https://www.allaboutgardening.com/string-of-turtles/
- ↑ https://www.echopress.com/lifestyle/trott-column-cultivate-peperomia-the-house-plant-of-the-year
- ↑ https://www.allaboutgardening.com/string-of-turtles/
- ↑ https://gardenerspath.com/plants/houseplants/grow-peperomia/
- ↑ https://candide.com/GB/stories/propagating-succulents-from-leaves/
- ↑ https://gardenerspath.com/plants/houseplants/grow-peperomia/
- ↑ https://www.allaboutgardening.com/string-of-turtles/
- ↑ https://plants.ces.ncsu.edu/plants/peperomia-prostrata
- ↑ https://www.echopress.com/lifestyle/trott-column-cultivate-peperomia-the-house-plant-of-the-year
- ↑ https://planthelp.me/wiki/Peperomia_prostrata
- ↑ https://www.echopress.com/lifestyle/trott-column-cultivate-peperomia-the-house-plant-of-the-year
- ↑ https://gardenerspath.com/plants/houseplants/grow-peperomia/
- ↑ https://gardenerspath.com/plants/houseplants/grow-peperomia/
- ↑ https://www.allaboutgardening.com/string-of-turtles/
- ↑ https://planthelp.me/wiki/Peperomia_prostrata
- ↑ https://planthelp.me/wiki/Peperomia_prostrata
About This Article