This article was co-authored by wikiHow Staff. Our trained team of editors and researchers validate articles for accuracy and comprehensiveness. wikiHow's Content Management Team carefully monitors the work from our editorial staff to ensure that each article is backed by trusted research and meets our high quality standards.
There are 9 references cited in this article, which can be found at the bottom of the page.
This article has been viewed 20,745 times.
Learn more...
Nanoleaf panels are decorative, multicolored light panels that can pulsate along to the beat of your TV, music, or videogames. They’re a great way to decorate your home and give the area a very cool look. Even better, hanging them is simple! All panel sets come with a mounting kit designed for easily hanging the panels on drywall or plaster. Once you figure out the pattern you want, then it’s just a matter of sticking them onto the wall and plugging them in.
Steps
Designing the Outline
-
1Find a location where the lights won’t get knocked into. The Nanoleaf panels are fairly durable, but you still want them out of the way so they don’t get damaged. Make sure they’re safely away from doors and foot traffic so no one hits them by accident.[1]
- Behind a couch, desk, or TV are popular places for the panels.
- The panels also have a cable running to them for power. Find a spot where the cable won’t get in the way.
-
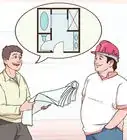
2Tape the paper template panels onto the wall so they're all touching. The panel kit comes with thin paper panels that you can hang to develop a template for your design. Use them as a guide to figure out the kind of pattern you want. Hold the paper panels against the wall and tape them down in the shape that you want. Make sure they're all touching each other, because the light panels have to be touching to work.[2]
- Check to make sure the design is level before you pick a final one. Hold a level up to the top panel and make sure it’s straight.
- If you want assistance designing and visualizing an arrangement for the panels, download the Nanoleaf app. You can aim your camera at the wall and the app will suggest some designs that would work in that area. The Nanoleaf app also controls the lights when they’re installed, so you’ll definitely want to download it.[3]
Advertisement -
3Rearrange the template until you find a design you like. Fortunately, the template isn’t set in stone. Simply peel the panels off the wall and rearrange them if you want to try different designs. Continue experimenting until you find a pattern that you like.[4]
- Don’t worry if you rip a panel while removing it. You can just tape it back together.
- Whichever design you pick, make sure all the pieces touch. Otherwise the panels won't connect or light up when you hang them.
-
4Trace each template piece with pencil. When you find a design that you like, mark it on the wall. Take a pencil and lightly trace each paper panel to mark the location.[5]
- Don’t worry, the panels will cover the pencil marks.
- Take a picture of the template just in case the pencil marks rub off.


Mounting the Panels
-
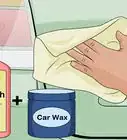
1Clean the wall with rubbing alcohol. Dampen a cloth or paper towel with rubbing alcohol, then rub it all over the area that you’re mounting the panels. This removes any dust or grease that could prevent the tape from sticking.[6]
- Rub lightly over the pencil marks so you don’t erase your template. This is why taking a picture of the template helps.
-
2Dry the wall thoroughly. Leftover moisture will prevent the tape from sticking. Either let the wall dry for 5-10 minutes or rub it with a dry rag.
-
3Stick a piece of double-sided tape to the corners of each panel. The mounting kit comes with double sided tape strips. Lay the panels facedown. Then peel the paper backing off of one side of a tape strip and hold it onto a corner for 30 seconds. Make sure the rounded tab sticks out so you can remove the panels easily. Repeat this until you have a strip of tape in the corners of each panel.[7]
- Nanoleaf panels commonly come in triangles, but sometimes squares, hexagons, and other shapes as well. Check the instruction manual if your panels are in different shapes to see if there is an ideal spot for the tape.
-
4Press the first panel into position and hold it for 60 seconds. Line the panel up with the first panel section in your template. Then peel off the backing on all the tape strips and press the panel down. Hold it in place for 60 seconds so the tape bonds to the wall.
- Confirm that the first panel is straight with a level. If the first one is crooked, then the other ones will be too.
- Since all of the panels connect to each other and the controller can connect to any panel, it isn't important to start at any particular spot of the design. However, it's probably easier to arrange everything if you start at the top or bottom of the pattern.
- If you make a mistake, you can remove the panel by peeling it off off. Grab the tape tab sticking out from the corners and pull them up to remove the panel. This is why leaving the tape tabs sticking out is important.
-
5Slide a panel linker into the next panel that you’re hanging. The mounting kit has small plastic linkers that slide into slots along the sides of the panels. These transmit the electrical signal between the panels and you need them to connect the panels. Slide a linker into one side of the second panel until it clicks.[8]
- Some special mounting kits have flex linkers that can bend around corners. You can order these for more complicated designs.
-
6Insert the linker into the slot on the first panel to mount the second one. Line the linker on the panel up with the slot on the first panel. Then remove the tape backing on the panel and insert the linker into the slot. Press down for 60 seconds so the tape bonds to the wall.[9]
-
7Continue the process until all the panels are attached. Keep sliding linkers into position, lining up the panels, and pressing them down for 60 seconds. Work until the entire design is mounted.
- Remember that you can peel the panels off if you make any mistakes and they’ll still stick fine. If you peel it off a second time, however, you should use a new piece of tape.
-
8Connect the controller to the panel and power it on. The controller is a rectangular piece about half the length of a light panel and looks like a small video game controller. It can fit into any panel, so insert it into a convenient area that’s out of the way. Plug the other end of the cord into an outlet, then power the controller on and make sure all the lights illuminate. If they do, then the installation is complete.[10]
- If any panels don’t light up, double check the connection between them. Make sure the linkers are fully inserted.
- The controller has a cord running to it. If you want to hide the cord, then try attaching it to the bottom panel to keep it out of the way.
-
9Insert the rhythm module into any slot to control the panel pulses. The rhythm module links up with the game, music, or show that you have connected to the lights and makes the panels pulsate along to the beat. It's a smaller than the controller and can also slide into any panel. Find a convenient spot and insert the module into position.[11]
- You can control the pulsations by linking the module to your Nanoleaf app.


Things You’ll Need
- Nanoleaf panel mounting kit
- Nanoleaf app (optional)
- Rubbing alcohol
- Rags
- Pencil
- Level
- Tape


References
- ↑ https://youtu.be/en1QLmFNT7w?t=145
- ↑ https://youtu.be/en1QLmFNT7w?t=98
- ↑ https://nanoleaf.me/en/consumer-led-lighting/products/smarter-series/mobile-application/
- ↑ https://nanoleaf.me/en/consumer-led-lighting/products/smarter-series/nanoleaf-light-panels-smarter-kit/get-started/
- ↑ https://nanoleaf.me/en/consumer-led-lighting/products/smarter-series/nanoleaf-light-panels-smarter-kit/get-started/
- ↑ https://youtu.be/PQHyE7T7vHk?t=32
- ↑ https://youtu.be/iq0QuX2WOd8?t=28
- ↑ https://youtu.be/iq0QuX2WOd8?t=49
- ↑ https://youtu.be/iq0QuX2WOd8?t=49
About This Article