This article was co-authored by Ryaan Tuttle. Ryaan Tuttle is a Home Improvement Specialist and the CEO of Best Handyman, Inc. in Boston, Massachusetts. With over 17 years of experience, he specializes in building home service businesses, focusing on creating scalable and efficient brands. With the help of his global team, the companies have achieved over 10+ million in sales and received recognition through magazine features, and enjoy partnerships with wikiHow and Jobber field service software. Boston Magazine and LocalBest.com have named Best Handyman Boston the Best Handyman in Boston. Ryaan holds Construction Supervisor and Home Improvement Contractor Licenses.
There are 16 references cited in this article, which can be found at the bottom of the page.
This article has been viewed 21,421 times.
Replacing kitchen worktops can be an expensive and painstaking home improvement project. But, there are plenty of options you can choose from to recover and revitalize your kitchen worktops, no matter your style or budget. Choose a material such as paint, sheet laminate, or even tile to cover the worktops and breathe new life into them for a fraction of the cost and labor it takes to replace them.
Steps
Painting the Worktops
-
1Use countertop paint to recover laminate worktops. Painting over laminate worktops is an easy and cost-effective way to recover them. Choose a paint that’s designed for countertops for the adhesion and protection.[1] [2]
- You can find countertop paint at your local paint supply store, home improvement store, or by ordering it online.
- Countertop paints come in a variety of colors to choose from so you can select one that matches or corresponds with the paint colors of your walls as well as your appliances.
-
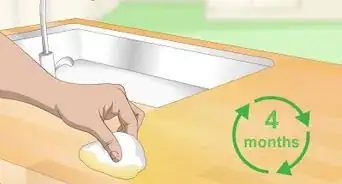
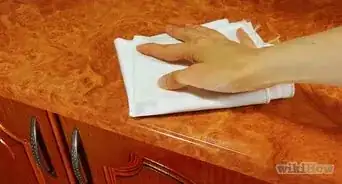
2Clean the worktop with dish soap and warm water and let it dry. Mix together warm water with dish soap and use a sponge to scrub down the worktop to remove dirt and grime from the surface so your paint will adhere to it better. Allow the worktop to dry completely for a 1-2 hours.[3]
- Use a clean towel to wipe down the worktop to help it dry faster.
- Touch the worktop with your finger to make sure it’s fully dry.
Advertisement -
3Sand the worktop lightly with 150-grit sandpaper. Remove the glossy coating from the preexisting laminate worktop by gently rubbing the surface in a circular motion with coarse-grain sandpaper. Be sure to sand the entire surface, including the edges and corners so the paint will adhere evenly.[4]
Pro Tip: Use an electric sander to speed up the sanding time.
-
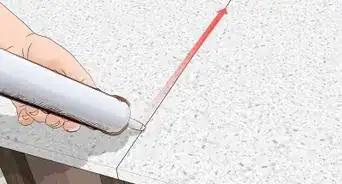
4Tape off the walls and edges that you don’t want to paint with painter’s tape. Take strips of painter’s tape and apply them to any backsplash or walls that you don’t want to paint. Apply the tape to the tops of the cabinets below as well so the paint doesn’t run or drip down on them. Make sure the tape is lined up evenly to create a clean edge.[5]
- If you have a stove or sink in the worktop, use painter’s tape to cover the edges where they meet.
-
5Add the paint to a paint tray and run a foam roller through it. Open up the can of countertop paint carefully so you don’t spill any and add some to the reservoir of a paint tray. Take a clean foam roller and run it through the paint, then scrape off the excess by rolling it over the textured portion of the paint tray.[6]
- Make sure the roller is evenly coated in the paint.
- Removing the excess paint will ensure an even coat and help prevent drips.
-
6Roll 1 coat of paint over the worktop and let it dry for 1 hour. Start at 1 section of the worktop and use broad, back and forth motions to apply the paint over the surface. Work your way along the worktop, overlapping your strokes to spread an even layer over the surface, and add more paint to the roller as you need it. Wait an hour when you’re finished to allow the first coat to fully dry.[7]
- It’s okay if you can still see the old worktop through the first layer of paint.
-
7Apply a second coat of paint with the foam roller. Once the first layer is dry, dip your foam roller into the paint in the tray and remove the excess. Start at the same location and spread another thin layer of the paint over the entire surface of the worktop using consistent back and forth motions. Wait an hour before you touch the paint so it can dry.[8]
- If you can still see the old worktop through the paint, apply another layer in the same manner.
-
8Allow the paint to cure for 3 days before you use the worktop. The countertop paint needs to fully cure and harden to form a protective layer that you can work on. Don’t place any appliances, utensils, or anything else on the worktop until the paint has cured.[9]
- Keep the area well-ventilated and use fans to help the paint cure.


Installing Sheet Laminate
-
1Use laminate sheets to recover existing laminate worktops. Laminate sheets are thin sheets of laminate that you can cut to size and install over your existing worktop. Choose them for an affordable way to recover and revitalize your laminate worktops.[10]
- Laminate sheets come in a variety of designs. You could choose wood-grain laminate to give your worktop the appearance of a wooden cutting board, or a solid white sheet for a clean look and feel.
- You can purchase laminate sheets at home improvement stores and online.
-
2Sand the laminate worktop with 80-grit sandpaper on an electric sander. Hold the sander against the surface of the worktop, keep pressure on it, and use circular motions to remove the glossy coat of the existing laminate worktop and to rough up the surface so the new sheet will adhere to it properly. Use a clean cloth or a brush to remove the dust and dirt after you sand the surface.[11]
- If you don’t own an electric sander, you may be able to rent one for the day from your local hardware or home improvement store.
- Make sure the worktop is clean and clear of debris so the adhesive will effectively bind.
- You can sand the worktop by hand, but it will be difficult to rough up the surface adequately.
-
3Lay the laminate sheet over the worktop so it hangs over the edge. Take a sheet of laminate that roughly fits your worktop and lay it on top of it so you can get an idea of how much you need to trim it. There should be at least 5–6 inches (13–15 cm) of the sheet hanging over the edge of the worktop so you can trim it down to size.[12]
-
4Mark the edges of the worktop and any areas that need to be cut out. Use a pencil or dry-erase marker to mark where the edge of the worktop is onto the laminate sheet and use a ruler or tape measure to add 2 inches (5.1 cm) and mark it on the laminate sheet so there’s some excess that you can trim after you install it. Mark the edges of any areas that you need to cut out of the sheet such as sinks or faucets on top of the sheet.[13]
- A dry-erase marker can easily be wiped off of the sheet.
- The marked lines over sinks or other obstructions should be as exact as you can make them so the sheet fits over them properly.
-
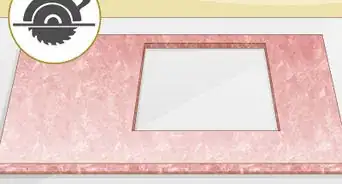
5Cut along the marked lines with a circular saw. Use a circular saw to make even cuts to cut the sheet down to size to fit over the worktop with a small overhang. Cut out any other areas you marked to create openings for sinks or anything else you need to accommodate.[14]
-
6Apply a layer of contact cement on the worktop and the back of the sheet. Use a paintbrush or a foam roller to apply an even layer of contact cement about 1⁄4 inch (0.64 cm) thick over the entire surface of the worktop. Then, apply a 1⁄4 inch (0.64 cm) thick layer onto the backside of the laminate sheet. Wait about 5-10 minutes for the contact cement to get sticky before you adhere it.[15]
- Use a 32 fl oz (950 mL) container of contact cement so you can be sure you have enough.
- You can find contact cement at hardware stores and online.
-
7Place dowels on top of the countertop spaced out about 3–5 inches (7.6–12.7 cm). After you apply the contact cement to the worktop, spread out wooden dowels over the surface to serve as a buffer between the worktop and the laminate sheet so you can line it up. The wooden dowels will not stick to the contact cement and will allow you to line up your sheet before you install it.[16]
- Use wooden dowels that are the same size.
- You can find dowels at home improvement stores and online.
-
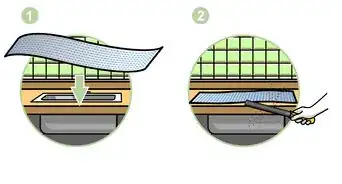
8Set the laminate sheet on top of the dowels and line it up with the worktop. Gently rest the sticky side of the laminate sheet on top of the dowels so the contact cement doesn’t touch the worktop. Use your hands to line up the sheet so the edges are flush against the wall and there’s a small overhang at the front.[17]
-
9Remove the dowels and press the laminate onto the worktop. Start at 1 end of the sheet and take out 1 dowel at a time. As you remove the dowels, press the laminate sheet onto the worktop so the adhesives bond evenly. Work your way from 1 side to the other to roll the sheet onto the worktop. Use your hands to smooth out the sheet so there aren’t any bubbles or creases.[18]
-
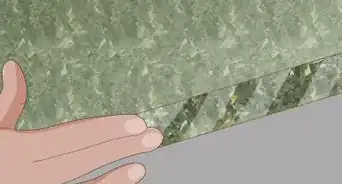
10Trim the edges with a trim router and file them down with a metal file. A trim router is a handheld device that uses a small bit to cut even edges. Fit a flush-trim bit into the router and place it on the edge of the laminate sheet. Move the router down the worktop to cut off the excess sheet so you have a flush and even edge. Take a metal file and hold it at a 45-degree angle against the edge of the worktop. Move the file back and forth over the edge to file it down so it’s smooth.[19]
Warning: File down the sharp edges of the laminate sheet to prevent cuts or scrapes.


Tiling the Worktops
-
1Use tile to add a textured surface to your worktop.[20] Tiles can be laid over any type of existing worktop to update and recover them. They’re also affordable and easy to install and will give your worktop the look of granite, marble, or whatever tile you want to use. Choose squares of tile to lay over your worktop.[21]
- There are lots of colors, textures, and styles of tiles for you to choose from. For example, you could go with rough-hewn granite tile for a rustic look or a flat and smooth black or white tile for a modern aesthetic.
- Choose squares of tile that are the same size, shape, and design.
- You can purchase tile at home improvement stores and online.
Pro Tip: The boxes of tile will tell you how much surface area they cover, so you can find out how much you need by measure the length and width of your worktop and multiplying them together to get the total surface area.
-
2Measure the dimensions of the worktop and cut thin cement board to size. Use a ruler or tape measure to find the width and the depth of the worktop. If you have a sink, measure the sink so you can account for it. Then, cut a sheet of cement board about 1⁄2 inch (1.3 cm) thick to the dimensions with a circular saw, or purchase cement board that is cut to the size of your dimensions. Cut out the openings for any sinks or other obstructions you need to fit the board over.[22]
- You can purchase cement board at home improvement stores and can have the board cut to size when you buy it.
-
3Mix together mortar according to the directions on the packaging. Use a bag of quick mixing mortar and combine it with water in a bucket according to the directions on the packaging. The mortar should have the consistency of a thick paste or mud.[23]
- If you add too much water, or the mortar is too thin, add more of the mix to the bucket.
- You can purchase quick mix mortar at hardware stores and online.
-
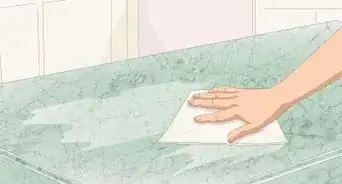
4Spread a 1⁄4 inch (0.64 cm) layer of mortar over the worktop with a hand trowel. Take a hand trowel and scoop out the mortar from the bucket. Spread an even layer over the entire surface of the worktop. Use the hand trowel to create ridges in 1 direction so the layer of mortar is consistent.[24]
- The trowel will leave small ridges in the mortar to help you place your tiles.
-
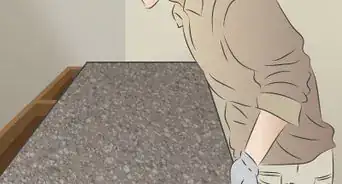
5Screw the cement board onto the worktop. Lay the cement board carefully onto the mortar on the worktop so you don’t crack it. Make sure the edges of the board line up with the edges of the worktop and is pushed flush against the wall. Use a power drill to drive backer board screws placed at the center of the board and 1⁄2 inch (1.3 cm) from the edge all the way around the board. Space the screws out 6 inches (15 cm) from each other.[25]
- The cement board serves as a surface to hold your mortar and tiles.
- You can find backer board screws at home improvement stores and online.
-
6Create a 1⁄4 inch (0.64 cm) layer of mortar over the board with a trowel. Scoop more of the mortar of the bucket and spread it over the surface of the cement board. Use the trowel to create an even layer with ridges that run in 1 direction for consistency.[26]
-
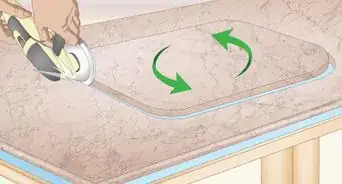
7Lay the tiles and push them into the mortar to secure them. Gently place the tiles on top of the mortar so you can arrange them. Once you’re satisfied with the placement, use your hands to firmly press the tiles into the mortar so they’re firmly installed. Twist the tiles slightly and then realign them to firmly set them into the mortar.[27]
-
8Cut out tiles as necessary to fit uneven spaces with a circular saw. For corners, uneven gaps, or to fit around spaces such as around a faucet or the edge of a sink, measure the space with a ruler or tape measure and mark the dimensions on a square tile. Use a circular saw to cut along the lines so you can trim the tile to size and install it in the mortar on the worktop.[28]
- Be sure to wear safety glasses when you cut tiles with a circular saw to avoid getting shards in your eyes.
-
9Allow the mortar to dry for 3 hours then add grout between the tiles. The mortar will harden after a few hours, and then you can mix together a grout of your choosing according to the directions on the packaging. Apply the grout over tiles using a trowel and wait 15 minutes for it to achieve a putty consistency. Then, use a wet sponge to wipe the grout from the surface of the tiles, rinsing the sponge in a bucket of water frequently.[29]
- The grout will dry in 1-2 hours.
- Choosing a grout color that closely matches the color of the tile will help hide stains when you’re using the finished worktop.


Expert Q&A
-
QuestionHow can I recover butcher block worktops?
 Ryaan TuttleRyaan Tuttle is a Home Improvement Specialist and the CEO of Best Handyman, Inc. in Boston, Massachusetts. With over 17 years of experience, he specializes in building home service businesses, focusing on creating scalable and efficient brands. With the help of his global team, the companies have achieved over 10+ million in sales and received recognition through magazine features, and enjoy partnerships with wikiHow and Jobber field service software. Boston Magazine and LocalBest.com have named Best Handyman Boston the Best Handyman in Boston. Ryaan holds Construction Supervisor and Home Improvement Contractor Licenses.
Home Improvement SpecialistIf you have butcher block counters, you can always refinish them to get them looking nice again.
Things You’ll Need
Painting the Worktops
- Countertop paint
- Foam roller
- Paint tray
- Dish soap
- 150-grit sandpaper
Installing Sheet Laminate
- Laminate sheet
- Electric sander with 80-grit sandpaper
- Pencil or marker
- Circular saw
- Contact cement
- Wooden dowels
- Paintbrush or foam roller
- Trim router with flush-trim bit
- Metal file
Tiling the Worktops
- Tile
- 1⁄2 inch (1.3 cm) thick cement board
- Quick mix mortar
- Bucket
- Grout
- Hand trowel
- Power drill
- Backer board screws


References
- ↑ https://www.bobvila.com/articles/painting-laminate-countertops/
- ↑ Ryaan Tuttle. Home Improvement Specialist. Expert Interview. 24 February 2021.
- ↑ https://www.apartmenttherapy.com/how-to-paint-laminate-kitchen-countertops-apartment-therapy-tutorials-217480
- ↑ https://www.apartmenttherapy.com/how-to-paint-laminate-kitchen-countertops-apartment-therapy-tutorials-217480
- ↑ https://youtu.be/wZ6azl6j9zs?t=33
- ↑ https://www.apartmenttherapy.com/how-to-paint-laminate-kitchen-countertops-apartment-therapy-tutorials-217480
- ↑ https://www.apartmenttherapy.com/how-to-paint-laminate-kitchen-countertops-apartment-therapy-tutorials-217480
- ↑ https://www.apartmenttherapy.com/how-to-paint-laminate-kitchen-countertops-apartment-therapy-tutorials-217480
- ↑ https://www.apartmenttherapy.com/how-to-paint-laminate-kitchen-countertops-apartment-therapy-tutorials-217480
- ↑ https://youtu.be/ZgWCMDA_G0M?t=8
- ↑ https://youtu.be/ZgWCMDA_G0M?t=19
- ↑ https://youtu.be/G-28Wl2f24I?t=88
- ↑ https://youtu.be/ZgWCMDA_G0M?t=75
- ↑ https://youtu.be/ZgWCMDA_G0M?t=97
- ↑ https://youtu.be/ZgWCMDA_G0M?t=254
- ↑ https://www.thisoldhouse.com/laundry/21015892/how-to-laminate-a-countertop-for-a-laundry-room
- ↑ https://www.thisoldhouse.com/laundry/21015892/how-to-laminate-a-countertop-for-a-laundry-room
- ↑ https://www.thisoldhouse.com/laundry/21015892/how-to-laminate-a-countertop-for-a-laundry-room
- ↑ https://www.thisoldhouse.com/laundry/21015892/how-to-laminate-a-countertop-for-a-laundry-room
- ↑ Ryaan Tuttle. Home Improvement Specialist. Expert Interview. 24 February 2021.
- ↑ https://www.bhg.com/kitchen/countertop/resurfacing-kitchen-countertop-ideas/
- ↑ https://www.bhg.com/kitchen/countertop/resurfacing-kitchen-countertop-ideas/
- ↑ https://www.bhg.com/kitchen/countertop/resurfacing-kitchen-countertop-ideas/
- ↑ https://youtu.be/5Ip1eQztuAg?t=211
- ↑ https://youtu.be/5Ip1eQztuAg?t=239
- ↑ https://www.bhg.com/kitchen/countertop/resurfacing-kitchen-countertop-ideas/
- ↑ https://www.bhg.com/kitchen/countertop/resurfacing-kitchen-countertop-ideas/
- ↑ https://youtu.be/aaRP_UY0TLk?t=58
- ↑ https://youtu.be/dHEVImtgCKQ?t=281
About This Article