This article was co-authored by wikiHow Staff. Our trained team of editors and researchers validate articles for accuracy and comprehensiveness. wikiHow's Content Management Team carefully monitors the work from our editorial staff to ensure that each article is backed by trusted research and meets our high quality standards.
This article has been viewed 39,038 times.
Learn more...
Unlike glass and similar materials, curbside recycling programs don’t typically pick up ceramics. However, this doesn’t mean they have to wind up in a landfill. Take your used or broken ceramics to a commercial recycling center or donate them to a thrift store to ensure they're being offloaded responsibly. You could even incorporate a few of your favorite pieces into a DIY home design project if you're not ready to part with them.
Things You Should Know
- If your municipal recycling facility doesn't accept ceramics, contact a nearby commercial recycler that handles items like sinks, toilets, and tiles.
- Consider donating any of your ceramic items that are in good shape to a thrift store or secondhand shop so someone else can enjoy them.
- Get crafty with old ceramics—you could use them to create a mosaic or fill a planter, for instance, or you could crush them up and use them as a filler in gravel or post holes.
Steps
Having Ceramic Goods Recycled Professionally
-
1Look for a recycling center in your area. Head online and run a quick search for “recycling centers” along with the name of your town, city, province, or territory. Many places, particularly larger cities, have commercial recycling centers that handle materials that normal municipal recycling programs don’t.[1]
- Scan the phonebook for listings for local recycling centers.
- Websites like Recycle Nation can be another helpful resource. These sites offer users a search function designed to help them track down nearby recycling and waste disposal facilities.
-
2Find out if the recycling center accepts ceramic items. Get in touch with a representative from the facility and ask what materials they take. If they accept common household fixtures like ceramic sinks, toilets, and tiles, there’s a chance they may be able to take other ceramic items off your hands.[2]
- Facilities that work with brick and cement can also usually recycle ceramic.[3]
- Not all commercial recyclers are equipped to process the same waste products. Some may take construction ceramics, for instance, but not kitchenware like bowls, plates, and mugs.
Advertisement -
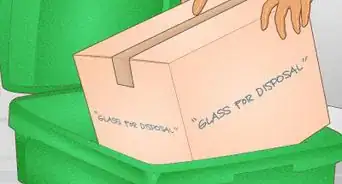
3Load up your ceramics carefully. If the recycling center agrees to take your ceramics, your next step will be to get them ready for transport. Consider the safety of facility’s material handlers and bundle your ceramics tightly in foam wrap or newsprint before placing them in a larger container. This will be especially important if you’re taking in any broken items.
- The recycler may request that your items be sorted or organized a certain way to expedite processing, so be prepared to accommodate their terms if asked.
-
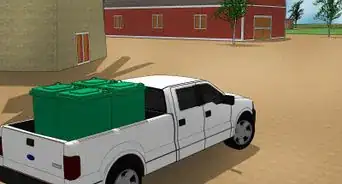
4Drop off your ceramic items at the recycling center. Load up your ceramics and take them to the nearest eligible facility. In some cases, you may be expected to go inside in order to deliver your haul. Other centers may have a drop box or another container stationed near the entrance where you can deposit your items and be on your way.
- If you’re unsure of what to do once you arrive at the recycling center, flag down an employee on site and ask them for assistance.
- Once the facility has received your ceramics, they’ll grind them down and turn them into aggregate material for use in paving, drainage, and insulation projects.[4]


Taking Your Ceramic Items to a Thrift Store
-
1Perform a quick inspection of the items you want to consign. Sort through your ceramic goods one-by-one to appraise their quality. Keep an eye out for chipped, cracked, or broken pieces. Damaged items are less likely to be accepted.
- Some thrift shops and secondhand stores will take lightly chipped or worn items, but others may not.[5]
- Taking a final inventory of your ceramics will also give you a chance to decide whether there’s anything among them you want to keep.
-
2Pack up your ceramics safely. Wrap each piece individually in foam wrap or newsprint before boxing it up. If you think its necessary, you can also surround your items with packing peanuts to provide additional cushioning. Having a protective layer in place will reduce the likelihood of mishaps while you’re en route.[6]
- Keep like items together as much as possible so they’ll be easier to unpack and organize once you get them to their new destination.
- Plastic milk crates are useful for transporting fragile items, as they’re sturdier than ordinary cardboard boxes and features built-in handles for gripping.
-
3Take your items to a nearby thrift store. Most used goods stores are happy to stock their shelves with cookware, serving dishes, and other crockery, provided they’re still in good condition. Even so, it’s a good idea to phone beforehand and ask them about their specific donation criteria. You don’t want to get there only to discover that they don’t accept items like the ones you’ve brought in.[7]
- Donating your unwanted ceramics is the next best thing to having them recycled commercially. The next person that comes along may be delighted to own a piece that you’re no longer interested in keeping.


Upcycling Ceramics
-
1Incorporate ceramics into a DIY design project. Arrange and glue small pieces around an uninspired mirror frame, or assemble them on a plain surface to create a dazzling multicolored mosaic. You could also try filling a glass succulent planter with ceramic fragments in place of stones, marbles, or other small objects. The possibilities are only limited by your imagination![8]
- For your own safety, be sure to pull on a pair of rugged work gloves anytime you’re handling ceramic shards with sharp edges.
- Coming up with creative new ways to enjoy old ceramic goods perfectly captures the idea of reuse, which is one of the central tenants of recycling.
-
2Put prized pieces on display. If you’ve got a chipped teacup or jewelry box that has sentimental value, consider turning turning it into a piece of tasteful decor. Small items can be safely locked away in a cabinet or shadow box for exhibition in your home, where they’ll be enshrined as priceless heirlooms. Each item will be like a tangible memory that you can share with loved ones and visitors.[9]
- Group ornamental ceramics together with related items to tell a story or bring a scene to life. For example, a hand-me-down baking dish could be paired with an antique rolling pin and measuring cups to capture the feeling of cooking Sunday morning breakfast with your grandmother.
-
3Repurpose broken ceramics for various home improvement projects. Throw any damaged pieces you have lying around into a bucket and crush them up with a blunt object until their pieces are a uniform size. You can then use them for the same sorts of jobs as you would professionally recycled materials, such as mixing gravel or promoting proper drainage in holes dug for posts or plants.
- Make sure you’ve ground down the pieces small enough to prevent them from cutting you when you’re working with them later on.


Warnings
- Avoid eating or drinking from broken ceramic kitchenware. If it’s severely damaged, it’s usually best to just let it go.⧼thumbs_response⧽


References
- ↑ https://livegreen.recyclebank.com/because-you-asked-what-should-i-do-with-my-chipped-dishes-and-bowls
- ↑ https://www.youtube.com/watch?v=jxeKHgGojeM&feature=youtu.be&t=67
- ↑ https://livegreen.recyclebank.com/because-you-asked-what-should-i-do-with-my-chipped-dishes-and-bowls
- ↑ https://livegreen.recyclebank.com/because-you-asked-what-should-i-do-with-my-chipped-dishes-and-bowls
- ↑ https://livegreen.recyclebank.com/because-you-asked-what-should-i-do-with-my-chipped-dishes-and-bowls
- ↑ https://glassandpotterysellers.org/packaging_tips.html
- ↑ https://greatist.com/health/how-to-recycle-anything
- ↑ https://www.countryliving.com/diy-crafts/g2416/repurposed-broken-china/?
- ↑ https://averageinspired.com/2014/08/how-to-arrange-a-china-cabinet.html
About This Article