This article was co-authored by Andre Kazimierski and by wikiHow staff writer, Amber Crain. Andre Kazimierski is a Painting Specialist and the Founder and CEO of Improovy, an on-demand house painting service startup. With more than 15 years of experience, Andre and the Improovy team use data and technology to streamline the home improvement process for homeowners and painting contractors. Andre started in the painting industry as a sophomore at Depaul University in Chicago, working with one of the nation’s largest painting companies to launch new cities and territories across the Midwest. Years later, he started 3rd Gen Painting and Remodeling and had a successful exit after growing the company to two different states.
This article has been viewed 37,617 times.
If the paint in your home tests positive for lead, you can remove the paint yourself, as long as you follow certain safety procedures. Our guide will show you how to scrape and wet-sand the paint away while minimizing the risks of lead contamination.
Steps
Testing for Lead
-
1Get a do-it-yourself test kit.[1] If your home was built before 1978 and you want to renovate it, you should test the area first to check for lead.[2] Testing kits are easy to use and available at most home improvement or hardware stores. Because lead is so toxic, the Environmental Protection Agency (EPA) has tested all of the do-it-yourself kits on the market and only supports two particular brands – LeadCheck and DLead.
-
2Scrape off several layers of the paint and test it.[3] Choose a place to test and then scrape away individual layers of the paint so you can check every layer. Test kits react to two chemicals – rhodizonate or sodium sulfide. To be thorough and accurate, get a test kit for each chemical. The results are shown by a test strip or swab that changes color when it comes in contact with one of these chemicals.
- If you’re color blind, have a friend or family member confirm your results.
- Do-it-yourself kits are not always reliable. Results may be contaminated by other materials present in your test sample.
Advertisement -
3Consider hiring a certified professional to test for lead. Professionals use x-ray fluorescence technology to determine which paint in your home contains lead. These contractors are certified in lead paint detection and removal.[4] If lead is detected, they will assist you with determining a removal strategy.
-
4Consult the Department of Housing and Urban Development website.[7] If you live in the United States, the Department of Housing and Urban Development (HUD) can provide a lot of information about lead-based paint, as well as guidelines for lead paint testing and removal. Information is also provided about laboratories near you that can help you test for lead.


Creating a Safe Environment for Removal
-
1Shut off all ventilation systems in your home.[8] This include fans, central heat and air circulation systems and furnaces. Leaving these systems on will result in lead paint dust being spread throughout your home. Close all vents.
- Keep all windows closed to prevent dust from blowing around.
-
2Block off all vents and openings with plastic sheeting. Seal off air intakes, ductwork, dryer vents, bathroom vents, doorways, windows and other openings to your home with one-mil (.001 inch) polyethylene sheeting. This heavy-duty plastic sheeting will help minimize how much dust gets dispersed through the air.[9]
- Seal doorways with poly sheeting. Close off and seal any room in which lead paint is not being removed. Exterior doorways also should be sealed.
- Secure the plastic sheeting in place with duct tape. You can get these materials at most hardware stores.
-
3Cover the floor with plastic sheeting.[10] Tape the plastic to the floor or baseboard at least five feet beyond the area you’re working in. Seal the side of the plastic so dust can’t get under it. If you have wall-to-wall carpet, be very thorough. Once lead paint dust gets into carpet, it can be very hard to remove.
- You could tape the plastic to the baseboard instead, but be very careful, since this could strip the paint off when you remove it.[11]
-
4Remove all furniture and other items from the area. Everything, including furniture, bedding, drapes, dishware, toys, food, rugs, etc.) must be removed to avoid contamination. If it can’t be removed, cover it with two sheets of heavy duty plastic. Secure the sheeting in place with duct tape so that all seams are sealed.[12]
-
5Limit access to the work area. Lead is extremely hazardous. Children and pregnant women should never, under any circumstances, do any lead paint removal work. Everyone, including pets, must stay out of the work area until clean-up is complete.
- If necessary, make arrangements for temporary living quarters.
- Seal off and restrict the work area to only others working on the project.[13]
-
6Wear appropriate protective clothing.[14] Wear a long-sleeved shirt, long pants and washable shoes. Disposable coveralls are a good option. Use paper-bootie shoe covers and remove them when you leave the work area. You’ll also need gloves, goggles and a half mask respirator equipped with a HEPA (High Efficiency Particulate Air) filter to protect your lungs.[15]
- Only HEPA respirators can filter lead dust and fumes. Paper or fabric dust masks will not protect you.[16]
- At the end of the day, take a shower as soon as possible to remove any lead dust on your skin.
- Always wash your work clothes in a separate load from the rest of the laundry.


Getting Rid of the Paint
-
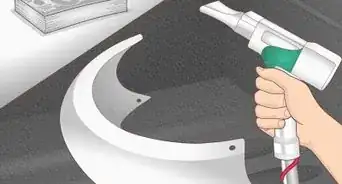
1Wet down interior surfaces that contain lead paint.[17] “Working wet” helps to keep the dust levels down. The lead dust will cling to the wet surfaces, allowing you to easily wipe away loose paint without causing a massive dust cloud. Before disturbing any painted surface, always use a water-filled spray bottle to wet the area.
-
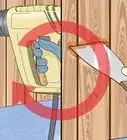
2Scrape off the paint.[18] Wet the surface down again. Using a 2 inch carbide scraper or wire brush, scrape off the loose and flaking paint.[19] Start at the top and work your way down. Keep cloths and an empty bucket nearby. Continually wipe up water, dirt, sludge and paint flakes as you work and wring out the rag into the bucket.
- You can also use a HEPA vacuum intermittently to clean up debris.
- Continually wet the surface with the spray bottle as you work to keep it moist.
-
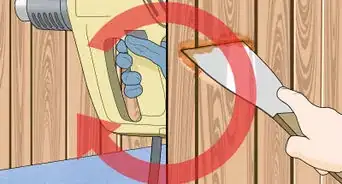
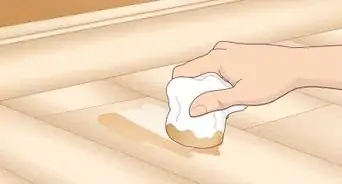
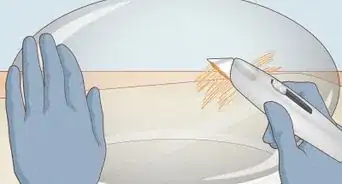
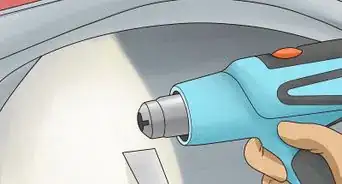
3Sand off the remaining paint. [20] Continue to work wet by moistening the surface before you start sanding. Never sand lead paint on a dry surface. Wet hand sanding with a coarse-grit sanding sponge or using an electric sander equipped with a HEPA filtered vacuum attachment are the only techniques that should be applied.[21]
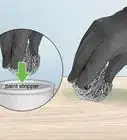
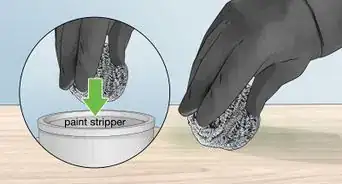
- Liquid paint removers can be used safely on small areas, like windowsills, doors and woodwork. Always read the warning labels and follow the instructions when using these products.[22]
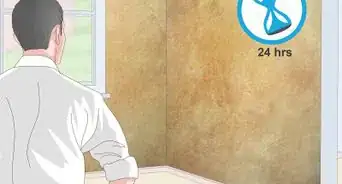
- Clean up the debris after every work day. Mist the debris with water, sweep it up and put it in double 4-mil or 6-mil plastic garbage bags. Wet-dust and wet-mop all surfaces.[23]
-
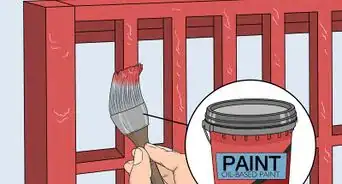
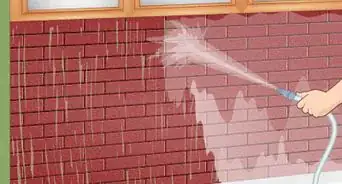
4Use wet methods on exterior surfaces that contain lead paint. Do exterior work on calm days with nice weather. Wet-misting and vacuuming should be used to control the dust and paint chips. Cover the ground around the house with heavy plastic sheeting. Make sure the outer edges of the sheeting are raised so that it will properly trap the debris.
- Removing all of the exterior paint isn’t necessary, and would cost you a lot of time and money. You only need to remove paint where it is loose and flaking off.[24]


Doing the Final Clean Up
-
1Vacuum the area with a HEPA vacuum.[25] HEPA vacuums, which can be obtained at any hardware store, come equipped with a certain kind of filter that effectively traps very fine particles and allergens. When you're dealing with lead paint dust, only a HEPA vacuum is sufficient for the job.[26] Use the vacuum to pick up as much of the paint chips and dust as possible. Be sure to get in the nooks and crannies.
- Double check the cracks and corners, especially around windows, for debris. Use an attachment to get into the hard to reach areas.
- Do not remove your respirator or any of your protective gear before or during cleaning.
-
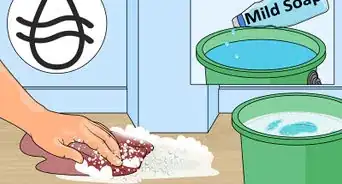
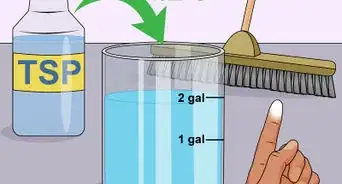
2Wipe everything down.[27] Mix together equal parts of an all-purpose cleaner and water in a spray bottle. Soak a heavyweight paper towel in the solution and begin wiping the work surface. Start at the top and work your way down, so that the debris and residue are always being pushed in a downward direction.
- When the paper towel surface gets dirty, toss it into a bucket and get a new one.
- Make sure the paint chips you wipe off also go into the bucket.
-
3Rinse the surface with clean water.[28] Fill a bucket with water, dip a clean cloth in it and start wiping everything down, starting from the top and working your way down. Always wipe horizontal surfaces in the same direction. Rinse and wring out the cloth in the bucket often. Change the water in the bucket as soon as it starts getting cloudy.
-
4Spray the heavy duty plastic with water.[29] Use the spray bottle to wet down the areas of the plastic that are contaminated with lead to keep the dust in place. Begin to fold the plastic inward, starting at the corners. Continue folding until the plastic is fully rolled up on the floor. Put it in 6-mil garbage bags, along with all of the debris you collected in the bucket.
-
5Vacuum the floor again.[30] Use the HEPA vacuum to suck up all debris on the floor. Be sure to get into the corners and edges of surfaces, where debris can hide. If you’re working around old wooden floors, be extra thorough. These older floors have a lot have cracks that the dust can settle in.
-
6Wash and rinse the floor.[31] Use the all-purpose cleaner mixture you used earlier to wipe down the floor thoroughly with a heavy duty paper towel. Make sure the paint chips you wipe up are wrung out into the bucket. After you've washed it, refill your bucket with clean water and repeat the rinsing technique from earlier – dip a cloth in the clean water, wipe down the surface, rinse and wring out the cloth, repeat.
- Remember to change the water in the bucket often.
- Double-bag all debris and paint chips in 6-mil plastic garbage bags and throw them in the trash.[32]
- Thoroughly wash off your tools and respirator. Be sure to throw away the respirator filters and sanding sponges.


Expert Q&A
-
QuestionCan you scrape lead paint?
 Andre KazimierskiAndre Kazimierski is a Painting Specialist and the Founder and CEO of Improovy, an on-demand house painting service startup. With more than 15 years of experience, Andre and the Improovy team use data and technology to streamline the home improvement process for homeowners and painting contractors. Andre started in the painting industry as a sophomore at Depaul University in Chicago, working with one of the nation’s largest painting companies to launch new cities and territories across the Midwest. Years later, he started 3rd Gen Painting and Remodeling and had a successful exit after growing the company to two different states.
Painting SpecialistYou can, but it's best to wet sand it so the particles you're scraping don't go into the air. Don't use orbital sanders or anything like that! Remember to encapsulate the loose paint and to properly dispose of it. -
QuestionHow can you tell if it's lead paint?Andre KazimierskiAndre Kazimierski is a Painting Specialist and the Founder and CEO of Improovy, an on-demand house painting service startup. With more than 15 years of experience, Andre and the Improovy team use data and technology to streamline the home improvement process for homeowners and painting contractors. Andre started in the painting industry as a sophomore at Depaul University in Chicago, working with one of the nation’s largest painting companies to launch new cities and territories across the Midwest. Years later, he started 3rd Gen Painting and Remodeling and had a successful exit after growing the company to two different states.
Painting SpecialistIf you can't do a proper test and your house was built before 1978, you can simply assume there's a great possibility of lead painting. Make sure you're using safe practices and the proper equipment to protect yourself when removing or painting over the lead paint.


References
- ↑ https://www.houselogic.com/remodel/painting-lighting/home-lead-paint-tests/
- ↑ Andre Kazimierski. Painting Specialist. Expert Interview. 26 January 2022.
- ↑ https://www.houselogic.com/remodel/painting-lighting/home-lead-paint-tests/
- ↑ Andre Kazimierski. Painting Specialist. Expert Interview. 26 January 2022.
- ↑ https://www.health.ny.gov/publications/2502/
- ↑ Andre Kazimierski. Painting Specialist. Expert Interview. 26 January 2022.
- ↑ http://portal.hud.gov/hudportal/HUD?src=/program_offices/healthy_homes/lbp/hudguidelines
- ↑ http://www.familyhandyman.com/smart-homeowner/home-safety-tips/how-to-remove-lead-paint-safely/view-all
- ↑ http://www.familyhandyman.com/smart-homeowner/home-safety-tips/how-to-remove-lead-paint-safely/view-all
- ↑ Andre Kazimierski. Painting Specialist. Expert Interview. 26 January 2022.
- ↑ http://www.familyhandyman.com/smart-homeowner/home-safety-tips/how-to-remove-lead-paint-safely/view-all
- ↑ https://www.health.ny.gov/publications/2502/
- ↑ https://www.health.ny.gov/publications/2502/
- ↑ http://www.familyhandyman.com/smart-homeowner/home-safety-tips/how-to-remove-lead-paint-safely/view-all
- ↑ Andre Kazimierski. Painting Specialist. Expert Interview. 26 January 2022.
- ↑ https://www.health.ny.gov/publications/2502/
- ↑ http://www.familyhandyman.com/smart-homeowner/home-safety-tips/how-to-remove-lead-paint-safely/view-all
- ↑ http://www.familyhandyman.com/smart-homeowner/home-safety-tips/how-to-remove-lead-paint-safely/view-all
- ↑ Andre Kazimierski. Painting Specialist. Expert Interview. 26 January 2022.
- ↑ http://www.familyhandyman.com/smart-homeowner/home-safety-tips/how-to-remove-lead-paint-safely/view-all
- ↑ https://www.health.ny.gov/publications/2502/
- ↑ https://www.health.ny.gov/publications/2502/
- ↑ https://www.health.ny.gov/publications/2502/
- ↑ http://www.familyhandyman.com/smart-homeowner/home-safety-tips/how-to-remove-lead-paint-safely/view-all
- ↑ http://www.familyhandyman.com/smart-homeowner/home-safety-tips/how-to-remove-lead-paint-safely/view-all
- ↑ https://www.health.ny.gov/publications/2502/
- ↑ http://www.familyhandyman.com/smart-homeowner/home-safety-tips/how-to-remove-lead-paint-safely/view-all
- ↑ http://www.familyhandyman.com/smart-homeowner/home-safety-tips/how-to-remove-lead-paint-safely/view-all
- ↑ http://www.familyhandyman.com/smart-homeowner/home-safety-tips/how-to-remove-lead-paint-safely/view-all
- ↑ http://www.familyhandyman.com/smart-homeowner/home-safety-tips/how-to-remove-lead-paint-safely/view-all
- ↑ http://www.familyhandyman.com/smart-homeowner/home-safety-tips/how-to-remove-lead-paint-safely/view-all
- ↑ https://www.health.ny.gov/publications/2502/
About This Article

To remove lead paint, start by turning off the ventilation systems, like fans or central air systems, to keep the paint dust from spreading around your home. Additionally, wear goggles and a respirator mask with a HEPA filter to protect yourself from lead dust and fumes. Next, spray the painted surface with water before scraping the paint off with a scraper or wire brush, starting at the top and working your way down. Then, wet the surface again and use coarse-girt sand paper to sand off the remaining paint. For tips on how to remove lead paint from exterior surfaces, read on!