This article was co-authored by Alberto DeJesus. Alberto DeJesus is a Construction Specialist and the CEO of DeJesus Industries. With more than four years of experience, he specializes in high-end real estate development and construction. Alberto and DeJesus Industries have been featured on NBC News and have worked with numerous well-known companies, including Mazda, Amazon, and CVS. Alberto holds a Bachelor’s degree from Boston University.
There are 7 references cited in this article, which can be found at the bottom of the page.
This article has been viewed 19,769 times.
Maybe it once served as the perfect way to seal a gaping baseboard and floor, or maybe it's just another obstacle you've encountered while refinishing a home. Whatever the reason, now it's time for that quarter round trim to go. Removing quarter round trim is a quick and simple process that almost anyone can accomplish. It only requires one or two tools, a little bit of elbow grease, and your own two hands.
Steps
Part One: Preparing to Remove the Quarter Round Trim
-
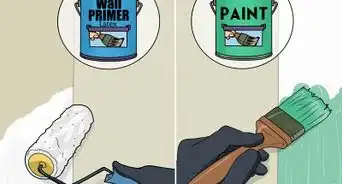
1Work slowly and carefully to prevent damaging the walls or baseboards. The process of removing quarter round trim has the potential to be damaging, so be aware of what condition you would like to leave the floors and baseboards in after removing the trim. Ripping the trim off the wall to quickly could cause the nails to leave larger holes behind in the floor or baseboard, and could also bend or even snap the trim in half. Not using your putty knife gently on the walls could leave scuff marks that may need to be re-touched with paint.[1]
- If you plan to replace the floors or baseboards, or if you are completing a demolition job, you won’t need to worry as much about the damage.
- Working patiently will minimize any damage but it may take more time to complete the project.[2]
-
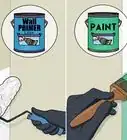
2Wear safety gear to protect you from hazards in the area. Whether you are a full-time construction worker or an occasional home improvement enthusiast, exposure to hazards such as wood dust or certain chemicals can add up over time and damage your health.[3] Depending on where you are working, you may need special gear to protect yourself.[4]
- Any wood shavings in the area may require you to use a respirator, or construction areas may require a hardhat.[5]
- Working with unfinished wood can give you splinters, so wear thick gloves to prevent them.
- Have a first-aid kit on hand in case of injury.
Advertisement -
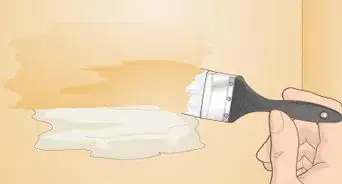
3Purchase a small putty knife or prybar. Without one of these tools, removing the trim will be very difficult. You will use this to slide under and behind the trim and pry it from the walls. The trim is attached with nails, so the primary goal will be pulling the nails out from either the baseboard or the floors.[6]
- You can use any type of flat tool that is no wider than 3 inches (7.6 cm).[7]


Part Two: Removing the Trim
-
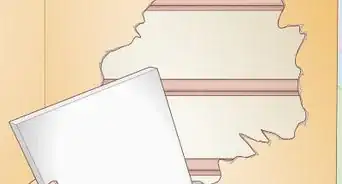
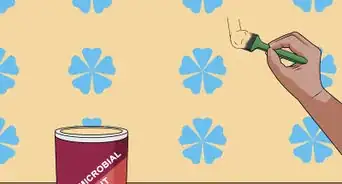
1Locate any gaps between the trim, the wall, and the baseboard. If there is significant gapping all across the trim, any space will work. If you cannot find any gaps because the baseboard was painted or caulked to the trim, you will need to score a straight line directly above and parallel to the trim where it meets the baseboard with a sharp X-acto knife in order to open up the space.
- Scoring the trim slowly and carefully will allow for the least damaging results.[8]
-
2Slide the putty knife carefully into a gap. Your knife should be near a nail, but not right next to it. Most quarter inch round disguises the nails used to hold it in place, so you may have to try a few times. Gently tap the putty knife in place with the heel of your hand to slide it into the gap.[9]
- If you cannot slide the putty knife in with your hand alone, try sliding in a piece of mail first and then insert the putty knife between the trim and the mail as a buffer.[10]
- If this still doesn’t work, you can tap a hammer against the back of your putty knife as it is positioned over the gap.[11]
-
3Wiggle the knife back and forth once inserted to loosen the trim. Moving the putty knife either up and down if you placed it under the trim, or towards and away from you if you placed it behind the trim, you will start to loosen the trim. This doesn’t have to be an aggressive motion, but using increasing force will help if you feel stuck.
- If there are multiple gaps and the one you are working on seems stuck, move to another gap.
- Keeping the back-and-forth motion slow will prevent the trim from snapping.[12]
-
4Look for the nails in the trim as it begins separating from the wall. As you wiggle your putty knife and the trim begins separating from the wall, you should be able to see if the nails in the trim are attached to the baseboard or floor. Your goal is to pull out as many of the nails as possible along with the trim so you do not have to go back and remove them from the baseboard or floor.
- If the trim is nailed into the floor, place the putty knife underneath the trim and continue pulling upward in the same wiggling motion. If the trim is nailed into the baseboard, place the putty knife between the trim and the baseboard and wiggle it as if you are trying to pull the trim toward you and away from the wall.
- Quarter round trim is usually nailed into the floor unless the floor is tile.[13]
- Continue this motion across the trim until is has loosened all the way across its length.[14]
-
5Pry the trim from the wall with the nails still attached. If the trim hasn’t completely separated from the wall at this point, gently pull the trim with both hands away from the wall. If you are less concerned with damage, you can pull more quickly and aggressively. Once the trim is removed, you may see some remaining nails in the wall. These can be removed with pliers or the back of a hammer.
- The nails used to attach quarter round trim are generally quite long and sharp, so be mindful of this as you completely detach the trim.[15]


Things You'll Need
- Quarter round trim
- A putty knife or prybar no greater than 3 inches (7.6 cm)
- Thick gloves to prevent splinters
- A ventilator mask safe for wood (if you will be exposed to wood shavings)
- A first aid kit with alcohol swabs and band-aids in case of injury


References
- ↑ Alberto DeJesus. Construction Specialist. Expert Interview. 15 December 2021.
- ↑ https://www.youtube.com/watch?v=r7UVyGRkL4I
- ↑ Alberto DeJesus. Construction Specialist. Expert Interview. 15 December 2021.
- ↑ https://www.osha.gov/SLTC/wooddust/index.html
- ↑ https://www.agc-ca.org/uploadedFiles/Member_Services/Safety-Health/Safety_Bulletins/sb08-6.pdf
- ↑ Alberto DeJesus. Construction Specialist. Expert Interview. 15 December 2021.
- ↑ https://www.youtube.com/watch?v=N9M9f9uwKYY
- ↑ https://www.youtube.com/watch?v=qCEqOzLm9V0
- ↑ https://www.youtube.com/watch?v=pE_995ju8zM
About This Article