This article was medically reviewed by Luba Lee, FNP-BC, MS and by wikiHow staff writer, Christopher M. Osborne, PhD. Luba Lee, FNP-BC is a Board-Certified Family Nurse Practitioner (FNP) and educator in Tennessee with over a decade of clinical experience. Luba has certifications in Pediatric Advanced Life Support (PALS), Emergency Medicine, Advanced Cardiac Life Support (ACLS), Team Building, and Critical Care Nursing. She received her Master of Science in Nursing (MSN) from the University of Tennessee in 2006.
This article has been viewed 18,301 times.
Getting splinters is a fact of life for curious kids, and they usually want you to get them out right away! Start by using a soothing voice and calm demeanor to reassure them that you can help. Then, clean and sterilize tweezers—and, if the splinter is embedded just below the surface, a pin—to pluck out the splinter. You might also consider using alternative removal methods if you think the child will tolerate them better. After you get the splinter out, apply an antibiotic ointment to help the skin heal.[1] Don’t be afraid to call the doctor if you need advice or assistance.
Steps
Keeping the Child Calm
-
1Use a soothing voice to tell the child you can help them. A child is likely to be very upset about having a splinter, especially if it hurts even a little. They may also be apprehensive about you removing it, out of fear that it will hurt even more. Use your best “calming adult” voice to ease their anxiety.[2]
- Clearly state that you’ll help them. For a small child, try something like: “Oh no, Molly has an ouchy splinter. Don’t worry, sweetie, Mommy will make the ouchy go away.”
- Or, for a child who’s a bit older: “Ow, I know splinters like that hurt, David. Let’s go wash up and I’ll take care of that for you.”
-
2Hold a small child on your lap or a helper’s lap. Embracing the child on your lap is a good way to help calm them down. Also, if they’re being squirmy out of pain or anxiety, it will be easier for you to keep them a bit more still and steady this way.[3]
- You may find it easier to have another trusted adult hold the child on their lap while you work to remove the splinter. However, it’s usually possible to do the entire job yourself.
Advertisement -
3Explain the process or distract them, depending on the child. Some kids may want to know exactly what’s happening and watch you work. In this case, explain what you’ll be doing step-by-step. Other kids, though, will do much better if their mind is elsewhere.[4]
- Keep your explanation simple: "I'm going to clean off my hands and your skin, then clean the tweezers. After that, I'll use the tweezers to pinch that tiny bit of the splinter that's sticking out. Then I'll pull the whole splinter out. You won't feel a thing!"
- To distract the child, sing some favorite songs together or play a game like “I spy.” Or, if necessary, turn on the TV or your tablet.
- Use your best judgment to determine if a child is better off with explanations or distractions.
-
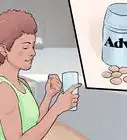
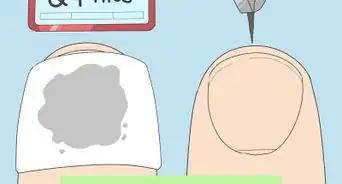
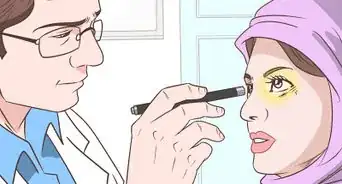
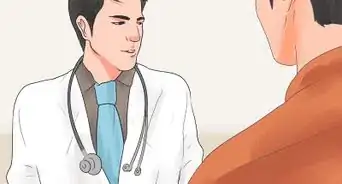
4Call the doctor for deep, large, or poorly-located splinters. If the splinter is a large shard that has caused a significant puncture, or if it is embedded deep under the skin, leave it in place and call your child’s doctor. Or, if any type of splinter is near a sensitive area—most especially in or near an eye—call the doctor as soon as possible.[5]
- It’s difficult to quantify when a splinter becomes “too big” or “too deep” to remove on your own. It may be best to consider whether you’d want to pull a splinter like that from your own skin.
- The doctor may advise you to bring the child in for splinter removal, give you advice on how to remove it yourself, or, in some cases, even tell you to leave it to work its own way out of the skin.


Pulling an Exposed Splinter with Tweezers
-
1Wash your hands and the area with the splinter. Wash your own hands with soap and water, then gently wash and rinse the child’s skin over and around the splinter. Don’t rub their skin vigorously or you may drive the splinter deeper. Gently pat the washed area dry with a clean towel.[6]
- Washing up helps to reduce the risk of transmitting bacteria into the wound.
- After washing the area with the splinter, you may want to soak it in clean, warm water for 5-10 minutes. This will soften their skin and may help loosen the splinter. Don’t soak their skin if they have a wood splinter, however, or it will swell and become harder to pull out.
-
2Wash and sterilize your tweezers. Clean and rinse the tweezers with soap and water to remove any dirt or debris. Then, do one of the following to sterilize the tweezers:[7]
- Option 1: Hold the tips of the tweezers in the flame of a match for 10-15 seconds. Let the tweezers cool completely on a clean cloth before proceeding.
- Option 2: Wet the edge of a clean cloth or a cotton ball with rubbing alcohol, then thoroughly wipe the tips of the tweezers. Lay the tweezers on a clean cloth for 30-60 seconds to let the alcohol evaporate.
-
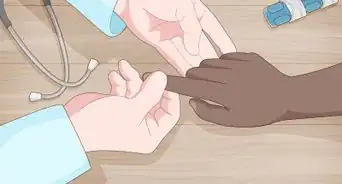
3Grasp the exposed tip of the splinter with the tweezers. Use a magnifying glass, if necessary, so you can clearly see the exposed end of the splinter. Carefully pinch the splinter’s tip between the teeth of the tweezers, making sure not to pinch any skin.[8]
- If there isn’t enough exposed splinter to grip with the tweezers, try using a sterilized pin to peel back a bit of the skin to you can grasp the splinter. Otherwise, call your child’s doctor.
- If you need to use a magnifying glass, or if the child is especially squirmy, you may want to enlist a helper if possible.
-
4Pull opposite to the direction the splinter entered. Your goal is to remove the splinter at the same angle it entered the skin, just in the reverse direction. So long as you have a good grip on the tip, the splinter should come right out with minimal trouble.[9]
- If you lose your grip once, try again. After 3 failed attempts, call the doctor.
- Likewise, if the splinter tip breaks off and the remainder is inaccessible, call the doctor.
- This is a good time to offer encouraging words: “Look, the splinter’s all gone already! You were so brave, Mary.”
-
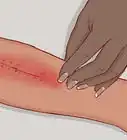
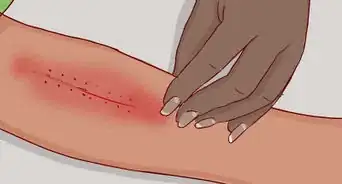
5Wash the area again, and bandage it if needed. To further reduce the risk of infection, give the area of the splinter another good washing with soap and water, then pat it dry with a clean towel. If there is minor bleeding, apply pressure with a clean cloth for up to 5 minutes.[10]
- Many splinters don’t require bandaging. If there was some bleeding, however, or if the child will feel better with their “boo-boo” covered up, place a small amount of antibiotic ointment on the wound, then cover it with an adhesive bandage.
- Call the doctor if there is substantial bleeding that won’t stop after 5 minutes of applying pressure, or if any signs of infection—like swelling, redness, warmth, or discharge—appear over the next 1-5 days.


Exposing a Buried Splinter with a Pin
-
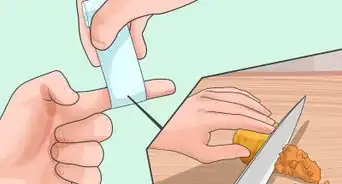
1Wash and sterilize a pin along with your tweezers. Just like with the tweezers, start by cleaning the pin with soap and water. Then, sterilize it by holding a flame to it for 10-15 seconds or wiping it with rubbing alcohol.[11]
- As when using tweezers alone, wash your hands and the area of the splinter with soap and water before cleaning your tools.
- Make sure the pin is cool and/or dry before using it.
- Don’t use a pin that is bent, has a blunted tip, or has any rust spots on it.
-
2Ice the area to reduce pain sensitivity. You’ll barely be pricking the child’s skin, so the pin won’t actually cause much pain. However, the thought of you sticking a pin into their skin may make the child to react in an exaggerated fashion. Icing the area down beforehand may help numb the pain and calm their nerves.[12]
- Never apply ice directly to bare skin. Wrap a bag of ice cubes or an ice pack in a clean towel, and hold it to the splinter for 1-3 minutes.
-
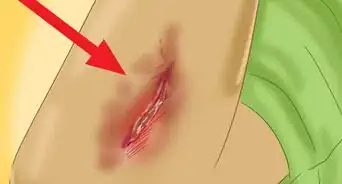
3Prick the skin just beyond the head of the splinter. Your goal is to peel up the very thin layer of skin that’s covering the splinter’s head. Hold the pin at a 45-degree angle to the skin, and aim for the point where the splinter entered the skin. Press just the very tip of the pin into the skin—you only need to go as deep as the head of the splinter.[13]
- If the child is curious about what’s happening, explain it simply: “OK, now you’ll feel just a tiny pinch as I stick the tip of the pin into your skin.”
- For many children, this is the best time to make sure they’re distracted. Recruit a helper if possible, especially since you’ll be handling both the pin and the tweezers.
-
4Lift up the skin with the pin to expose the splinter’s head. Keep the tip of the pin embedded under the skin and lift gently upward and toward the head of the splinter. This should lift away the skin just enough for you to access the head of the splinter with your tweezers.[14]
- With most children, you’ll only get one chance to use the pin. If you aren’t able to access the splinter, you’re probably better off calling the doctor rather than testing the child’s patience again.
-
5Remove the splinter with tweezers as normal. While keeping the pin in position, use the tweezers to pluck out the splinter. As with an exposed splinter, pull it out at the angle of entry but in the opposite direction. Wash the area again with soap and water after you’re done.[15]
- Use an antibiotic ointment and a bandage if there’s a bit of bleeding or if it makes the child feel better.
- If you can’t get all of the splinter out, or if you notice any signs of infection (like redness or swelling), call the doctor.


Using Tape, Glue, or Other Methods
-
1Apply tape over the splinter and peel it away. Grab a roll of sticky tape you have at home, like transparent tape, electrical tape, or duct tape. Cut a small piece of tape that’s about twice as long as the splinter and press it firmly over the splinter and surrounding skin. Peel the tape away slowly and steadily, opposite to the direction that the splinter entered.[16]
- The head of an exposed splinter should stick to the tape and pull out the entire splinter.
- This method won’t work with an embedded splinter.
- Wash your hands and the area around the splinter before and after using the tape.
-
2Peel away a layer of dried school glue over the splinter. Squeeze a small dab of white school glue onto the exposed head of the splinter, then smear it into a thin layer using a clean finger. Wait 5-10 minutes for the glue to dry, then use your fingernails to peel up the corner of the glue on the edge closest to the embedded tip of the splinter. Peel the glue away slowly, working in the opposite direction of the splinter’s entry.[17]
- This method works in the same way as using tape, but some splinters may be a bit more likely to stick to the glue.
- As always, wash your hands and the area around the splinter before and after using the glue.
-
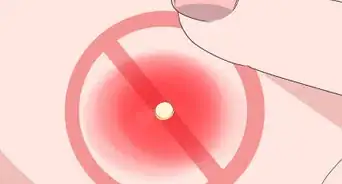
3Try leaving small, painless splinters alone for a few days. If an embedded splinter is around 0.125 in (3.2 mm) or smaller and isn’t causing any pain or discomfort, your best bet may be to simply leave it alone. Over a period of several days, the splinter will work its way to the surface of the skin, where it will either fall out on its own or be easier to pluck out.[18]
- If the splinter starts causing pain, or if you notice any signs of infection like redness, swelling, or discharge, call the child’s doctor.
- It’s fine to play it safe and call the doctor before deciding whether to leave a splinter in place. Depending on the type of splinter and other factors, they may prefer that you bring the child in to have even a tiny splinter removed.
-
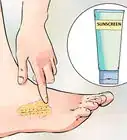
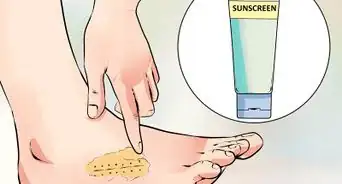
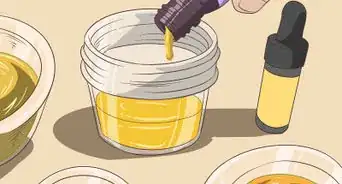
4Consider home remedies to draw the splinter to the surface. If the splinter is embedded and your child is not eager to have you use a pin to expose it, it may be worth your while to give a home remedy a try. Just keep in mind that the evidence for their effectiveness ranges from limited to nonexistent.
- Try, for instance, soaking the area in white vinegar or warm water with epsom salts for 15-30 minutes.
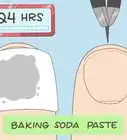
- Or, try spreading one of the following over the splinter, covering it with an adhesive bandage, and waiting 24 hours before using tweezers:
- Ichthammol ointment (“drawing salve”), available online or in some pharmacies.
- A thick paste made of baking soda and water.
- A small square of a banana peel.
- A small piece of bread soaked in warm milk.


Things You’ll Need
- Tweezers
- Soap and water
- Rubbing alcohol or matches (for sterilizing)
- Pin (optional)
- Magnifying glass (optional)
- Adhesive bandage (optional)


References
- ↑ https://www.healthychildren.org/English/health-issues/conditions/skin/Pages/Splinters-and-Other-Foreign-Bodies-in-the-Skin.aspx
- ↑ https://www.cincinnatichildrens.org/health/s/splinters
- ↑ https://www.babycenter.com/0_splinters_11271.bc
- ↑ https://www.whattoexpect.com/toddler/childhood-injuries/splinters-in-children.aspx
- ↑ https://www.cincinnatichildrens.org/health/s/splinters
- ↑ https://www.cincinnatichildrens.org/health/s/splinters
- ↑ https://www.cincinnatichildrens.org/health/s/splinters
- ↑ https://www.cincinnatichildrens.org/health/s/splinters
- ↑ https://www.cincinnatichildrens.org/health/s/splinters
- ↑ https://www.cincinnatichildrens.org/health/s/splinters
- ↑ https://www.cincinnatichildrens.org/health/s/splinters
- ↑ https://www.cincinnatichildrens.org/health/s/splinters
- ↑ https://www.cincinnatichildrens.org/health/s/splinters
- ↑ https://www.cincinnatichildrens.org/health/s/splinters
- ↑ https://www.whattoexpect.com/toddler/childhood-injuries/splinters-in-children.aspx
- ↑ https://www.babycenter.com/0_splinters_11271.bc
- ↑ https://www.babycenter.com/0_splinters_11271.bc
- ↑ https://www.cincinnatichildrens.org/health/s/splinters
- ↑ https://www.healthychildren.org/English/health-issues/conditions/skin/Pages/Splinters-and-Other-Foreign-Bodies-in-the-Skin.aspx
About This Article