This article was co-authored by Melissa & Michael Gabso. Melissa and Michael Gabso are the Owners of MC Construction & Decks based in Los Angeles, California. With over ten years of experience, they specialize in exterior and interior remodeling and redesign, including kitchen, bathroom, and deck construction. MC Construction & Decks also provides plans and permitting services and is known for backyard beautification projects. MG Construction & Decks has been rated as one of the top contractors in the Los Angeles area year after year.
There are 8 references cited in this article, which can be found at the bottom of the page.
This article has been viewed 26,489 times.
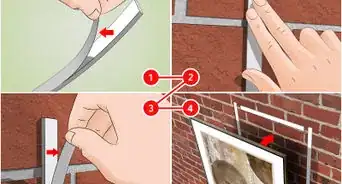
Repairing loose bricks needs to be done for safety and to cover unsightly gaps in surfaces. It's done by removing the old mortar and spreading new mortar around the brick. You'll have to blend the mortar lines, keep them moist, and protect them from nature for a few days, but your home will look good and stay strong for years to come.
Steps
Removing the Old Mortar
-
1Put on your safety gear. Wear safety glasses, good leather gloves, a long-sleeved shirt, and a dust mask to stay safe. You'll be kicking up a lot of dust and mortar fragments. Protect your eyes by wearing safety glasses. When using the chisel or an angle grinder, put on a respirator to ensure you don't breathe in airborne mortar particles.[1]
- Make sure the area is well-ventilated, especially if you use a grinder.
-
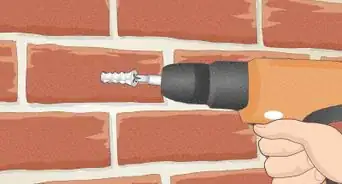
2Chip away the old mortar with a hammer and chisel. Point a flat-headed chisel directly at the mortar around the loosened brick. Lay the flat side of the chisel firmly on the brick and strike at the edge of the mortar connecting it to the brick, as though you are trying to slide a spatula under a pancake. Work around the brick, breaking apart the mortar one side at a time. Be careful not to strike the brick and damage it.[2]Advertisement
-
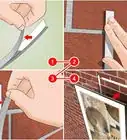
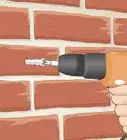
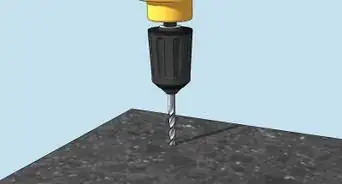
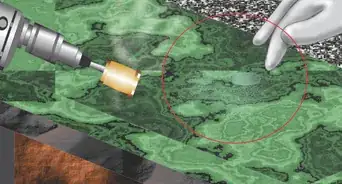
3Cut into stubborn mortar with an angle grinder. Pick up a 4 in (10 cm) angle grinder at the home improvement store. Start with the vertical joints. Position the grinding disc to cut 1⁄2 in (1.3 cm) into the mortar. Repeat this with the horizontal joints to free the brick.[3]
- Make sure that you choose a masonry-specific grinding disc.
- Be very careful when using the angle grinder. It's easy to slip and cut into the brick.
- Before using the grinder on bricks you plan to use, it's best to practice on an old brick or a cheap practice brick.
-
4Brush away the debris with a whisk broom. Clear out the wall space with a mortar whisk broom or another stiff-bristle brush. If you have an air compressor, it'll also help clear out any remaining dust.[4]
- Remember to wear your protective eye wear and face mask, especially if you use an air compressor. You should also watch where the debris goes so that you don't hurt yourself or others.
-
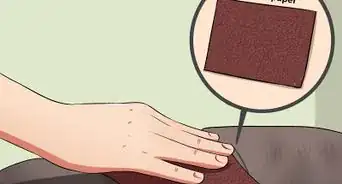
5Chisel the old mortar off the brick. Set the brick down on a flat surface. Hold the chisel at an angle above it. Hammer the chisel quickly and lightly while moving the tip over the mortar.[5]
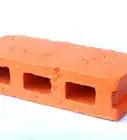
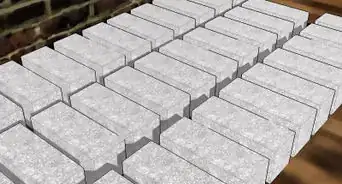
- If the brick needs to be replaced, bring the old brick to the store. Try to match the size and color. You can do the same thing with a piece of the mortar.[6]
-
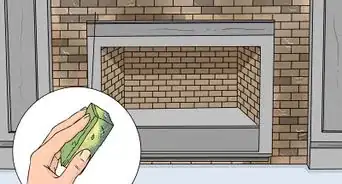
6Brush and rinse off the brick. Clear off the debris with a wire brush or air compressor. Finish cleaning the brick by spraying it with water. Keep the brick and wall hole damp with a hose or misting bottle so the mortar sticks and cures better.[7]


Mixing Mortar
-
1
-
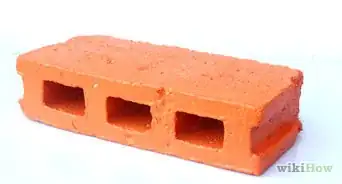
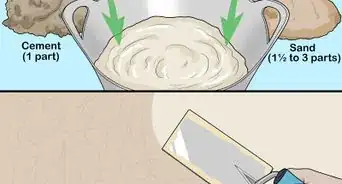
2Place dry mortar mix in a bucket. The kind of product you want is labeled as mortar mix. Avoid sand or concrete mixes. Add the amount of mortar you need into a mixing container, such as a wheelbarrow or dishpan. Match the type of mortar you get to the type that's in the rest of your wall, if possible.[10]
- Mortar mixes come in different grades. M is the strongest and meant for walls bearing heavy loads. S is a little more flexible, N is for most walls exposed to the weather, and O is for interior and non-load-bearing exterior walls.
- If you don't know what's in your wall, you might need to guess based on the grading scale.
-
3Mix the mortar with water until it's thick. Follow the manufacturer's instructions to figure out how much water to add. Stir the water and mortar mix together with a hand trowel. Try to get the mortar into a consistency similar to peanut butter.[11]
- You may also purchase latex additive from a home improvement store and add a little bit to make the mixture stronger.
- Start with small batches. You'll have an hour or less to use the mortar before it dries.


Adding and Protecting New Mortar
-
1Spread a layer of mortar inside the hole. Dip your trowel into the mortar to scoop up a small coating. Spread about 1⁄2 in (13 mm) of mortar over the left and right sides of the cavity. Finish by coating the bottom of the hole with an equal amount of mortar.[12]
- If the mortar begins drying out while you're mixing and applying more mortar, lightly moisten it with a hose or misting bottle.
-
2
-
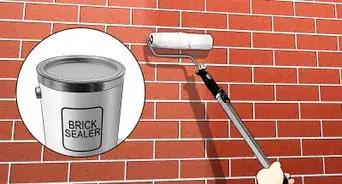
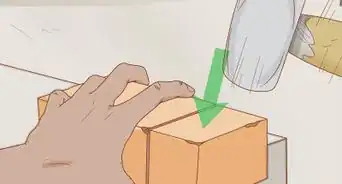
3Slide the brick into the hole. Pick up the brick and push it into the hole.[15] Mortar will ooze out, so make sure you're still wearing sturdy gloves.
-
4Fill the joints with mortar. Use the trowel or a tuckpointing tool to catch the oozing mortar and push it back into the spaces around the brick. Load more mortar onto one of these tools and push it into these joint spaces until they're full.[16]
-
5Smooth out the mortar to match the rest of the wall. After you've finished filling the joints, stroke a flat blade over the mortar to even it out. In addition to the trowel or tuckpointing tool, you may use a brick jointer. Blend in your work by making it match the joints around other bricks as much as possible.[17]
- Let the joint mortar set up until it just gives when you press your finger into it, and then use the brick jointer tool to create the dimpled beveled joint lines.[18] If the mortar is too wet when you create the beveled joint lines, then it may just scrape out of the joints.
-
6Wipe away excess mortar with a soft-bristle brush. Use the brush to remove any mortar that has spilled over the bricks. Dampen the mortar first if it has begun to solidify. It's important to do this immediately or else you'll need muriatic acid or a commercial cleaner to remove the mortar.
- Take special care when using muriatic acid.
-
7Spray the mortar daily for 3 days. Fill a spray bottle with water and immediately use it to lightly mist the new mortar today. This allows the mortar to cure properly. Do this once a day until the mortar is strong.[19]
-
8Cover the mortar when you're not misting it. Purchase a tarp and tape it over the new mortar right after you've misted it the first time. The tarp keeps the mortar safe from the sun and rain. You will need to pull down the tarp to mist the mortar, but after 72 hours it should be safe to remove permanently.[20]


Expert Q&A
Did you know you can get expert answers for this article?
Unlock expert answers by supporting wikiHow
-
QuestionHow do I match the color of the new mortar to the color of the old mortar?
 Gerber Ortiz-VegaGerber Ortiz-Vega is a Masonry Specialist and the Founder of GO Masonry LLC, a masonry company based in Northern Virginia. Gerber specializes in providing brick and stone laying services, concrete installations, and masonry repairs. Gerber has over four years of experience running GO Masonry and over ten years of general masonry work experience. He earned a BA in Marketing from the University of Mary Washington in 2017.
Masonry Specialist & Founder, GO Masonry LLCRip out a piece of the old mortar and bring it with you to the store. Then you can compare the color to the different options that they have available.
Support wikiHow by unlocking this expert answer.
Things You'll Need
- Safety glasses
- Waterproof gloves
- Bucket
- Chisel
- Hammer
- Trowel
- Angle grinder
- Masonry grinding disc
- Grounded electrical cord
- Tuckpointing tool
- Whisk broom
- Soft-bristle brush
- Mortar mix
- Water


References
- ↑ Gerber Ortiz-Vega. Masonry Specialist & Founder, GO Masonry LLC. Expert Interview. 10 March 2020.
- ↑ https://www.todayshomeowner.com/video/repairing-brick-mortar-cracks/
- ↑ https://www.bobvila.com/articles/how-to-repoint-brick/
- ↑ http://www.planitdiy.com/how-to/painting-decor/exterior-brick-mortar-repair-2/
- ↑ https://www.familyhandyman.com/masonry/how-to-reset-a-loose-brick/view-all/
- ↑ Gerber Ortiz-Vega. Masonry Specialist & Founder, GO Masonry LLC. Expert Interview. 10 March 2020.
- ↑ http://www.planitdiy.com/how-to/painting-decor/exterior-brick-mortar-repair-2/
- ↑ Gerber Ortiz-Vega. Masonry Specialist & Founder, GO Masonry LLC. Expert Interview. 10 March 2020.
- ↑ https://www.familyhandyman.com/masonry/how-to-reset-a-loose-brick/view-all/
- ↑ http://www.finehomebuilding.com/2000/10/01/mortar-what-type-do-you-need
- ↑ https://www.thisoldhouse.com/how-to/how-to-repair-mortar-brick-wall
- ↑ https://www.familyhandyman.com/masonry/how-to-reset-a-loose-brick/view-all/
- ↑ Melissa & Michael Gabso. Remodel & Redesign Experts. Expert Interview. 7 October 2020.
- ↑ https://www.thisoldhouse.com/how-to/how-to-repair-mortar-brick-wall
- ↑ Melissa & Michael Gabso. Remodel & Redesign Experts. Expert Interview. 7 October 2020.
- ↑ https://www.thisoldhouse.com/how-to/how-to-repair-mortar-brick-wall
- ↑ https://www.familyhandyman.com/masonry/how-to-reset-a-loose-brick/view-all/
- ↑ Gerber Ortiz-Vega. Masonry Specialist & Founder, GO Masonry LLC. Expert Interview. 10 March 2020.
- ↑ http://www.planitdiy.com/how-to/painting-decor/exterior-brick-mortar-repair-2/
- ↑ https://www.thisoldhouse.com/how-to/how-to-repair-mortar-brick-wall
About This Article