This article was co-authored by wikiHow Staff. Our trained team of editors and researchers validate articles for accuracy and comprehensiveness. wikiHow's Content Management Team carefully monitors the work from our editorial staff to ensure that each article is backed by trusted research and meets our high quality standards.
There are 15 references cited in this article, which can be found at the bottom of the page.
The wikiHow Video Team also followed the article's instructions and verified that they work.
This article has been viewed 230,284 times.
Learn more...
An easy, inexpensive, and quick way to redecorate your bathroom is to replace the shower knobs. Shower knobs can either be single or double, depending on the type of faucet that you have. Replacing shower knobs is as easy as removing the old knobs and fitting new ones!
Steps
Replacing Double Knobs
-
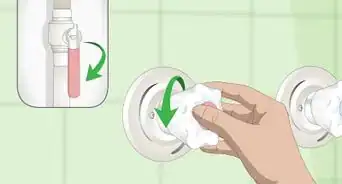
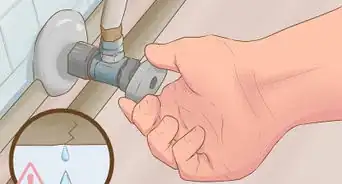
1Switch off the water before you start. You can either turn off the valve specifically for the shower, or you can shut off the water supply at the main line, which is on the outside of the house or in the basement. Switch off the water and then turn the shower on, which allows any remaining water flow out.[1]
- Some bathrooms have a separate valve for the shower located in the bathroom, but this is uncommon.
- If the water supply handle is round and looks like a wheel, turn the handle clockwise to switch it off. It will take around 2 full turns.[2]
- If the water supply handle is a lever, give the handle a 1/4 turn, where it will stop.
-
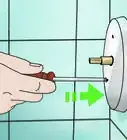
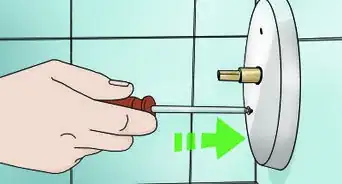
2Remove the decorative trimming on the knob. Push a flathead screwdriver beneath the cover plate on the knob. Gently lift the screwdriver handle away, and the cover will pop off.[3]
- You can use a utility knife instead of a flathead screwdriver.[4]
- If the cover plate is stuck, use a handle puller to remove it. You can buy these from your local hardware store.
Advertisement -
3Unscrew the screw in the center of the knob. Use a Phillips screwdriver counterclockwise to twist the screw out. It will fall out quickly, so be ready to catch it.[5]
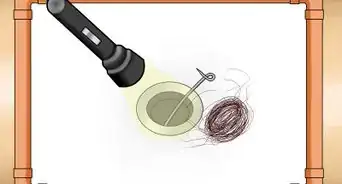
- Place a cloth over the shower drain in case the screw or any small parts fall.
-
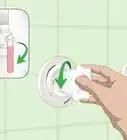
4Take off the knob to reach the valve stem. Twist the knob counterclockwise to remove it from the valve. It should twist off easily.[6]
- If the knob seems to be stuck on the valve, give it a few very light taps with a hammer on the outside, where you hold it to turn it. This will loosen any mineral deposits and it won't damage the knob.
-
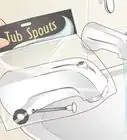
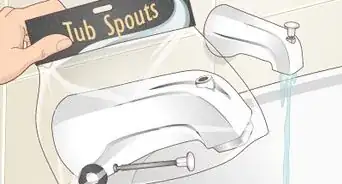
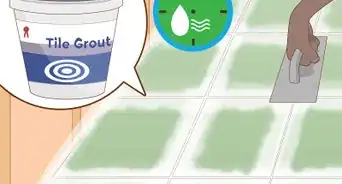
5Purchase replacement knobs that are the same size and brand of the old ones. Take the old knobs and screws with you to the hardware or plumbing store, and show them to the salesperson. They will be able to help you to match new shower knobs to your old fittings, ensuring that you get the right brand and size.[7]
- A universal faucet handle is another option if the store doesn't sell your particular brand.
- Shower knobs are made from many different materials, and you should try to find some that match your other fittings in your bathroom, such as the showerhead and taps. Brass, plastic, and chrome are common materials.[8]
-
6Push the new knob onto the valve. Make sure that the cold labelled knob goes on the cold valve, or the hot labelled knob goes on the hot valve Generally the cold water knob will be on the right, and the hot water knob will be on the left.
- If your old shower knobs were previously the wrong way around, this is a good opportunity to switch it.
-
7Twist and screw the knob into place. Twist the knob onto the valve, until it slides into place. Use a Phillips screwdriver to put a screw into the centre of each knob, and tighten it as much as possible to prevent any leaks.[9]
-
8Replace the cover plate on each knob. Use your thumbs to push each cover back onto each knob. Make sure that the cover is flush and sits flat on the knob.[10]
-
9Repeat this process for the second shower knob. Remove the decorative trimming, take out the screw, and take the knob off the valve. Then install in the new knob, making sure that the cold water knob is on the right, while the hot water knob is on the left.[11]
-
10Turn on the water supply and test out the knobs. Twist the hot and cold knobs on individually to check that they don’t leak. If there is a leak, remove the knob and tighten the screw again.[12]
- Turn the main water supply back on slowly. For round handles, pause after a 1/2 revolution for a few seconds before opening it fully.[13]
- Turn a lever 1/8 of a turn, wait for a few seconds, and turn it the rest of the way until it's parallel with the water pipe.


Fitting a New Single Knob
-
1Turn the water off before you begin. Switch the main water supply line off, or just the valve specifically for the shower if you have access to it. Turn the shower on to drain out any residual water once you have turned the water supply off.[14]
- This prevents you from getting accidentally soaked if you turn the handle while you are replacing it.
- The main water supply can usually be found in your basement or outside.
- If the main water supply handle is a wheel, switch it off by turning it clockwise for 2 full turns.[15]
- For main water supply handles that are levers, turn the lever 1/4 until it's at a right angle to the pipe. It will stop being able to be turned at this point.
-
2Place an old cloth over the shower drain. Lay a cloth flat over the drain to catch any small parts that may fall while you are replacing the knob. This will prevent you from losing anything, and will also keep your drain from getting blocked.[16]
-
3Remove the covered button. This is normally located on the underside of the handle, and has the red and blue temperature symbol on it. Use a utility knife to press beneath it, and flick it off.[17]
- The covered button goes over a hole in the shower handle where the screw is. Some showers don’t have a covered button for this hole, and in this case you won’t have to remove one. Just find the small hole on the underside of your handle.
-
4Use an Allen key to remove the screw. Insert the Allen key into the screw within the hole. Twist the Allen key counterclockwise to remove the screw, and pull the handle off.[18]
- Use the long end of the Allen key, as the hole will be quite deep.
- It will only take a few full twists for the handle to be able to be pulled away.
-
5Purchase a replacement handle that matches the size and brand of the old one. Put the old handle and screw into a plastic bag, and show it to the salesperson at the hardware or plumbing store. They will be able to show you what faucet handles will work for your old fittings.[19]
- If they don’t sell handles from the same brand, they will offer you a universal faucet handle instead, which can fit onto any fittings.
- Choosing a new shower faucet with the same layout means that you will be able to replace and install it yourself, rather than needing to get extensive plumbing work to switch between the styles.
- Shower faucets are made from many different materials, including brass, plastic, zinc-alloy, and chrome. Match your new handles to the other fittings in your bathroom such as the showerhead and taps. Brass is the most expensive option yet will last the longest, while plastic is the most inexpensive option.[20]
-
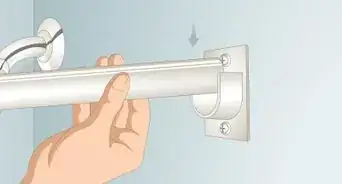
6Push the new handle over the valve. Most handles can simply be pushed into place over the existing fittings, but some new handle sets may come with a spacer that you insert before you push the new handle on. Fit the spacer into place inside the handle as per the instructions that came with your set first, and then push the handle onto the valve.[21]
- Fitting the new handle will depend on the type and brand of faucet that you have, so checking with the instructions that came with your new set is best.
-
7Place the screws into the new handle. Use a Phillips screwdriver to attach the screws into your new handle. It depends on the set that you chose as to how many screws you will need to use.[22]
- These screws usually go in the very center of the new shower handle.
-
8Push the cover into place. Push the new covering over the top of the hole where the central screw is. This cover will usually have either hot/cold symbols or the brand logo.[23]
- Make sure that the cover is firmly in place and that it is sitting flat against the handle.
-
9Test the new handle. Turn the water supply back on slowly, and move the handle to each side. Test that the hot and cold water works, and that there are no leaks.[24]
- If there is a leak, remove the new cover and tighten the screws.
- Taking your time to slowly turn the water back on is key. For wheel-shaped handles, stop after a 1/2 revolution for a few seconds before turning it the full way.[25]
- For levers, turn it 1/8 of a turn, wait for a few seconds, and then turn it back to the original position of being parallel with the pipe.


Things You’ll Need
- Old cloth
- Flathead screwdriver
- Utility knife
- Hand puller
- Allen key
- Phillips screwdriver
- Hammer
- New shower knobs kit

References
- ↑ https://www.homeadvisor.com/r/shower-faucet-repair-guide/
- ↑ https://www.wsscwater.com/customer-service/residential-tips/locating-and-operating-your-main.html
- ↑ https://www.homeadvisor.com/r/shower-faucet-repair-guide/
- ↑ https://youtu.be/rknx5jEy1IY?t=82
- ↑ https://www.homeadvisor.com/r/shower-faucet-repair-guide/
- ↑ https://www.homeadvisor.com/r/shower-faucet-repair-guide/
- ↑ https://youtu.be/rknx5jEy1IY?t=38
- ↑ https://www.thisoldhouse.com/ideas/facts-faucets
- ↑ https://youtu.be/rknx5jEy1IY?t=194
- ↑ https://youtu.be/rknx5jEy1IY?t=251
- ↑ https://www.homeadvisor.com/r/shower-faucet-repair-guide/
- ↑ https://youtu.be/rknx5jEy1IY?t=256
- ↑ https://www.wsscwater.com/customer-service/residential-tips/locating-and-operating-your-main.html
- ↑ https://www.homeadvisor.com/r/shower-faucet-repair-guide/
- ↑ https://www.wsscwater.com/customer-service/residential-tips/locating-and-operating-your-main.html
- ↑ https://youtu.be/4ohsuRhpP-c?t=21
- ↑ https://youtu.be/c1d3zg-0JnU?t=12
- ↑ https://youtu.be/4ohsuRhpP-c?t=51
- ↑ https://youtu.be/rknx5jEy1IY?t=38
- ↑ https://www.thisoldhouse.com/ideas/facts-faucets
- ↑ https://youtu.be/rILRStPhIQs?t=107
- ↑ https://youtu.be/rILRStPhIQs?t=200
- ↑ https://youtu.be/rILRStPhIQs?t=223
- ↑ https://youtu.be/rILRStPhIQs?t=228
- ↑ https://www.wsscwater.com/customer-service/residential-tips/locating-and-operating-your-main.html
About This Article

An easy, inexpensive, and fast way to give your bathroom a new look is to replace the shower knobs. Before you start, turn the water off. If you have access to the valve for the shower, turn that off too. After you turn the water off, turn the shower on to drain out any lingering water. Lay a cloth flat over the drain to catch any small parts that may fall while you’re replacing the knob so you don’t lose anything. Then, you'll need to remove the covered button and screw that hold the old handle on. Once you get the old one off, push the new handle over the valve, replace the screw, and push the cover into place. To learn how to replace double knobs, keep reading!