This article was co-authored by Melissa & Michael Gabso and by wikiHow staff writer, Christopher M. Osborne, PhD. Melissa and Michael Gabso are the Owners of MC Construction & Decks based in Los Angeles, California. With over ten years of experience, they specialize in exterior and interior remodeling and redesign, including kitchen, bathroom, and deck construction. MC Construction & Decks also provides plans and permitting services and is known for backyard beautification projects. MG Construction & Decks has been rated as one of the top contractors in the Los Angeles area year after year.
There are 7 references cited in this article, which can be found at the bottom of the page.
wikiHow marks an article as reader-approved once it receives enough positive feedback. In this case, 97% of readers who voted found the article helpful, earning it our reader-approved status.
This article has been viewed 140,641 times.
Good brickwork can definitely stand the test of time, but bricks aren’t impervious to damage. Once a brick splits, cracks, or flakes, go ahead and replace it to prevent moisture seepage or structural issues.[1] If you want to do the job yourself instead of calling a professional brick mason, check below for a helpful step-by-step guide. And make sure to put on work gloves, eye protection, and a dust mask before you get started!
Things You Should Know
- After removing the old brick and mortar, either clean cosmetic damage on old bricks so they can be reused or use old bricks to find the correct size and shape for replacement bricks.
- Trowel the bottom layer of the new brick's hole and in thinner layers, trowel the left and right sides of the hole.
- After applying a thick layer of mortar on the top and sides of the replacement brick, insert the brick at an angle and scrape away excess mortar.
Steps
Removing the Old Brick and Mortar
-
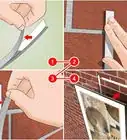
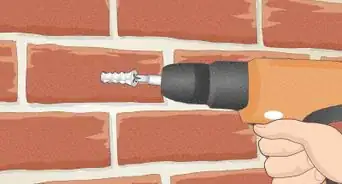
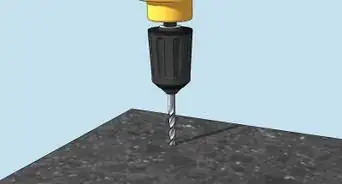
1Drill a series of holes into the mortar all the way around the bad brick. This method takes a bit more time than using an angle grinder, but is easier for the average DIYer. Use a masonry bit and drill into the mortar as deep as the bit allows. Drill the holes as close together as possible to break up the mortar and free the brick.[2]
- Drill into the mortar closer to the bad brick than to the good surrounding bricks. Otherwise, you may damage them.
- Squirt or spray water onto the area before you start drilling, and frequently while drilling, to reduce the amount of masonry dust.
-
2Cut into the mortar with an angle grinder instead of using a drill. This is a faster alternative to drilling, but carries a higher risk of damaging the surrounding bricks. Put a masonry blade on your angle grinder, then cut straight into the mortar with the spinning blade, all the way around the damaged brick. Cut into the center of each mortar joint, or perhaps a bit closer to the damaged brick than the undamaged surrounding ones.[3]
- Just like when using a drill, spray or squirt water over the work area before you start and every so often during the process.
Advertisement -
3Try to jiggle the brick free once you’ve broken up the mortar. If the brick is already really loose or broken in multiple pieces, it’ll probably come out fairly easily by hand. If the brick won’t come out this way, move on to using a chisel or drill to get it out.[4]
-
4Knock through any stubborn mortar with a chisel to loosen the brick. Hold the wide, beveled blade of your bolster chisel against the mortar and smack the flat tip of the handle firmly with your lump hammer (small sledgehammer). Keep chipping away at the mortar until the brick is loose enough to remove by hand.[5]
- A bolster chisel has a wider blade than a cold chisel. Both chisels, along with a lump hammer, are essential tools for any brick removal job.
-
5Drill through and break up the brick if it refuses to come out. Even when damaged, some bricks really don’t want to leave their spot! If you can’t pull or chisel out the entire brick, use a masonry bit to drill a series of vertical holes in the brick’s center. Hit the brick with your lump hammer alone, or with your hammer and cold chisel, to break it into pieces. Remove the broken pieces of brick from the wall.[6]
-
6Chip away the mortar around the brick’s former location with a chisel. Set the blade of your bolster chisel or cold chisel against a section of the remaining mortar and lightly tap the handle with your lump hammer. Strike only as firmly as is needed to break free the mortar. Work carefully so you don’t damage the surrounding bricks. Try to get every bit of mortar you can.[7]
- Use your fingers and a hand brush to sweep all the mortar chips and other dust and debris out of the opening.


Readying the New Brick and Mortar
-
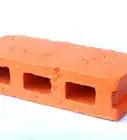
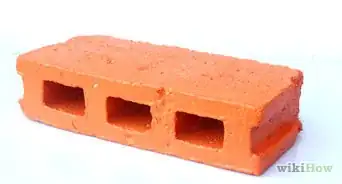
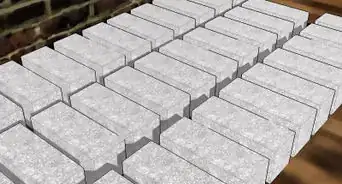
1Use the removed brick to find a color and size match. If the damaged brick came out in one piece, use it to find a color, style, and size match. If you only have broken pieces, use those for a color match but also write down the length, width, and height measurements of one of the remaining bricks in the wall. Go to a hardware store, construction supply retailer, or brickyard to find your closest match.[8]
- If there are manufacturer markings on the brick, you may be able to track down a perfect match. Otherwise, aim to get the closest match you can find.
- Look around in a basement, garage, shed, etc. for any spare bricks left behind from when the wall was built. You may be in luck!
-
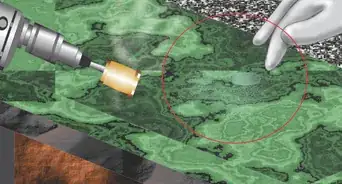
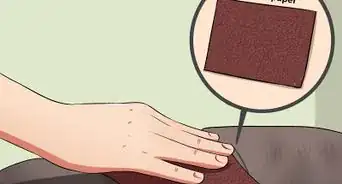
2Consider reusing the removed brick if it has only superficial damage. If the face of the removed brick is just stained or marred, or even if it has only small cracks or light spalling (flaking), you should be able to simply flip it around and reuse it! So long as the brick still looks and feels structurally sound and solid, it’ll be fine to reuse.[9]
- To reuse the brick, though, you’ll have to carefully chip away all the remaining mortar that’s stuck to it.
-
3Soak the replacement (or reused) brick in water for about an hour. Fill a bucket about halfway with water and then fully submerge the mortar-free replacement brick (or salvaged brick from the wall) in it. Soaking the brick ensures that it doesn’t suck up the moisture from the mortar and dry it out too quickly.[10]
-
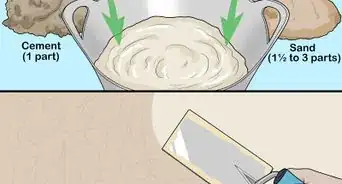
4Mix up about 1/10 to 1/5 of a bag of brick mortar mix. A typical 80 lb (36 kg) bag of brick mortar mix, when combined with water, makes enough mortar for about 40 bricks. That means you only need to mix up about 10-20% of the bag’s contents to install one brick and have some extra mortar if needed. Stir together this small batch of mortar in a bucket according to the ratio on the package—for instance, by adding 4 scoops of water for each 1 scoop of mortar mix.[11]
- Start using this batch of mortar within 30 minutes of mixing it.
- If you want to more closely match the existing brick mortar, stir in a few drops of mortar coloring (available alongside mortar mixes) according to the package instructions.
- To get an even more precise color match, mix up several very small batches of mortar with varying amounts of mortar coloring in them 24 hours beforehand. Apply the mortar samples to cardboard and compare the colors when they dry.


Applying the New Mortar
-
1Wet the surrounding bricks first so they suck up less mortar moisture. Spray all the existing bricks that will be adjacent to the new brick with a hose or a spray bottle until they are completely damp. Otherwise, they’ll leech out the water from the new mortar too quickly, which makes it brittle.[12]
-
2Trowel a thick layer of mortar on the bottom of the opening in the wall. Scoop up a nice glob of mortar from the bucket with your pointed trowel, then deposit it on top of the brick or bricks that are directly below where the replacement brick will go. Add more mortar as needed and spread it out like cake frosting so you have around a 1 in (2.5 cm) layer of mortar.[13]
- Don’t worry about making the mortar look nice and neat here—just make sure to create a nice thick bed for the new brick to squish down onto.
-
3Spread thinner, fairly even mortar layers onto the left and right sides. Once you’ve added a thick bed of mortar to the bottom of the opening, scoop up some more mortar and press it against the bricks to each side. Aim to make the mortar around 1⁄2–1 in (1.3–2.5 cm) thick on the sides.[14]
- Some of the mortar will fall off—don’t worry about that. Just try to get an even layer with full coverage.
-
4Pull the new brick from the water and “butter” its top and sides. Hold the brick on the bottom with one hand and use your pointed trowel to add a good 1 in (2.5 cm) layer of mortar to the top of the brick. Then add 1⁄2–1 in (1.3–2.5 cm) layers to the two sides that will be embedded in the wall.[15]
- This is called “buttering” the brick—just like your morning toast!


Installing the New Brick
-
1Insert the brick at an angle and wiggle it into place with your fingers. Line up the brick with the opening, then tilt the face (the side pointed towards you) slightly downward. Slide the brick into the opening and lift the face side to level the brick. Wiggle the brick back and forth as you press it in to set it firmly into the mortar bed. Keep wiggling and nudging the brick as needed until it’s even with the surrounding bricks.[16]
- Line up the new brick as perfectly as you can while the new mortar is still soft.
-
2Use a trowel, with or without a brick jointer, to press in more mortar. If you don’t have a brick jointer, load up mortar along one side of your pointed trowel and press into each joint around the new brick. This process is faster and neater if you have a brick jointer—a tool that looks like a straight or angled rod. In this case, use the jointer to slide mortar off of the trowel and into the joints. Keep pressing mortar into the joints until they simply won’t take any more.[17]
-
3Use a trowel handle or jointer to tidy up and shape the mortar joints. Most brick walls have concave—inward dipping—mortar joints. Assuming this is the case, slide the rounded handle tip of your trowel, or the concave edge of your brick jointer, along each mortar joint so they match the concave look of the existing joints.[18]
- If the wall has flat mortar joints, skip this part.
-
4Scrape away the excess mortar on the bricks with a trowel blade. Work carefully so you don’t mess up the nice concave (or flat) joints you made in the mortar between the bricks. Make short, quick scrapes across the face of each brick in the area to remove the excess mortar.[19]
- Use a damp rag to wipe away any remaining bits of mortar on the bricks.


Community Q&A
-
QuestionHow many bricks can you safely remove at one time? If I need to replace six bricks in one spot can I take them all out at once or should I replace one at a time?
 Community AnswerAt one end of the course of bricks, take out two bricks. Then replace one brick with new mortar. Once set, take out the next brick, maintaining a gap of only one brick.
 -
QuestionThe damaged brick I want to replace is London Stock. What should the pointing be made up of?Community AnswerDon't use cement-based mortar, it is too hard. Use lime mortar - level 3 hardness for outside, but level 2 is okay for inside.
Warnings
- While replacing one brick is often a manageable DIY job, replacing multiple, contiguous bricks is usually best left to the pros. Attempting a complicated DIY masonry job that you're not experienced enough for, then having to hire a mason to fix your mess, will cost you more money in the long run.⧼thumbs_response⧽
- Always wear safety glasses, a dust mask, and work gloves when doing brickwork.⧼thumbs_response⧽
Things You’ll Need
- Protective eyewear
- Work gloves
- Dust mask
- Drill with masonry bit
- Spray bottle
- Water and mixing buckets
- Bolster chisel
- Cold chisel
- Lump hammer
- Pointed trowel
- Brick jointer
- Mortar mix
- Mortar coloring (optional)
- Angle grinder (optional)


References
- ↑ Melissa & Michael Gabso. Remodel & Redesign Experts. Expert Interview. 7 October 2020.
- ↑ https://www.diydoctor.org.uk/projects/Replacingabrick.htm
- ↑ https://youtu.be/vqK5bkoOF9M?t=85
- ↑ https://www.diydoctor.org.uk/projects/Replacingabrick.htm
- ↑ https://www.diydoctor.org.uk/projects/Replacingabrick.htm
- ↑ https://www.bhg.com/home-improvement/exteriors/stone-work/how-to-repair-brick-and-block-walls/
- ↑ http://www.ultimatehandyman.co.uk/how-to/brickwork/replacing-a-damaged-brick
- ↑ Melissa & Michael Gabso. Remodel & Redesign Experts. Expert Interview. 7 October 2020.
- ↑ Melissa & Michael Gabso. Remodel & Redesign Experts. Expert Interview. 7 October 2020.
- ↑ https://www.diydoctor.org.uk/projects/Replacingabrick.htm
- ↑ https://www.diydoctor.org.uk/projects/Replacingabrick.htm
- ↑ https://www.diydoctor.org.uk/projects/Replacingabrick.htm
- ↑ https://www.bhg.com/home-improvement/exteriors/stone-work/how-to-repair-brick-and-block-walls/
- ↑ https://www.diydoctor.org.uk/projects/Replacingabrick.htm
- ↑ https://www.diydoctor.org.uk/projects/Replacingabrick.htm
- ↑ https://youtu.be/vqK5bkoOF9M?t=380
- ↑ https://www.diydoctor.org.uk/projects/Replacingabrick.htm
- ↑ https://youtu.be/vqK5bkoOF9M?t=530
- ↑ https://www.diydoctor.org.uk/projects/Replacingabrick.htm
About This Article