This article was co-authored by wikiHow staff writer, Rain Kengly. Rain Kengly is a wikiHow Technology Writer. As a storytelling enthusiast with a penchant for technology, they hope to create long-lasting connections with readers from all around the globe. Rain graduated from San Francisco State University with a BA in Cinema.
This article has been viewed 497,214 times.
Learn more...
After using Microsoft Word for many projects, you may find that the program no longer runs the way it did when it was first installed. The default settings for one or more features—such as fonts, toolbar placement, and autocorrect options—might be different after clicking the wrong thing or moving things around by accident. Uninstalling and reinstalling Word won't help because those preferences are saved on your computer; you'll need to find and rename the Normal template file so Word can create a new one. This wikiHow teaches you how to restore Microsoft Word to its original layout and settings on Windows and macOS.
Things You Should Know
- You must delete or rename the Normal template (Normal.dotm) for Word to create a new one.
- On Windows, go to your User folder → "AppData" → "Roaming" → "Microsoft" → "Templates".
- On Mac, open the "Library" folder → "Group Containers" → "UBF8T346G9.Office" → "User Content" → "Templates".
Steps
Windows
-
1Close Microsoft Word. Be sure to save any open documents. You won't be able to reset any of your settings while the application is open.
- This method requires modifying the Windows registry, which is an advanced task. Before you edit the registry, it's a good idea to back it up so you can restore it if something goes wrong.
-
2Press ⊞ Win+E. This opens the File Explorer. You can also open File Explorer by clicking it in the Windows menu.Advertisement
-
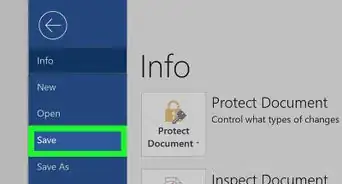
3Set the File Explorer to show hidden files and folders. This is necessary for displaying a folder you'll need to edit:
- Click the View menu at the top of File Explorer.
- Click Options at the top-right corner of the window.
- Click the View tab.
- Select Show hidden files, folders, and drives under "Hidden files and folders".
- Click Apply, and then click OK.
-
4Navigate to your Users folder in File Explorer. To do this, click the address bar at the top of File Explorer, type C:\Users\, and then press Enter.
- If Windows is installed on another drive, replace C with the appropriate drive letter.
-
5Navigate to your Microsoft Templates folder. Follow these steps:
- Double-click the folder for your username in the right panel.
- Double-click the AppData folder (this is usually hidden).
- Double-click the Roaming folder.
- Double-click the Microsoft folder.
- Double-click the Templates folder.
-
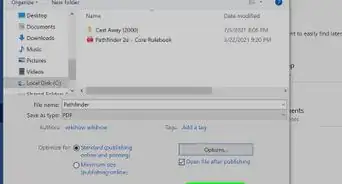
6Rename the "Normal.dotm" file to Normal.old. This file contains many of your Word options—when you rename the file, Word will have to create a new file with its original factory settings.[1] Here's how to rename the file:
- Right-click Normal.dotm and select Rename.
- Remove .dotm from the end of the file name and replace it with .old.
- Press the Enter key.
- Now that you're finished in File Explorer, it's a good idea to go back to View > Options > View and rehide hidden files and folders.
-
7Press ⊞ Win+R. This key combination opens the Run window, which is where you'll be able to open the registry editor for the remaining settings changes.
-
8Type regedit and click OK. This opens the registry editor.[2]
- You may have to click Yes to open the editor.
-
9Double-click HKEY_CURRENT_USER. It's in the left panel of the registry editor. This expands more options inside.
-
10Double-click SOFTWARE. It's in the new set of folders that expanded in the left panel. More folders will appear.
-
11Double-click Microsoft. It's also in the left panel. Even more folders will expand.
-
12Double-click Office. More folders will expand.
-
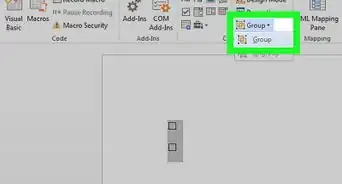
13Double-click the correct folder for your version of Word. The next folder you'll enter depends on which version of Word you're using:
- Word 365, 2019, and 2016: Double-click the 16.0 folder.
- Word 2013: Double-click the 15.0 folder.
- Word 2010: Double-click the 14.0 folder.
- Word 2007: Double-click the 12.0 folder.
- Word 2003: Double-click the 11.0 folder.
-
14Click the Word folder one time. Don't double-click—just click it once to select it.
-
15Press the Del key to delete the key. When you're prompted to confirm, click Yes to do so.
- Now that you've made these changes, you can close the registry editor and File Explorer. Restart your computer.
- You can now start from scratch in Word.


macOS
-
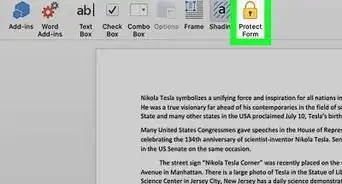
1Close Word and all other Office applications. You'll need to move some files around, and you won't be able to do so while Office applications are open.
- This method should work on all modern versions of Word for macOS, including Word 2016, Word 2019, and Word 365.
-
2Open the Finder . It's the two-toned smiley face icon on the left side of the Dock.
-
3Press the ⌥ Option key as you click the Go menu. It's at the top of the screen. This displays a menu that contains the Library folder, which would've been hidden if you hadn't used the Option key.[3]
-
4Click the Library folder. A list of files will appear.
-
5Double-click the Group Containers folder. It's inside of the Library folder. Another set of files and folders will appear.
-
6Double-click the UBF8T346G9.Office folder. Yet another folder and file list will appear.
-
7Double-click the User Content folder. Don't worry, you're almost there!
-
8Double-click the Templates folder. This is the folder that contains the file containing your Word settings.
-
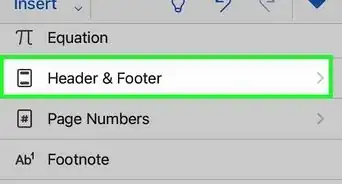
9Rename the normal.dotm file. To rename it:
- Click normal.dotm one time to select it.
- Press the Return key.
- Delete the part that says ".dotm" and replace it with .old.
- Press Return to save the new file name, which is now normal.old.
-
10Close Finder and restart your computer. When you open Word again, it will automatically recreate the normal.dotm file, giving you a fresh start.[4]


Community Q&A
-
QuestionHow do I stop a dot from showing on my document in Microsoft Word whenever I press the space bar?
 Community AnswerFile --> Options --> Display. Go down to 'Always show these formatting marks on the screen' and uncheck 'spaces'.


References
- ↑ https://docs.microsoft.com/en-us/office/troubleshoot/word/reset-options-and-settings-in-word
- ↑ https://wordribbon.tips.net/T012864_Factory_Default_Settings_for_Word.html
- ↑ https://www.ionos.com/digitalguide/server/configuration/showing-hidden-files-on-a-mac/
- ↑ https://answers.microsoft.com/en-us/msoffice/forum/msoffice_word-mso_mac-mso_365hp/reset-microsoft-word-365-normal-template-on-mac/9d1fc3e0-2b07-4c88-8edc-88b4155c4e3c
About This Article

1. Close Microsoft Word.
2. Set the File Explorer to show hidden files and folders.
3. Navigate to C:\Users\username\AppData\Roaming\Microsoft\Templates in File Explorer.
4. Rename the "Normal.dotm" file to Normal.old.
5. Open the Registry Editor.
6. Navigate to HKEY_USERS.DEFAULT\Software\Microsoft\Office
7. Double-click your version of Word.
8. Delete the Word key.
9. Restart Word.