X
wikiHow is a “wiki,” similar to Wikipedia, which means that many of our articles are co-written by multiple authors. To create this article, 12 people, some anonymous, worked to edit and improve it over time.
There are 7 references cited in this article, which can be found at the bottom of the page.
This article has been viewed 64,188 times.
Learn more...
Mandolins have a beautiful and distinctive sound, but their strings can really take a beating while being played. Old strings will change in tone, altering that crisp mandolin timbre. Luckily, replacing old mandolin strings is easy. It only takes a few steps and a little bit of time to make your mandolin sound just like new once again.
Steps
Part 1
Part 1 of 4:
Preparing to Restring your Mandolin
-
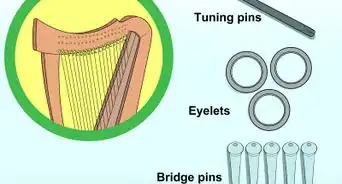
1Buy new strings. You can buy a complete set of 8 strings or buy individuals if you are only wanting to replace specific strings. Different brand strings sound different, so if you like the sound of your current strings, buy the same exact strings.[1] You should be able to find great mandolin strings at your local musical instrument store or from an online retailer.
- Choose the strings that will be suit your purposes. Remember that a higher price doesn't always mean the strings will be better.
- Do not use strings for another instrument on a mandolin. Mandolin strings are made specifically for the instrument and thus other strings will not work the same way.
-
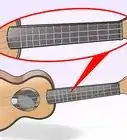
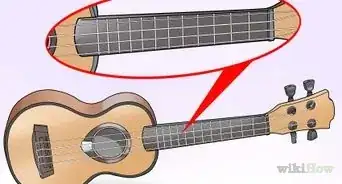
2Familiarize yourself with the way the mandolin operates and the names of its parts. This will help you get through the steps of replacing your strings without confusion.
- A mandolin at its simplest has only a few basic parts, the body, the neck (which contains the fretboard), the headstock, and strings. The strings are secured onto the mandolin at the top with tuners on the headstock (or peg head) and at the bottom with a tailpiece , as well as being held up off the body by a bridge, located near the sound holes in the middle of the body.[2]
Advertisement -
3Lay the mandolin on your lap, face up. Have enough room around you so that you can move it around freely.
- You will also need to have your new strings near by, as well as a pair of wire snippers to clip the ends of the new strings once they are attached. Have these easily accessible.


Advertisement
Part 2
Part 2 of 4:
Removing the First String
-
1Loosen one of the old strings on your mandolin by rotating the tuner knob on the peg head of the mandolin. Look at the way the old string is wrapped around the post and turn the tuner knob in the direction that will loosen the string.
- The tuner knob and the post that the string is attached to should rotate in the same direction, so you just need to pay attention to which direction the post needs rotate.[3]
- Loosen the string quite a bit. It should be loose enough so that there is no tension on it and it can be easily slipped off the hook it's attached to at the bottom of the mandolin.
-
2Remove the tailpiece cover, if your mandolin has one. This cover will be attached to the tailpiece at the bottom of your mandolin. It covers the area where the strings are attached to the tailpiece and protects your forearm while playing.[4] This cover should just pop off the tailpiece by pulling up on it a bit or sliding it down toward the bottom of the mandolin.
-
3Detach the string from the bottom of your mandolin. The tailpiece at the bottom of your mandolin has at least eight hooks on it, where the strings attach.[5] Mandolin strings usually just have a loop at the end that attaches to one of the hooks on the tailpiece. You will just need to pull the loop off of the hook on the tailpiece to detach the string.
-
4Detach the string from the tuner knob. With the other end of the string loose, twist the string off around the post of the tuner and pull the end of it out of the hole in the middle of the post.[6] The string should come off easily.


Advertisement
Part 3
Part 3 of 4:
Attaching the First New String
-
1Hook the loop on your replacement string to the correct hook on your tailpiece. Be sure you are attaching the correct string, one that matches the one you just removed.
- Once hooked on, keep the string taut so that it doesn't come off the hook.
-
2Pull the string up, along the fretboard and up towards the peg head. Make sure that the string is seated properly in the bridge and the nut, which is located at the top of the fretboard. These two pieces hold the string centered in place, as well as off the surface of the body and fretboard.[7]
-
3Stick the end of the string through the hole in the post. This is a small hole but should fit the string easily.
-
4Pull the string tight through the hole then wrap the string around the post. You want to lock the string in place, so put a kink in it right where it comes through the hole in the post. Then wrap the string around the post, locking it in place.[8]
-
5Tighten the string by turning the tuner knob associated with the post it's attached to. You do not need to tune it yet, just make sure the string is taut and won't slip out of place.
- Check once again the the string is seated correctly in the bridge and the nut. If not, loosen the string slightly then hold the string in place while you retighten it.
-
6Clip off any excess string sticking up off the tuning post. Simply clip the string as close to the post as you can, making sure not to knick any other strings in the process.


Advertisement
Part 4
Part 4 of 4:
Finishing String Replacement
-
1Repeat these steps for each of the strings you are replacing. Remember, it's best to remove one string and then immediately replace it, instead of taking them all off at once.
- Removing a single string, and then immediately replacing it, allows you to keep track of your strings, making sure that you are replacing each string with the same type.
- Another reason for this is that the bridge and the tailpiece of your mandolin may be held on solely by pressure from the strings and thus may fall off if all the strings are removed. It's simply easier to keep them in place than to put them back in place.[9] If you take off all the strings and your bridge or tailpiece fall off during string replacement, don't be surprised or worried. You will just need to put them back in place while you attach the new strings.
-
2Stretch your new strings just a little bit. Because new strings will stretch out naturally, forcing you to retune repeatedly, you can speed up this process by intentionally stretching new strings out a bit when you put them on. This should be done by over tightening them just a little bit. Be careful not to break them, especially the thin ones they are more delicate.
- After they are just a bit overtightened, leave them to stretch out for at least 5 hours.
-
3Tune your mandolin and enjoy.


Advertisement
Warnings
- If you stretch the strings too tight, you can risk damaging the mandolin or breaking the strings. Be careful, as this could possibly hurt you or your instrument.⧼thumbs_response⧽
Advertisement


References
- ↑ http://www.mandolinmania.com/strings.html
- ↑ http://banjolin.co.uk/mandolin/anatomy.htm
- ↑ http://www.lutherie.net/mandolin.gear.direction.html
- ↑ http://www.frets.com/FretsPages/Musician/Mandolin/MandoString/mandostring1.html
- ↑ http://banjolin.co.uk/mandolin/anatomy.htm
- ↑ https://www.youtube.com/watch?v=q2Hk34p2OBA
- ↑ http://www.mandolinmania.com/familiar.html
- ↑ https://www.youtube.com/watch?v=q2Hk34p2OBA
- ↑ http://www.frets.com/FretsPages/Musician/Mandolin/MandoString/mandostring2.html
About This Article
Advertisement