This article was co-authored by wikiHow Staff. Our trained team of editors and researchers validate articles for accuracy and comprehensiveness. wikiHow's Content Management Team carefully monitors the work from our editorial staff to ensure that each article is backed by trusted research and meets our high quality standards.
The wikiHow Video Team also followed the article's instructions and verified that they work.
This article has been viewed 76,059 times.
Learn more...
Rolling sushi is an art form, and without the proper tools, it can be challenging to do. Typically, sushi is rolled using a bamboo or silicone mat. The flexibility of the bamboo and silicone allows the layered ingredients to be rolled easily. Don’t worry if you do not have a special sushi mat. With a lint-free towel, some homemade sushi rice, and chopped vegetables, you will be able to roll your own sushi in no time.[1]
Ingredients
Sushi Rice
- 1 cup (158 g) white rice
- 2 cups (470 mL) water
- 3 US tbsp (44 mL) rice vinegar
- 2 tbsp (25 g) sugar
- 1/2 tsp (2.5 g) salt
Sushi Components
- 1 cup (158 g) sushi rice
- 3 sheets of nori (dried seaweed)
- 1 cup (150 g) of chopped vegetables (carrots, cucumbers, red peppers, avocado)
- A chopped meat of your choice (crab, shrimp, salmon, or deli meats)
- Toppings of your choosing (soy sauce, pickled ginger, wasabi)
Yields 3 servings of sushi.
Steps
Preparing the Rice and Filling
-
1Prepare 1 cup (158 g) of sushi rice according to the packaging instructions. The instructions for preparing sushi rice can vary. Typically, you start by rinsing the rice under cold water in a strainer to clean the grains. Then, bring the rice to a boil in a covered pot with water, and allow it to steam over a reduced heat for at least 15 minutes or until the water has cooked off.[2]
- The sushi rice should be sticky after the water evaporates.
- You can purchase sushi rice in Asian markets and most grocery stores in the world food section.
-
2Create sushi rice with 1 cup (158 g) of white rice and a vinegar solution. Sushi rice, unlike white rice, is treated with vinegar-based flavorings. If you do not have sushi rice, you can use white rice and prepare it as you normally would. Heat the white rice in a pot on the stove or use a rice cooker to prepare the rice for the sushi. Then, coat the rice in a vinegar-based solution to flavor it similarly to sushi rice.[3]
- Heat 3 US tbsp (44 mL) of rice vinegar, 2 tbsp (25 g) of sugar, and 1/2 tsp (2.5 g) of salt in a saucepan over a medium heat.
- Stir and heat the solution until the granules of sugar and salt have dissolved. Then, allow the mixture to cool before pouring it over your prepared white rice.
- Gently, mix the solution with the white rice until it is absorbed.
Advertisement -
3Cut the vegetables and meat into thin slices to use as a sushi filling. Place your selection of vegetables and meat on a cutting board, and use a sharp knife to thinly slice them. Cut the items so the length is no longer than 2–3 in (5.1–7.6 cm). This will allow you to layer the different slices within your sushi.[4]
Laying Out the Nori and Filling
-
1Rest a lint-free towel on a flat surface to create a base for rolling the sushi. Choose a thick hand towel that will support the sushi when you go to roll it. Just make sure that it is larger than the piece of nori (dried seaweed) you will be working with. If the towel is smaller than the nori, it will be difficult to roll.[5]
- A standard or full piece of nori is typically 8 by 8 in (20 by 20 cm).
-
2Lay a piece of plastic wrap across the towel to act as a barrier. Trim the width of the plastic wrap as needed so that it is roughly the same size as the towel. The plastic wrap will act as a protective layer between the nori and the towel, so you do not wind up with fabric fibers in your sushi.[6]
- Instead of plastic wrap, you can use parchment paper to layer the towel.
-
3Layer the plastic wrap with a piece of nori to be the sushi casing. Center the piece of nori along the plastic wrap and towel. Adjust the towel and plastic wrap size as needed to fit the nori.[7]
- Nori usually has an earthy and salty taste that complements all types of sushi nicely. As you perfect making sushi and begin to experiment with different fillings, make sure to try different nori flavors as well. Nori is available in a wide variety of flavors like barbeque or spicy chili.
-
4Use your hands to spread a thin layer of rice on top of the nori. Keep the rice layer very thin so you can fill the sushi with other items. The rice layer should be dense enough to coat the entire sheet of nori. The sticky rice will help keep the filling inside of the sushi.[8]
- Wet your fingers and palms with water to keep the rice from sticking to your hands.
-
5Make a line of filling across the nori about 1 in (2.5 cm) from an edge. Use a spoon or fork to help guide the line of filling along the nori. Make the line of filling about 1 in (2.5 cm) wide, and leave space along the edge of the nori so you have a starting point to roll it.[9]
-
6Experiment by preparing the sushi so the rice is on the outside of the nori. Cover the nori with rice as you would for the traditional sushi roll. Then, carefully flip the covered nori over so that the rice is resting against the plastic wrap. Finish this inside-out roll by adding the filling and rolling it up with the towel. This is a great way to bring texture to the outside of your sushi.[10]
- Consider topping the roll with slices of avocado or pickled ginger before cutting and serving.
Rolling and Serving the Sushi
-
1Lift the edge of the nori with the filling to begin rolling it. Apply a light pressure and roll the nori horizontally to create a tube-shape. Allow your fingers to cup the filling to prevent it from falling out. Continue to roll the nori until the filling is covered.[11]
-
2Lift the exposed edge of the towel and use its weight to finish rolling. Push the towel over the top of the rolled nori and let it guide you as you roll it. Apply a gentle pressure to tightly shape the roll. Then, remove the towel and plastic wrap from the roll once it is completely formed.[12]
- If needed, wet the edge of the nori with some water to seal it to the rest of the roll.[13]
- Repeat the filling and rolling process for the remaining 2 nori sheets.
-
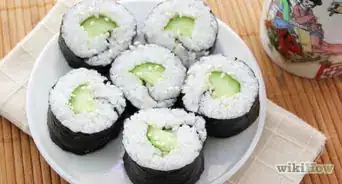
3Place the sushi roll on a cutting board and cut it into 6-8 pieces. Use a sharp knife to cut the sushi roll into 1 in (2.5 cm) pieces. Do not saw the sushi roll to cut it. Instead, let the weight of the knife press through the sushi roll. This will keep you from tearing the nori on a standard sushi roll or knocking the rice off an inside-out roll.[14]
- If the blade of the knife becomes sticky from the rice, wet it with a little bit of water or wipe it off between cuts.[15]
-
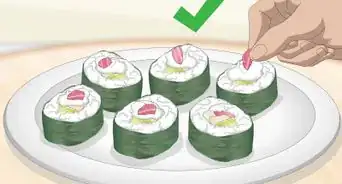
4Arrange the sushi on a dish and pair it with a topping of your choice. Serve the sushi immediately after preparing, or allow it to chill in the refrigerator for 20 minutes before eating. Then, pair the sushi with your favorite dipping sauces and garnishes, and enjoy![16]
- Dip your sushi in tangy soy sauce or spicy wasabi.[17]
- Coat the sushi with pickled ginger or lightly toasted sesame seeds.
Things You’ll Need
- Lint-free hand towel
- Plastic wrap or parchment paper
- Cooking pot or a rice cooker
- Measuring spoons and cups
- Cutting board
- Knife
References
- ↑ https://gizmodo.com/5-ways-to-roll-sushi-without-a-mat-and-barely-have-to-1652851035
- ↑ https://www.justonecookbook.com/sushi-rice/
- ↑ https://minimalistbaker.com/how-to-make-sushi-without-a-mat/
- ↑ https://spoonuniversity.com/how-to/make-homemade-sushi-without-bamboo-mat
- ↑ https://minimalistbaker.com/how-to-make-sushi-without-a-mat/
- ↑ https://www.plated.com/morsel/sushi/
- ↑ https://minimalistbaker.com/how-to-make-sushi-without-a-mat/
- ↑ https://spoonuniversity.com/how-to/make-homemade-sushi-without-bamboo-mat
- ↑ http://justbento.com/handbook/recipe-collection-mains/sushi-roll-bento-make-sushi-rolls-without-sushi-mat
- ↑ https://minimalistbaker.com/how-to-make-sushi-without-a-mat/
- ↑ https://minimalistbaker.com/how-to-make-sushi-without-a-mat/
- ↑ http://justbento.com/handbook/recipe-collection-mains/sushi-roll-bento-make-sushi-rolls-without-sushi-mat
- ↑ https://spoonuniversity.com/how-to/make-homemade-sushi-without-bamboo-mat
- ↑ https://spoonuniversity.com/how-to/make-homemade-sushi-without-bamboo-mat
- ↑ http://justbento.com/handbook/recipe-collection-mains/sushi-roll-bento-make-sushi-rolls-without-sushi-mat
- ↑ https://www.plated.com/morsel/sushi/
- ↑ https://spoonuniversity.com/how-to/make-homemade-sushi-without-bamboo-mat


