This article was co-authored by Ryaan Tuttle. Ryaan Tuttle is a Home Improvement Specialist and the CEO of Best Handyman, Inc. in Boston, Massachusetts. With over 17 years of experience, he specializes in building home service businesses, focusing on creating scalable and efficient brands. With the help of his global team, the companies have achieved over 10+ million in sales and received recognition through magazine features, and enjoy partnerships with wikiHow and Jobber field service software. Boston Magazine and LocalBest.com have named Best Handyman Boston the Best Handyman in Boston. Ryaan holds Construction Supervisor and Home Improvement Contractor Licenses.
There are 11 references cited in this article, which can be found at the bottom of the page.
This article has been viewed 15,333 times.
Brick is prone to damage just like any other type of flooring. Bricks are porous, so they absorb dirt and moisture, leading to permanent stains. You can guard against this by using either a film-forming sealer or a penetrating sealer. Film-forming sealers cover the top of the floor and make it look a little darker. Penetrating sealers are easier to maintain and don’t affect the floor’s color. Both are simple to apply by hand, so choose one according to preference. After the sealer dries, unsightly stains won’t be a problem in your home.
Steps
Cleaning and Prepping the Floor
-
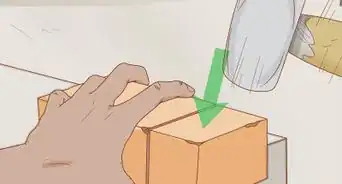
1Vacuum dirt and debris off of the floor. Any debris left on the floor could get sealed in if you don’t eliminate it now. Note any dirty spots, including in the gaps between each brick. Go over the floor a few times to ensure you are able to remove as much debris as possible.[1]
- If you’re working on outdoor flooring, you could use a stiff-bristled broom, a hose, or a power washer to push debris off of the bricks.
-
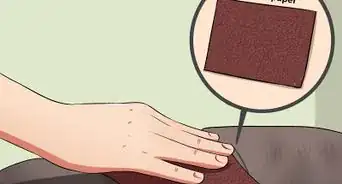
2Mop the floor with soapy water until it looks clean. Try mixing at least 1 cup (240 mL) of a mild dish detergent into 16 cups (3,800 mL) of warm water. Scrub the floor with a microfiber mop to remove remaining stains without leaving much water behind. If you still see stains, use a nylon scrub brush on them. Apply alternative cleaning solutions to deal with stains you can’t get rid of any other way.[2]
- One alternative to try is a mix of at least 1 US tbsp (15 mL) of baking soda with 16 cups (3,800 mL) of water. You could also use the same amount of vinegar or Borax in place of the baking soda.
- For very dirty floors, you may need to get a brick cleaner or trisodium phosphate (TSP) from your local hardware store. These cleaners are potent, so wear gloves and a respirator mask when handling them.
Advertisement -
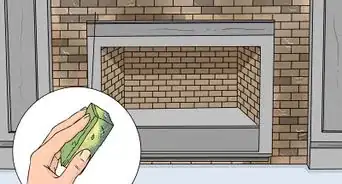
3Rinse the floor by mopping it with clean water. Remove the remaining debris and any water left on the floor. A microfiber mop will do this very well. Pick a string mop or a scrub brush mop, since other types may not hold up as well when used on such a rough surface. Once the floor looks clean, give it about an hour to air dry.[3]
- For outdoor brick flooring, you can spray cleaning solutions off with a hose.
- Remember that any stains left on the floor will get sealed in with the brick. However, moisture can prevent the sealer from working properly.
-
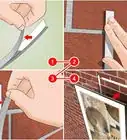
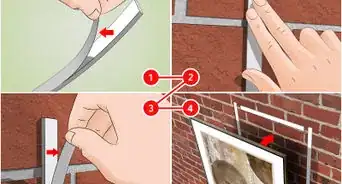
4Apply painter’s tape over baseboards and other areas near the floor. Protect these areas so the sealer doesn’t get on them.[4] Place a strip of tape along the bottom edge and underside of each baseboard in the room. You can also place it along doors and walls to keep them dry while you work. Expect a little splashing while you’re applying the sealant and guard against it.[5]
- Painter’s tape is available online or at most hardware stores. It doesn’t leave residue on walls, and it’s very resistant against moisture.


Using an Acrylic Film-Forming Sealer
-
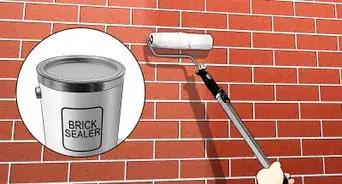
1Select an acrylic film-forming sealer that works on brick. Film-forming sealers come in several varieties, so choose carefully. Water-based acrylic sealers are much safer to use on indoor floors. Once you have the sealer, pour it into a container that is big enough for the paint roller you plan on using.[6]
- Acrylic sealers are less likely to yellow than wax or polyurethane ones. They also don’t release toxic fumes, so they are easier to apply.
- If you choose another type of sealer, take safety precautions when using it indoors. Ventilate the area by opening nearby doors and windows. Also, wear a respirator mask.
-
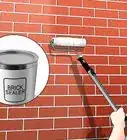
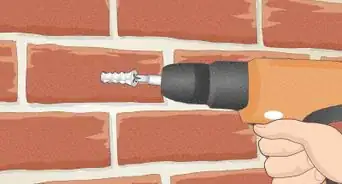
2Choose a paint roller with a 3⁄4 in (1.9 cm) nap to apply the sealer. Brick sealer can be applied with a standard paint roller or brush.[7] A 3⁄4 in (1.9 cm) roller is the perfect thickness for applying a consistent layer of sealer without taking damage from a rough surface like brick. The length of the roller doesn’t matter as much, so you can use the longest one you have to coat the floor at the quickest possible rate.[8]
- The nap is the roller’s thickness. At the right thickness, the roller will be able to spread a consistent amount of the sealer into the mortar between the bricks.
- You could use a brush instead of a roller, but finishing the floor will take longer. Use a 2 in (5.1 cm) nylon or polyester chip brush, for instance.
- Even if you have a roller, consider also keeping a brush on hand to reach corners and other tough spots.
-
3Begin spreading the sealer across the far end of the room. Start in one of the lesser-used corners and work your way back to the door. Run the roller through the roller tray, then use it to roll sealer on the floor. Work toward the opposite corner, taking care not to step in the sealer.[9]
- Working across the width of a room is easiest. If you’re sealing a brick patio, for instance, start near your home and work toward the opposite end.
- Make sure the sealer applies evenly. Try pushing the roller back and forth across the floor a few times.
-
4Use the roller to spread the remaining sealer across the floor. Move down to an uncoated portion of the floor and spread a layer of sealer across it. Take some time to check each section of the floor for any sealer puddling over it. If you notice any, spread it out with the roller. Eventually, you will reach the opposite end of the floor and have a nice, consistent layer of sealer across it.[10]
- Push the roller back and forth across the brick a few times to spread out the coating and stop it from puddling. If you notice lots of puddles forming, use less sealer with each application.
- The brick turns darker as you add the sealer, so missed spots are noticeable. Finish covering these spots, but don’t neglect the spaces between the bricks. They can be easy to overlook.
-
5Let the sealer dry on the floor for at least 4 hours. The drying time can vary depending on the product you’re using, so check the manufacturer’s instructions for a more specific estimate. Some sealing products can require as much as 24 hours to dry. You won’t be able to walk on the floor until then.[11]
- While the sealer dries, keep the floor protected. Make sure everyone in your home knows not to go near it.
-
6Recoat the brick with a second layer of sealer. The second coat of sealant ensures that the brick is completely waterproof.[12] Use a roller or a brush the same way as you did before. Start in one corner and work your way through the room, making sure you get the gaps in between the bricks.[13]
- Check the manufacturer’s instructions to ensure the sealer has plenty of time to set in. It always takes longer to cure than surface dry. Give it 24 to 48 hours to ensure it fully dries.
- The film seal can last 10 years or more. If you notice light spots or stains forming, then it may be time to refinish the brick with a new coat of sealer. Remove the old finish with a seal stripper before applying the new sealer.


Applying a Penetrating Sealer
-
1Load a penetrating brick sealer into a hand pump sprayer. All penetrating sealers are similar and safe to use indoors, so you won’t have many options to choose from. Instead, make sure you have a good hand pump sprayer with a fan tip nozzle. The sprayer allows you to move around and quickly cover the floor. A fan tip nozzle sprays a gentle circle of sealer instead of a single stream, enabling you to get a more consistent coating.[14]
- Many hardware stores not only sell sprayers, but rent them out as well. You can look for them while purchasing a sealer there, or get everything you need online.
- If you are unable to find a sprayer, you could use a paint roller instead. Try using one with a 3⁄4 in (1.9 cm) nap. It could also be brushed on with a 2 in (5.1 cm) nylon or polyester chip brush.
-
2Position the spray nozzle in one corner of the room. Start in a lesser-used corner, leaving yourself space to get out of the room without stepping on the sealer. Hold the spray nozzle about 6 in (15 cm) from the floor. You can start applying it by working along the edge of the floor toward the opposite corner.[15]
- To operate a hand pump sprayer, raise and lower the pump on the top of the machine. When it becomes difficult to move, press the trigger on the nozzle to spray the sealer.
- The easiest way to cover a floor is usually by gradually working across it. Go along its width instead of the longer sides unless you don’t have a choice.
- Add the sealer sparingly by moving at a steady pace. If you see the sealer puddling, move at a faster rate to avoid using too much of it in any single spot.
-
3Cover the floor by sweeping the sprayer across it. Move down to an uncoated portion and sweep the nozzle across it to continue applying the sealer. Instead of moving in a straight line, move the sprayer continuously in a circle. This will allow you to spread the sealer more consistently while avoiding puddling. Check each section as you go to identify any problem spots that don’t glisten like the rest of the floor after it has been covered.[16]
- Note any spots that seem to absorb the sealer quickly. The brick will absorb it right away, appearing dull and dry compared to the rest of the floor. Apply a little extra there to keep the brick coated.
- Spots that have too much sealer, or puddles, have to be smoothed out. Remember where these spots are so you can come back to them.
-
4Smooth out uneven sections of the floor with a paint roller. Be aware of any spots on the floor that look dry or have puddles of sealer. Take a dry paint roller and push it back and forth across the floor. It will pick up some of the excess sealer and spread the remainder out. If you add too much sealer at once, you can use the roller to spread it around more consistently.[17]
- Double-check that the floor looks well-covered and consistent before letting the sealer dry. Tight areas, such as near corners and baseboards, can be easy to overlook.
-
5Wait about 24 hours for the sealer to dry. The exact time you’re supposed to wait will vary depending on the product you’re using. For accuracy, check the manufacturer’s recommendations. In the meantime, keep the floor safe and free from traffic.[18]
- Let other people in your home know not to step on the floor while it dries. Lock the doors or hang signs nearby as reminders.
-
6Apply a lighter coating of sealant to finish protecting the floor. This time, the brick won’t need to absorb as much sealant. Move across the floor at a quicker pace to avoid using too much. Make sure the second layer looks consistent and is spread evenly across the floor. Use a paint roller as needed to help eliminate uneven patches.[19]
- The exact amount of sealant needed varies depending on the floor. Watch for puddles. Puddled sealer shows that the bricks aren’t absorbing anything, so spray less of it or stop completely.
- If the bricks won’t absorb any sealer at all at this point, they don’t need the second coating. Most floors require 2 coats, but there are some exceptions.
-
7Allow the sealer to dry for about 48 hours. The remaining sealer will soak into the bricks, leaving the floor as clean and dry as the day it was installed. Don’t walk on it until it has finished curing. After that, it will resist moisture and stains for many years.[20]
- Penetrating sealers are generally designed to last for 15 years. While not necessary, you could attempt to apply a fresh layer of sealer every year to ensure your floor is well-protected from damage.


Expert Q&A
-
QuestionWhat is the best sealer for brick?
 Ryaan TuttleRyaan Tuttle is a Home Improvement Specialist and the CEO of Best Handyman, Inc. in Boston, Massachusetts. With over 17 years of experience, he specializes in building home service businesses, focusing on creating scalable and efficient brands. With the help of his global team, the companies have achieved over 10+ million in sales and received recognition through magazine features, and enjoy partnerships with wikiHow and Jobber field service software. Boston Magazine and LocalBest.com have named Best Handyman Boston the Best Handyman in Boston. Ryaan holds Construction Supervisor and Home Improvement Contractor Licenses.
Home Improvement SpecialistIt depends on the kind of substrate you're going to use as priming material. For example, if it's stone or plywood, you should apply a primer using either a paint brush or a small paint roller. -
QuestionHow do you waterproof a brick floor?Ryaan TuttleRyaan Tuttle is a Home Improvement Specialist and the CEO of Best Handyman, Inc. in Boston, Massachusetts. With over 17 years of experience, he specializes in building home service businesses, focusing on creating scalable and efficient brands. With the help of his global team, the companies have achieved over 10+ million in sales and received recognition through magazine features, and enjoy partnerships with wikiHow and Jobber field service software. Boston Magazine and LocalBest.com have named Best Handyman Boston the Best Handyman in Boston. Ryaan holds Construction Supervisor and Home Improvement Contractor Licenses.
Home Improvement SpecialistAfter priming, put down two to three coats of waterproofing material, covering any joints or seams with a fiberglass or a mesh tape.
Warnings
- Wax and polyurethane film finishes release dangerous fumes, so take the necessary safety precautions when applying them. Ventilate your space and wear a respirator mask.⧼thumbs_response⧽
Things You’ll Need
Cleaning and Protecting the Floor
- Vacuum or broom
- Microfiber mop
- Bucket
- Mild dish detergent or brick cleaner
- Measuring cup
- Water
- Commercial brick cleaner (optional)
Using a Film-Forming Sealer
- Film-forming sealer
- Paint roller tray or bucket
- Paint roller with a 3⁄4 in (1.9 cm) nap
- Respirator mask for wax or polyurethane sealers
- Paint brush (optional)
Applying a Penetrating Sealer
- Penetrating sealer
- Hand pump sprayer
- Fan nozzle
- Paint roller with a 3⁄4 in (1.9 cm) nap


References
- ↑ https://www.bobvila.com/articles/how-to-clean-brick/
- ↑ https://www.bobvila.com/articles/how-to-clean-brick/
- ↑ https://www.thisoldhouse.com/how-to/whats-best-way-to-get-rid-algae-brick-pavers
- ↑ Ryaan Tuttle. Home Improvement Specialist. Expert Interview. 17 February 2022.
- ↑ https://www.thisoldhouse.com/ask-toh/sealing-brick-floor
- ↑ https://www.masonrymagazine.com/blog/2018/09/01/coatings-sealants-and-graffiti-protection/
- ↑ Ryaan Tuttle. Home Improvement Specialist. Expert Interview. 17 February 2022.
- ↑ https://sealwithease.com/how-to-seal-brick-pavers/
- ↑ https://www.youtube.com/watch?v=_brpvgnsIKU&feature=youtu.be&t=93
- ↑ https://www.youtube.com/watch?v=_brpvgnsIKU&feature=youtu.be&t=131
- ↑ https://extremehowto.com/sealing-interior-brick/
- ↑ Ryaan Tuttle. Home Improvement Specialist. Expert Interview. 17 February 2022.
- ↑ https://www.thisoldhouse.com/ask-toh/sealing-brick-floor
- ↑ https://www.thisoldhouse.com/ask-toh/sealing-brick-floor
- ↑ https://sealwithease.com/how-to-seal-brick-pavers/
- ↑ https://sealwithease.com/how-to-seal-brick-pavers/
- ↑ https://www.youtube.com/watch?v=mbDnXqAVhQ8&feature=youtu.be&t=143
- ↑ https://sealwithease.com/how-to-seal-brick-pavers/
- ↑ https://www.thisoldhouse.com/ask-toh/sealing-brick-floor
- ↑ https://www.youtube.com/watch?v=mbDnXqAVhQ8&feature=youtu.be&t=167
About This Article