This article was co-authored by wikiHow staff writer, Travis Boylls. Travis Boylls is a Technology Writer and Editor for wikiHow. Travis has experience writing technology-related articles, providing software customer service, and in graphic design. He specializes in Windows, macOS, Android, iOS, and Linux platforms. He studied graphic design at Pikes Peak Community College.
This article has been viewed 51,066 times.
Learn more...
This wikiHow teaches you how to set up a new Nintendo Switch. Setting up a new Nintendo Switch is a bit of lengthy process. You need to charge the console, set up the dock, and then go through the initial system setup process. Use the following steps to set up and configure your new Nintendo Switch.
Steps
Console Unboxing and Setup
-
1Remove the Nintendo Switch from the box. A new Nintendo Switch comes with the following items in the box.[1]
- Nintendo Switch tablet console.
- Left and Right Joy-con Controllers.
- Nintendo Switch dock.
- Joy-con controller straps.
- Joy-con controller grip.
- AC Adapter.
- HDMI cable.
-
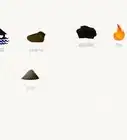
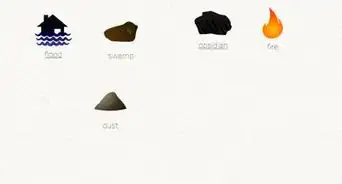
2Attach the joy-con controllers to the tablet console. The tablet console is part of the Nintendo Switch with the touch screen. This is the main piece of the Nintendo Switch. The Joy-con controllers are the two attachment pieces that contain an analogue stick and four action buttons and a "+" or "-" button. Slide the track on the side of the joy-con controllers into the side of the console to attach the joy-con controllers. The joy-con with the "-" button goes on the left. The joy-con with the "+" button goes on the right.
- If you have a Nintendo Switch Lite, skip to step 2 in method 2.
Advertisement -
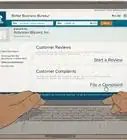
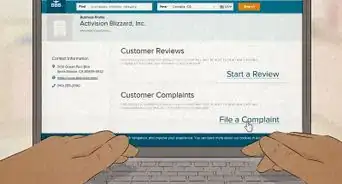
3Open the back-panel of the Nintendo Switch dock. The Nintendo Switch dock is the black, rectangle-shaped box that comes with the Nintendo Switch. The back-panel is the side that has the oval-shaped Nintendo logo. Place your fingers in the slot above the panel to grip the back-panel door and pull to open it. The back-panel contains ports for the AC Adapter, HDMI cable, and a USB port for additional Nintendo Switch accessories. There is a slot on the side of the dock for wires to run through.
-
4Connect the AC Adapter to the dock. Plug the AC Adapter that came with the Nintendo Switch into an electrical outlet. Plug the other end of the electrical outlet into the port labeled "AC Adapter" in the back-panel of the Nintendo Switch dock. Run the cable through slot on the side of the dock.
-
5Connect the HDMI cable from your TV to the dock. Connect an HDMI cable to a free HDMI port on your TV to the port labeled "HDMI Out" in the back-panel of Nintendo Switch dock. Run the cable through the slot on the side of the Nintendo Switch dock.
-
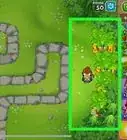
6Place the Nintendo Switch in the dock to charge it. The Nintendo Switch dock is used to charge the Nintendo Switch console, as well as display the Nintendo Switch display on your TV. Place the console in the slot on the top of the Nintendo Switch with the screen facing the same direction as the Nintendo Switch logo on the front. If it is inserted properly, a green light flashes in the lower-left corner of the Nintendo Switch dock. Allow about three and a half hours for the console to charge. The console will also charge the joy-con controllers when they are attached.
- You can also charge the console by connecting the AC Adapter, or any USB-C charger to the port on the bottom of the Nintendo Switch console.


Initial System Setup
-
1Remove the NIntendo Switch from the dock and power it on. Once the Nintendo Switch is charged, remove it from the dock press the Power button to turn it on. The Power button is on the top of the console on the left side. It has an icon with a circle with a line through it. It's next to the volume buttons at the top.
-
2Select a language. There are 8 steps to the initial system setup process. They are marked by the 8 dots in the upper-right corner of the screen. The first step is to select the language you speak from the list displayed on the screen.
- To select an item on the Nintendo Switch, you can double tap it on the screen, or use the left joy-con controller to navigate to it, and press A on the right joy-con controller to select it.
-
3Select your region. The Nintendo Switch has four market regions. The Americas (United States, Canada, Mexico, South America), Europe, Australia/New Zealand, and Japan. Select the region you live in.
-
4Accept the End-User License Agreement and select Next. Tap or select the checkbox next to "Accept" to accept the End-User License Agreement. If you wish to read the End-User License Agreement, select the black box that says "View End-User License Agreement". Select Next when you are ready to continue.
-
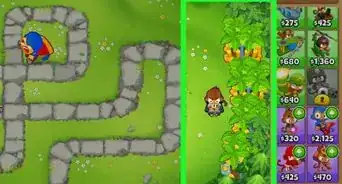
5Select a wireless network. The Nintendo Switch scans for local wireless networks during the initial setup process. Select your preferred wireless network and use the on-screen keyboard to enter your wireless password. Select Ok or press the "+" button on the right joy-con controller to continue. You will be alerted if the Nintendo Switch successfully connects to the network. Select Ok to continue.
- If you are using a wired connection, you will need to purchase a wired LAN adapter. Connect a network cable to the wired LAN adapter, and connect the wired LAN adapter to the USB port in the back-panel of the Nintendo Switch dock. Select "Wired connection" during the network setup portion of the initial setup process.[2]
-
6Select a time zone. If you don't see your city listed in the list of time zones, select another city in your time zone.
-
7Select Connect to TV. For the next step, the Nintendo Switch will walk you through the process of connecting to your TV. If you don't wish to do this right now, you can select to do this at a later time.
- If you have a Nintendo Switch Lite, skip to step 12.
-
8Detach the joy-con controllers and select Next. To detach the joy-con controllers, press and hold the round button on the back of the joy-con controllers next to the ZR and ZL buttons. While holding the round button, slide up to detach the joy-con controllers. Select Next when you are ready to continue.
- You can use the kickstand on the back of the console to prop it up while holding the joy-con controllers. Read "How to Open the Nintendo Switch Kickstand" to learn more about how to use the kickstand and joy-con controllers.
-
9Select Next to read the dock setup instructions. If you haven't already done so, set up the Nintendo Switch dock as outlined on screen, or in the instructions in Part 1. Select Next on each of the dock setup instructions.
-
10Select the Nintendo Switch input source on your TV. Use your TV remote to select the HDMI source you connected your Nintendo Switch to.
-
11Place the Nintendo Switch console in the dock and select Success. When you place the Nintendo Switch in the dock, the image on the Nintendo Switch screen should automatically display on your TV. If you see the image on your TV, select Success. If you do not see an image on your TV, remove the Nintendo Switch from the dock and select No Image on TV Screen for further instructions.
-
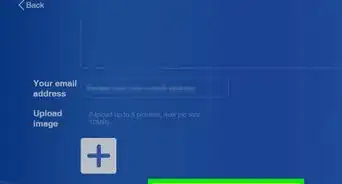
12Select Next to create a new account. The next step in the Nintendo Switch setup process is to create a new user account. Select Next to continue.
-
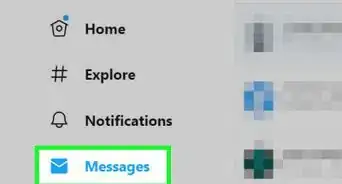
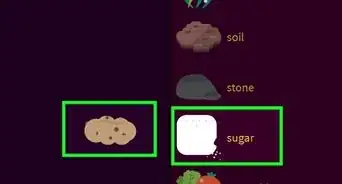
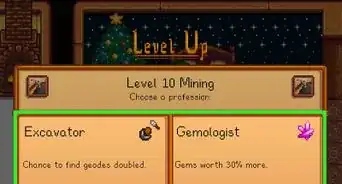
13Select a user icon. There are a variety of icons of Nintendo characters you can select as the icon for your user account. You can also select Mii to create a Mii, you would like.
- Read "How To Create A Mii on Nintendo Switch" to learn more about how to create a Mii.
-
14Create a user nickname and select Ok. Use the on-screen keyboard to type a nickname for the user and select Ok.
-
15Select Add another user or Skip. If you want to add more users, select Add another user and select an icon and nickname. When you have added all the users you want, select Skip.
-
16Select Configure Parental Controls or Skip. If you want to set up parental controls, select Configure Parental Controls and follow the on-screen instructions. You will need to download an app for your smartphone to use parental controls. If you do not wish to configure parental controls, select Skip to finish the setup process.
- Read "How To Use Parental Controls on Nintendo Switch" to learn more about how to set Parental Controls on the Nintendo Switch.
-
17Press the Home button on the left joy-con controller. The Nintendo Switch setup process is now complete. Press the Home button to go to the home screen. It's the button that resembles a house on the right joy-con controller.[3]


Community Q&A
-
QuestionCan different users have different saved data on games? As far as I know, the new Zelda game only has one save slot.
 Community AnswerYes, different users of the same system can have different save files if they sign onto their account when entering a game.
 -
QuestionWill Nintendo switch ever be backward compatible in the future?
 HagukananTop AnswererNo, it will not. The Switch cartridges are completely unique to the console, so Wii U, Wii, 3DS, and DS games are not and will never be compatible with the Switch.
 -
QuestionWhere is the best place to buy a Nintendo Switch? I live in a low income household.HagukananTop AnswererThey're sold at many retail stores, such as Target, Walmart, etc., and Best Buy sometimes has good deals on the Nintendo Switch and the accessories that go with it. You could also look at stores that sell them used and reconditioned, to save a lot on them. Or, wait for the sales.

-Step-13.webp)
References
About This Article