This article was co-authored by Andrea Beaulieu and by wikiHow staff writer, Luke Smith, MFA. Andrea Beaulieu is a Professional Tailor, Fashion Designer, and the Owner of MOORE, a Brooklyn, New York based storefront and apparel workshop for gender-neutral, contemporary streetwear as well as custom-tailored products. Andrea has over 20 years in the fashion design and marketing industries and specializes in pattern making, draping, and the construction of garments. She holds a BS in Fashion Design and Merchandising from the University of North Carolina at Greensboro.
There are 9 references cited in this article, which can be found at the bottom of the page.
This article has been viewed 709,080 times.
Got a tear in the sleeve of your sweater? Or maybe a big ol’ hole in your favorite denim jacket? Sewing up unfortunate holes in your favorite clothing is a cinch, so don’t toss those tattered jeans just yet! All you need is a needle and thread (and in some cases, a bit of extra fabric). We’ll show you how to thread a needle, backstitch a torn seam or small rip, and fasten a patch to a larger hole. Don’t nix it, fix it!
Things You Should Know
- Use a thicker needle for heavier materials like denim or layered fabrics, and go for a thinner needle for more delicate fabrics like cotton or nylon.
- Turn your garment inside-out and backstitch along the length of a ripped seam or hole to fasten the edges together.
- Measure larger holes, then cut a patch of matching fabric to size. Then, fasten the patch to the underside of the garment with a running stitch.
Steps
Threading the Needle
-
1Pick a thick needle for tough fabrics, and a thin needle for soft fabrics. If the fabric is thick and tough (like denim, leather, or multi-layered cloth), use a sharp, heavy needle to pierce the cloth without too much effort. If the fabric is soft or thin (like cotton or nylon), use a thinner, more delicate needle. To be sure you're using the right needle, check the packaging to see what kind of fabric it's recommended for.[1]
- The larger the needle, the smaller the “gauge.” For example, an 8-gauge needle is very thick, so it's best for heavy, woven materials. A 16-gauge needle is very thin, so it's suited for more delicate fabrics.[2]
- Use a needle with a rounded tip for knits and a needle with a sharp tip for woven fabrics.[3]
-
2Cut a length of thread about 2.5 times longer than the hole. For larger holes, the rule of thumb is that you’ll need about 2.5 times more thread than the size of the hole.[4] For smaller holes (up to about 2 in (5.1 cm)) go ahead and cut about 24 in (61 cm) of thread—this will give you ample slack to comfortably make the stitches and tie off the fix.[5]
- To better hide the stitches, use a thread that’s similar in color to the fabric.
Advertisement -
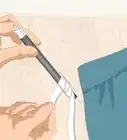
3Thread the needle and knot the thread. Pull the thread through the needle so that you have 2 threads of equal length on either side of the eye of the needle. Then, tie the two ends together about 0.5–1 in (1.3–2.5 cm) from the tips with a simple knot—tying an overhand knot will do.[6]
- Double or even triple tie the knot when mending fabrics with looser weaves to ensure the knot doesn’t slip through the fabric.
- If the thread’s tip is frayed, snip it about 1 in (2.5 cm) down from the frayed end, or simply lick it to get a cleaner tip before you thread the needle. Alternatively, use a needle threader if you’re having trouble.

Fixing a Seam or Small Hole
-
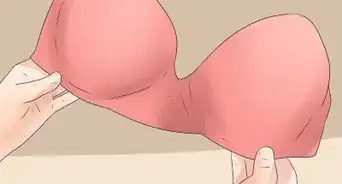
1Turn the garment inside out and expose the hole. Turning the fabric inside-out gives you better access to the hole, and also makes it so that when you stitch it up, the stitch will be invisible. When you’ve found the hole, go ahead and snip away any loose threads.[7]
- Use this method to fix holes up to about 1 in (2.5 cm) wide—stitching wider holes without a patch may pucker or disform the garment.
- This method can be used to simple tears up to about 4–5 in (10–13 cm), where you just need to join 2 edges of a rip.
-
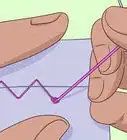
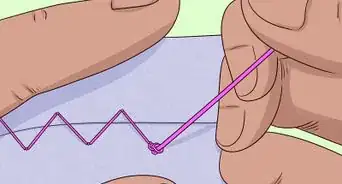
2Make the first stitch at one end of the hole. Pinch the edges of the hole together, so that they’re aligned on the inside of the garment. Then, insert the needle about 2 mm (0.079 in) from the edge at one end of the hole, fastening both edges together and pulling the thread all the way through so that the knot is stopped by the fabric. Then, thread the tip of the needle back up through the edges about 2 mm (0.079 in) along the tear.[8]
- Optionally, wear a thimble or 2 to protect your fingertips as you work.
-
3Backstitch to the end of the hole. To backstitch, insert the needle halfway along the stitch you just created, and then reinsert it so that it emerges another half length after the end of the first stitch. Repeat this stitch until you reach the end of the hole, and the tear is fastened shut.[9]
-
4Loop the needle through the final stitch to tie off the thread. To finish sewing, make one last stitch, inserting the needle and pulling it through. Before you tighten it, though, thread the needle through the loop created by the partial stitch, and then pull it tight. Make another 1 or 2 stitches this way, threading the needle through the same hole and inserting it into the loop each time to tie off the thread. Then snip off the thread just above the new knot, and your hole is fixed![10]
Patching a Large Hole
-
1Measure the length and width of the hole. Use a ruler or soft measuring tape to find the measurements for the largest parts of the tear or hole. Larger holes need to be reinforced by a patch, so we’ll use these measurements to gauge the size of the patch.[11]
-
2Cut a patch about 1.5 in (3.8 cm) larger than the hole. Use the same or a similar material as the garment itself, matching both the color and weight. Make sure the patch is big enough to cover the entire hole, and then some. You don’t have to cut it to shape, just a square or circle will do.[12]
- Patches come in many common fabric types, like denim or cotton. You might also use a bit of scrap fabric from another piece of clothing.
- Many menders opt to use a decorative fabric instead—it’s difficult to make invisible fixes to large holes, so why not show off your handiwork, instead?
-
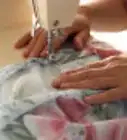
3Pin the patch in place on the underside of the garment. Bring the edges of the hole as close together as possible, so that the fabric lays flat and doesn’t pucker. Then, use sewing pins to temporarily fasten your patch in place on the inside of the garment, so that the patch peeks up through the tears.[13]
-
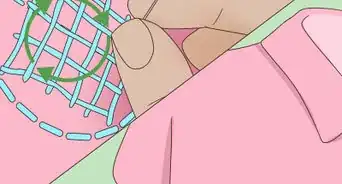
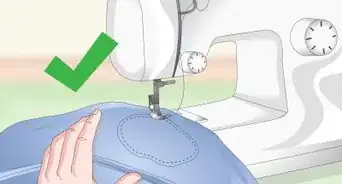
4Use a running stitch around the perimeter of the patch. Insert the needle up from the underside of the patch, then sink it down through the fabric again about 0.25 in (6.4 mm) along the edge of the patch, joining the patch to the garment. Then, bring the needle up through the fabric about 0.25 in (6.4 mm) from the last stitch, creating a dotted line, or “running stitch.” Continue this stitch all the way around the edge of the patch.[14]
- Stitch at least about 1 in (2.5 cm) from the edge of the tears, if possible.
-
5Strengthen the torn edges with rows of running stitches. If your hole has irregularly-shaped tears, sew them down to the patch by laying them flat across the patch, then sewing back-and-forth lines of running stitches all along the area of the patch, keeping each row about 0.25 inches (0.64 cm) away from the next.[15]
- If the hole is especially frayed, reinforce it with a liquid seam sealant before you start stitching. This can help make the fix more durable.
-
6Thread the needle through your last stitch to tie off and cut the thread. Once you’ve secured the patch to the garment with ample running stitches, loop the needle through your last stitch, and pull it tight to tie it off. Repeat this 1-2 more times to secure the thread, then snip it away just above the knot.[16]
- To better hide the fix, iron on a decorative patch over the mended hole.
- Embroider a design onto the patched hole to give your handiwork some flair and add some character to the garment.
Expert Q&A
-
QuestionHow do I pick the right needle for the material I'm sewing?
 Andrea BeaulieuAndrea Beaulieu is a Professional Tailor, Fashion Designer, and the Owner of MOORE, a Brooklyn, New York based storefront and apparel workshop for gender-neutral, contemporary streetwear as well as custom-tailored products. Andrea has over 20 years in the fashion design and marketing industries and specializes in pattern making, draping, and the construction of garments. She holds a BS in Fashion Design and Merchandising from the University of North Carolina at Greensboro.
Professional Tailor & Fashion DesignerAll needles have a label on the packaging that will tell you the specific kind of fabric they work best on. Needles are also sized based on the gauge of the needle—the larger the gauge, the smaller the needle. Lighter fabrics need a smaller needle, and heavier wovens need a larger needle. -
QuestionHow do I sew a hole in my stuffed animal
 wikiHow Staff EditorThis answer was written by one of our trained team of researchers who validated it for accuracy and comprehensiveness.
Staff AnswerwikiHow Staff EditorStaff AnswerIf you don't mind the stitches being visible, you can use the above method about sewing smaller holes, and start sewing on the outside of the stuffed animal. Is the hole is large, remove the stuffing and add a patch to the interior, then replace the stuffing. -
Questionwhat is the best way to sew up the bottom of a spandex Spider-Man suit?wikiHow Staff EditorThis answer was written by one of our trained team of researchers who validated it for accuracy and comprehensiveness.
Staff AnswerwikiHow Staff EditorStaff AnswerTuck the hem into the leg by about an inch, then use a running stitch all the way around the hem to secure it.
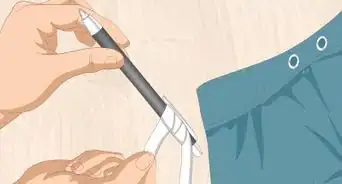
Things You'll Need
- Scissors
- Sewing needle
- Thread
- Fabric patch
- Ruler or soft measuring tape
- Sewing pins
- Seam ripper (Optional)
- Thimble (Optional)


References
- ↑ Andrea Beaulieu. Professional Tailor & Fashion Designer. Expert Interview. 1 May 2020.
- ↑ Andrea Beaulieu. Professional Tailor & Fashion Designer. Expert Interview. 1 May 2020.
- ↑ Andrea Beaulieu. Professional Tailor & Fashion Designer. Expert Interview. 1 May 2020.
- ↑ https://craftsbliss.com/how-much-sewing-thread-for-project/
- ↑ https://www.youtube.com/watch?v=aLrSjrW2AG4&t=62s
- ↑ https://www.youtube.com/watch?v=RycqcXvRZvc&t=50s
- ↑ https://www.thepennyhoarder.com/save-money/diy-clothing-repairs/
- ↑ https://www.youtube.com/watch?v=mUE_ATvXIdA&t=56s
- ↑ https://www.youtube.com/watch?v=mUE_ATvXIdA&t=56s
- ↑ https://www.youtube.com/watch?v=aLrSjrW2AG4&t=407s
- ↑ https://www.sierraclub.org/sierra/3-simple-clothing-repairs-you-can-do-right-now
- ↑ https://www.sierraclub.org/sierra/3-simple-clothing-repairs-you-can-do-right-now
- ↑ https://www.sierraclub.org/sierra/3-simple-clothing-repairs-you-can-do-right-now
- ↑ https://www.sierraclub.org/sierra/3-simple-clothing-repairs-you-can-do-right-now
- ↑ https://www.sierraclub.org/sierra/3-simple-clothing-repairs-you-can-do-right-now
- ↑ https://www.sierraclub.org/sierra/3-simple-clothing-repairs-you-can-do-right-now
About This Article

To sew up a hole, first thread a needle using thread that’s the same color as the fabric you’ll be sewing. Turn the fabric inside out so you’re sewing on the wrong side of the fabric. Then, insert the needle through the fabric and back out again just below the hole. Pull the thread all the way through to the knot, then go back in and out of the same spot with the needle a few more times to make a secure knot in the fabric. Next, bring the needle through one side of the hole and out the other side, pulling the thread tight. Go through the same side again, slightly above where you went through before, and out the other side. Repeat this process all along the hole. When you get to the end of the hole opposite from where you started, go in and out of the fabric in the same spot a few times like you did before to make another secure knot. Finally, snip off the excess thread at each end. To learn how to fix a hole with an iron-on patch, read on!