This article was co-authored by wikiHow Staff. Our trained team of editors and researchers validate articles for accuracy and comprehensiveness. wikiHow's Content Management Team carefully monitors the work from our editorial staff to ensure that each article is backed by trusted research and meets our high quality standards.
There are 10 references cited in this article, which can be found at the bottom of the page.
This article has been viewed 42,242 times.
Learn more...
Surf shops are full of premade boards fresh from the factory. But what if none of them suit your body type or riding style? Most new surfers don’t realize that overseeing the creation of their own surfboard is even an option. Not only is making your own surfboard far cheaper than buying one off the shelf, and it also allows you to control every contour and angle of the board for a more personalized ride. Shaping the board, however, is the most crucial aspect in determining how it will maneuver. While it does require a keen eye and delicate handling, shaping a surfboard isn’t as hard as you might think. All you need is a visual image of the kind of board you want to create, the right set of tools and the patience to sculpt the board a little at a time.
Steps
Cutting the Basic Shape of the Board
-
1Gather the tools you need. Shaping a surfboard properly requires the right work space and instruments. Set up shop in a well-lit, open area with a table or rack that you can use to hold the board in place while you work. To shape your board, you’ll be making use of an electric power planer, a handsaw, a surform tool and a sandpaper block. It will also help to have a soft lead pencil and a straight edge or T-square for measuring.[1]
- For your own safety, you’ll want to make sure you have eye and ear protection (lab safety goggles or woodworking glasses and a pair of noise-deadening earmuffs will work just fine) and that you’re wearing a respirator, as there will be lots of foam dust floating around the room once the shaping process is underway.
-
2Start with a blank. To get started, you’ll need to have your raw materials in order. The innards of a surfboard are made from lightweight foam, which big manufacturers buy and trim down to size. For the rider shaping his or her own board, however, there is the “blank,” a hunk of foam that has been cut into a rough surfboard shape that can then be shaved down to the surfer’s preferred specifications. Purchase a blank and get to work![2]
- It’s best to find a blank that’s larger than you want your finished board to be so that you’ll have more room for error in trimming and shaping the foam.[3]
- Surfboard blanks only cost a fraction of what premade boards cost, and can be shaped in a matter of hours.
Advertisement -
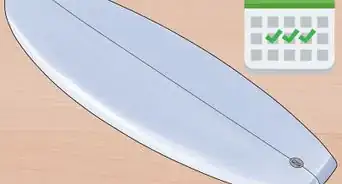
3Draw the outline. Decide on the basic shape that you want your surfboard to have. It may be a longboard with a sharp, pointed nose, or a shorter performance board with a wide, rounded tail and shallow rails. Look up sample dimensions online for the type of surfboard you want to fashion, or use an old surfboard that rides well for reference. Trace the outline of your preferred board shape onto the rough foam blank. It may help to use a template or other visual aid to get the shape of the board right.[4]
- Choose a shape for your surfboard that fits your own unique attributes and needs. The length and shape of your board might be impacted by your weight, body type, riding style or the kind of surf you usually ride.
- If you already have a surfboard that you like and want to use it as a template, simply trace around it onto a few overlapping pieces of posterboard, then cut out the outline. Lay this outline over the foam surfboard blank as you cut it to get the right length and width.[5]
-
4Cut the board to shape. Take a handsaw and cut around the outline you just drew, starting at either the nose or tail and moving along one edge at a time. Use long, smooth strokes to avoid getting off track or breaking the foam. Don’t worry about being too precise, as you’ll continue to cut and shave the board as you go.[6]
- Secure the board on your work table or rack (some shapers use special racks with built-in adjustable clamps, others use bungee cords or straps, or simply hold the board down with their free hand) so that it doesn’t slide around as you’re cutting it.
-
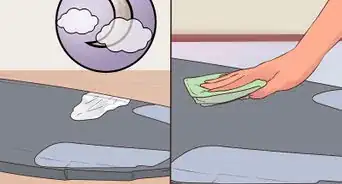
5Sand the edges flat. Run a sanding block along the jagged edges of the foam blank to smooth them out. Get the edges as flat and even as you can, as they’ll be your starting point for shaping the rails (which impact how the board handles) later on. From here, you’ll be using finer techniques to bring out the finished shape of the board.[7]
- Use the sandpaper to work out any imperfections made from sawing the outline.
- The sides of the board should be as close to 90 degrees to the deck (top) and belly (bottom) as you can get them.[8]


Contouring the Board
-
1Shave down the foam to the desired thickness. Plug in the power planer and set it to the appropriate depth. Run the planer over the outer surface of the blank to shear away a thin layer of foam at a time. Repeat this process, always going back over the surface in the same direction, until the board is as thick or thin as you want it.[9]
- If you’re new to shaping, adjust the power planer’s depth gauge to a shallow setting to avoid over shaping or accidentally taking off too much foam at once.
- Mow the blank foam using smooth, straight sweeps. Rather than sliding the planer straight down the length of the board, start at the stringer (the line running through the midpoint of the board) and guide it from the centerline off the edge. This cuts down on the distance the planer has to travel, producing a more fluid and consistent shave.[10]
-
2Get the rocker right. Now that the board is the correct shape and thickness, you can begin adding “rocker,” or upward curvature of the board. Do this by shaving away the foam near the nose or tail (or both, if you prefer) so that the end up the board turns up slightly. Since you’ll have to take off a lot of foam to form the rocker, it’s best to leave the blank a little thicker near the ends.[11]
- You can attempt this with the power planer, but it may be easier to use a surform tool, as this will give you more manual control over how much foam you remove and prevent you from making irreparable mistakes.
- Tail rocker allows the rider to manipulate the back end of the board for ease of turning and shifting, while nose rocker keeps the front end of the board from digging into the water as the surfer drops in.[12]
-
3Create concave for the bottom of the board. Finish shaping the deck by adding concave. Concave is a term used to describe the way the board curves inward at the bottom to catch the wave. After you decide whether you want deep or shallow concave, you can achieve the right amount using the surform tool to carve further into the belly.[13]
- Concave creates traction for the surfer by “cupping” the water, making it easier to dig in.[14]
- Since the rails of concave boards sit a little lower in the water, they naturally give up some speed and lift.
-
4Shape and blend the rails. The last step in shaping your surfboard is to shave and round out the rails, or the outer edges of the board. Using the surform tool, scrape away at the flat edge of the outline of the blank so that it forms a bevel. Do the same to both sides of the beveled edge where it comes to a point. Complete the rails by going over them with the sanding block, making the slope as smooth and gradual as possible.[15]
- Most professional surfboard makers use a technique called “rail bands” when shaping the rails. Rail bands essentially function as a schematic for how the rails need to be shaved and blended as they meet the deck and belly of the board.[16]
- As you shape the rails, crouch down periodically so you can examine the board at eye-level. This will help you pick up on any inconsistencies in thickness or slope.


Choosing a Shape for Your Board
-
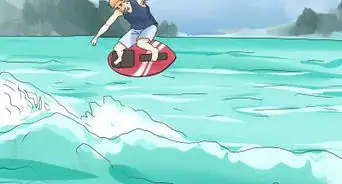
1Leave the bottom flat. Surfboards with flat bottoms offer more surface area for gliding over the water, making for greater speed and balance. Their larger point of contact also makes them more stable in rough surf. Flat-bottoms work well with most types of boards, and are especially useful for fast, smooth waves.
- Heavier surfers may benefit from flat-bottomed boards because their increased surface area prevents the board from sinking into the water as much.
- Start out with a flat board until you get a sense of what you do and don’t like about it before moving on to more specialized contours.
-
2Make it a single concave. The underside of a single concave board features one broad upturned curve. This makes the board more hydrodynamic, as it conforms around swells and allows water to pass easily underneath. Because the rails sit lower in the water and provide more “grip,” concave boards are great for performance.[17]
- Many competitive surfers prefer boards with deep single concave.
- Single concave boards may be difficult to manage in choppy or turbulent surf.
-
3Go with a standard double concave. Double concave surfboards curve upwards on both sides of the stringer, resulting in a shallow “M” shape when viewed from a cross section. If you buy a premade board straight off the shelf, chances are it has a double concave body contour. The double curve streamlines the board creates lift, letting the rider stay more on top of the wave.[18]
- The lift and controlled channeling of double concave surfboards makes them ideal for newer riders who are just learning.[19]
- Use a rocksteady double concave board to work on correcting balance issues.
-
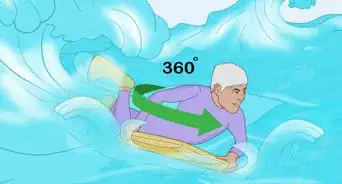
4Try out a "Vee" shape. This board style takes its name from the angled point of its underside. Similar to double concave boards, the Vee shape gives the rider greater leverage when carving and rapidly changing direction. The convex belly slices through the water, making it swift and easy to handle without compromising the rider’s footing.
- Vee shaped boards can be useful if you tend to change your foot positioning frequently as you ride.
- This is a popular body style for big wave riding, as it enhances stability and steering and fine balancing ability.


Things You'll Need
- Surfboard blank
- Work table or rack
- Electric power planer
- Handsaw
- Reformer
- Sandpaper block
- Straight edge or T-square
- Soft lead pencil
- Respirator
- Safety goggles
- Protective earmuffs
Warnings
- Polyurethane or polystyrene particles released when sawing and shaping the blank are hazardous to breathe. Make sure you’re always wearing your respirator, along with work glasses and earmuffs, when running the power planer.⧼thumbs_response⧽
- Be careful when using potentially dangerous edged tools like the power planer, surform tool and handsaw. A quick slip could result in serious injury. Remember: safety first!⧼thumbs_response⧽


References
- ↑ https://www.surfertoday.com/surfing/how-to-shape-a-surfboard
- ↑ http://www.fiberglasssupply.com/Product_Catalog/Surfboard_Blanks_/Surfboard_Blank_Selection_Guid/surfboard_blank_selection_guide.html
- ↑ http://www.surfline.com/gear/how-to-shape/address-blank.cfm
- ↑ https://www.surfertoday.com/surfing/how-to-shape-a-surfboard
- ↑ http://www.surfline.com/gear/how-to-shape/address-blank.cfm
- ↑ https://www.youtube.com/watch?v=PXDW3eFtcCc
- ↑ https://www.surfertoday.com/surfing/how-to-shape-a-surfboard
- ↑ https://www.youtube.com/watch?v=PXDW3eFtcCc
- ↑ https://www.surfline.com/surf-news/step-two-milling-thickness/87048
- ↑ https://www.youtube.com/watch?v=PXDW3eFtcCc
- ↑ https://www.youtube.com/watch?v=PXDW3eFtcCc
- ↑ http://www.surfscience.com/topics/surfboard-anatomy/rocker/different-rocker-shapes
- ↑ https://www.youtube.com/watch?v=YbQo-b27Czk
- ↑ http://www.surfscience.com/topics/surfboard-anatomy/bottom-contour/different-concaves-for-your-waves
- ↑ https://www.youtube.com/watch?v=PXDW3eFtcCc
- ↑ https://www.surfline.com/surf-news/step-four-turning-rails/87057
- ↑ http://www.boardcave.com/the-surfers-corner/surfboard-bottom-contours/
- ↑ http://www.boardcave.com/the-surfers-corner/surfboard-bottom-contours/
- ↑ http://www.boardcave.com/the-surfers-corner/surfboard-bottom-contours/
About This Article