This article was co-authored by wikiHow Staff. Our trained team of editors and researchers validate articles for accuracy and comprehensiveness. wikiHow's Content Management Team carefully monitors the work from our editorial staff to ensure that each article is backed by trusted research and meets our high quality standards.
This article has been viewed 145,223 times.
Learn more...
Making a surfboard requires a lot of patience, precision, and, of course, supplies. This is a meticulous, slow process and it is easy to make mistakes. On the other hand, the reward of owning a completely individual and unique surfboard that you created to your specifications is well worth the hard work!
Steps
Making the Surfboard Template
-
1Pick a suitable workspace like a garage or workshop. You need a space that's both large and well ventilated. You will make a mess so make sure the space you pick can handle it.
- Working outside is a plus when it comes to ventilation, but an indoor facility with 3 perfectly placed fluorescent lights will show flaws in your shaping so you can catch them early on.
- This is a weather-dependent project if you work outdoors. Know that you won't be able to do any work in the rain, snow, or even in the wind.
- It may be a good idea to build a room specifically for board building; for a short board you will need at least a 10 feet x 8 feet (3 meters x 5.4 meters) room and longer than 10 feet if you're building a long board.
-
2Get a thin piece of plywood and create a template by tracing a surfboard onto it. Try out several different surfboards to find one you like first to copy the design. Lay your plywood on the ground and place the surfboard on top of it, then mark the outline of the board with a marker.
- Make sure the stringer (the wooden strip that stretches the length of the board through the middle) is lined up perfectly straight between the plywood's ends.
- To make it easier to trace, you can mark placement points with a marker at the nose and the tail, at the board's midpoints, then all the way around the board making each consecutive point parallel from the last, so the surfboard's cut-out is accurate.
- Be extremely careful to not move the board or the plywood while you are tracing the outline.
Advertisement -
3Secure the plywood to a workhorse and cut it out with a jigsaw. Put on your safety goggles and plug in the jigsaw. Very carefully cut along your outline to create your surfboard-shaped template.
- Make sure the edges where you will be cutting are hanging off the sides of the sawhorse and use a carbon steel blade to cut through the plywood.
-
4Get a foam or wood surfboard blank from a surfboard supply shop. A surfboard blank is the foundation of any surfboard, which you will shape into the final product. Choose foam or wood based on your personal preference.
- There are many different shapes, weights, lengths, and densities of surfboard blanks. The type of blank you need depends on how you ride the wave. If you love to rip small waves, a less dense blank is for you (as long as you don't mind replacing it more often). The denser the board, the stronger it is and the longer it will last.
- EPS foam is often hailed as a good choice of material for the blank, as it is both a strong and long-lasting material, while being lower in density than polyurethane foam.[1]


Shaping the Surfboard
-
1Post the blank bottom-up on the workhorse and trace the template onto it. Set the template on top of the blank and make sure it lies completely flat along the stringer line. Use a thick pencil to trace the shape of the surfboard template onto the blank from nose to tail. Turn over the blank and trace the shape onto the front.
- If you have never shaped a surfboard before, you should spend some time in a surfboard workshop and watch how they do it to get an idea of the process before you start.[2]
-
2Cut the excess foam (or wood) from the surfboard blank with the jigsaw. Be sure to leave 1 to 1 1/2 inches (2.54 to 3.81 cm) excess from the surfboard template trace; this will give you room to shape.
- Saw with extreme caution, especially when you cut around the stringer on the nose.
-
3Secure the surfboard blank to the workhorse with clamps and plane both sides. Adjust an electric planer to a .08 in (2 mm) depth and very delicately plane the underside of the board from tail to nose. Turn it over and plane the top of the board. Plane only enough to reach the softer white foam under the hard surface.
- When you get closer to the nose, it will become difficult to use the electric planer; this is when you should use hand and finger planers for precision.
- You can get all the planers you need at a home hardware or carpentry supply store.
-
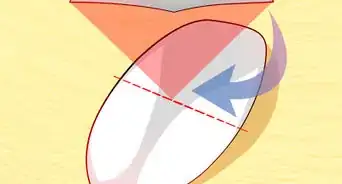
4Shape the curve of the rails with a hand or finger planer. The rails are the curved sides of your board, and the way you shape them will affect how the board handles. Make a softer curve for more buoyancy in smaller surf, and a sharper curve for better performance in bigger surf.
- There are countless ways to shape the rails of your board, but in general, the softer the curve the more forgiving your board will be. Sharper curves are often found in higher performance boards.[3]
-
5Smooth out the rails of the blank with steel mesh. Hold a piece of steel mesh in both hands and move it along the rails from tail to nose. Make the back 1/4 of the rail into a sharper edge and the front 3/4 more rounded.


Adding Resin to the Surfboard
-
1Cover the underside of the surfboard blank with 6 oz (168 g) of fiberglass cloth. Use sharp scissors to trim the cloth around the shape of the blank and make sure to leave about 2 inches (5 cm) of extra cloth draping over the board. Cut the cloth into “V” shapes where your board curves so you can fold it over the rails.
- You can buy fiberglass cloth at a surfboard supply shop, marine shop, or fiberglass shop.
-
2Mix 24 oz (800 mL) of resin with catalyst. Resin and catalyst are the substances that when mixed together will create the clear, hard coating on the surfboard. Read the ratios for the specific product you have and mix them together in a small plastic container or bucket.
- Buy polyester surfboard resin and catalyst at a surfboard supply shop.
-
3Pour the surfboard resin mix over the fiberglass cloth and spread it out evenly. Begin in the center of the board and use a squeegee to work the resin in a figure 8 pattern throughout the middle of the board. Work the resin out and over the rails to lock in the fiberglass when you reach the edges.
- Resin should take around 5 to 6 minutes to cool, so timing is important. Be sure the entire cloth is evenly wet and secure on the blank. Leave any excess cloth (it will eventually be covered), but make sure to squeegee away any excess drips.
-
4Allow the resin to cure for about 1 day, then repeat on the other side. Add resin to the top side with the same method you used for the bottom. Add an extra 4 oz. (133 mL) layer of fiberglass cloth on the deck for added strength.


Adding the Fins
-
1Buy a removable molded fin system from a surf supply shop. A removable system is the best option so that you will be able to remove them to transport your board. It is much easier to buy molded fins than attempt to make your own.
- You can also add multiple fin positions to your board if you want to be able to change placement based on waves.
-
2Mark the fin placement and trace the fin boxes. Take measurements from the surfboard you got your template from, and use a marker to mark where the fins will go on your new board. Trace the outline of the fin boxes onto the board where you will insert them.
- Fin boxes are the part of the removable molded fin system that will stay in your board, the fins slide in and out of these.
-
3Use a chisel and sandpaper to carve out shallow holes for the fin boxes. Carefully chisel out the inside part of the outlines of the fin boxes, just deep enough to place them in flush with the board. Smooth out the holes by hand with sandpaper.
- Be careful not to carve out any material outside of the outlines. Just get most of the middle part out with the chisel, then finish shaping the hole carefully with sandpaper.
- You can get a chisel at a hardware store or carpentry supply store. If you don't have one you could also use a sharp flathead screwdriver as a chisel.
-
4Secure the fin boxes in place with surfboard resin. Pour just enough resin in the holes to hold the fin boxes in place. Place the fin boxes snuggly in their holes and wipe away any excess resin around the edges.
- The fin boxes will get further secured in place when you put a hot resin coat on the whole board.
-
5Mix 30 oz (1000 mL) of hot resin with catalyst and spread it over the surfboard. Make sure the surfboard is fin-side-up, pour the resin over it, and spread it out with a wide paintbrush until the entire area, including the fin boxes, is covered.
- Be careful not to get resin inside the slots of the fin boxes where the fins will go into place.
-
6Let the resin cure for 3 hours, then cover the other side of the board. Flip the board over after the resin cures and repeat the process for the top side. Make sure to wipe up any drips to avoid resin streaks on your board.
- Make sure to let the resin cure on the top side for 3 hours before you do anything else to the board.


Putting in the Leash Plug and Sanding
-
1Drill a hole for the leash plug with a 1.33 inch (3.4 cm) diameter drill-bit. The hole you drill needs to be 2 1/4 to 3 1/4 inches (6 to 8 cm) from the tail, near the stringer. Use a small knife to peel away the fiberglass and foam until the leash plug is even with the deck.
- The leash plug is what holds the ankle leash to your surfboard. You can get one at a surf shop.
-
2Mix 3 oz (100 mL) of hot coat resin with catalyst and pour a bit into the hole. Place the leash plug into the hole then fill the rest with resin to set it. Wipe away the excess resin with a paintbrush.
-
3Let the resin cure for at least 1 day before you start to sand. After 1 day the resin will be cured and the leash plug will be completely secured to the board. You will now be able to move on to sanding and finishing your board.
-
4Sand the underside of the surfboard with an electric sander. Sand with fine-grit sandpaper until all bumps and lumps are gone, as well as the gloss. Sand by hand in areas where it is hard to use the electric sander.
- Don't over sand; this will cause damage to the board. If this happens, use a small amount of surfboard resin and fiberglass cloth to fix the damage, then re-sand to smooth any blemishes.
-
5Moisten very fine-grit sandpaper and sand the board until it becomes glossy. By using very fine grit sandpaper you are just polishing the finish instead of removing it. Sand until it is extremely smooth to the touch and shiny.
- Without this extra sanding step, your board will make your skin irritated and itchy.
-
6Allow your board to remain unused for 3 days. Let the surfboard resin completely set to finish the process. Your surfboard will be ready to hit the waves after 3 days are up!


Community Q&A
-
QuestionHow do I add graphics?
 Community AnswerYou can use colored resin, or place a graphic under the final resin layer. Make sure the graphic won't run when covered.
 -
QuestionLength of surf board
 Gavin DonnellyCommunity AnswerSurfboards are usually 6-8 feet long. The size depends on your height and weight, as well as personal preferences.
 -
QuestionHow do I add graphics?Community AnswerYou can use colored resin, or place a graphic under the final resin layer. Make sure the graphic won't run when covered.
Warnings
- Always wear latex gloves when working with resin.⧼thumbs_response⧽
- Always wear safety goggles when working with saws and dust of any kind.⧼thumbs_response⧽
- Always wear a surgeon's mask while sanding.⧼thumbs_response⧽
- Do not touch hot resin with your skin.⧼thumbs_response⧽
Things You'll Need
- 3 fluorescent lights (when shaping in a room)
- Very thin plywood
- Marker
- Safety goggles
- Jigsaw
- Surfboard blank
- Wooden workhorse
- Thick pencil
- Electric planer
- Hand planer
- Finger sized planer
- Steel mesh 4 inch x 4 inch (10 cm x 10 cm)
- Fiberglass cloth (minimum 6 oz. or 168 g, but the heavier the cloth the stronger the board will be, 20 feet or about 6 meters is suggested)
- Scissors
- Surfboard resin and catalyst
- 3 plastic squeegees
- Masking tape
- Fiberglass rope (39 inches or 100 cm)
- Surgical latex gloves
- Hot coat resin and catalyst
- 3 wide paintbrushes
- Electric drill with 1.33 inch (3.4 cm) diameter drill-bit
- Small knife
- Leash plug
- Surgical facemasks
- Electric circular sander
- Sandpaper that fits the electric circular sander (both coarse and fine)
- Wet sandpaper
- Dust brush
- Fin box and fins


References
About This Article

To make a surfboard, trace your surfboard design on a thin piece of plywood and cut it out with a jigsaw to create a template. Next, get a foam or wood surfboard blank, trace the template onto it, and cut the excess with the jigsaw. Then, shape the curve of the rails with a hand or finger planer and smooth them with steel mesh. Cover the underside of the blank with fiberglass cloth and spread resin over it. Finally, secure the fin boxes in place with surfboard resin. For tips on adding the leash plug and sanding your finished board, read on!