This article was co-authored by wikiHow Staff. Our trained team of editors and researchers validate articles for accuracy and comprehensiveness. wikiHow's Content Management Team carefully monitors the work from our editorial staff to ensure that each article is backed by trusted research and meets our high quality standards.
This article has been viewed 175,234 times.
Learn more...
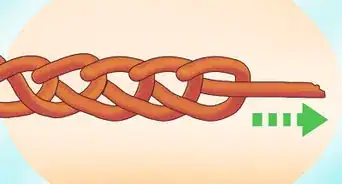
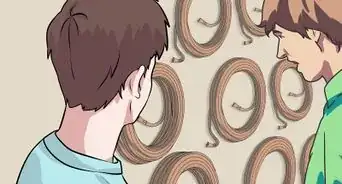
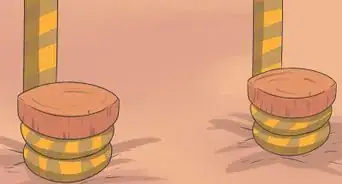
Need to make your rope a little longer? Splicing could be the solution—this technique helps join two separate lengths of rope together to make longer stretches of rope (without the potential snag points of knots). These techniques are stronger than knots and are generally intended for permanent lengthening.[1] We'll walk you through two common types of splices, so you can lengthen your rope in no time.
Steps
Eye Splice
-
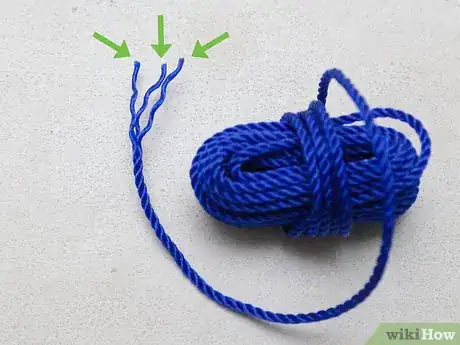
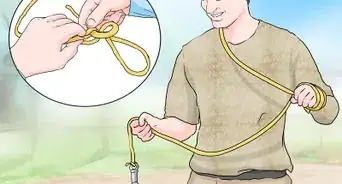
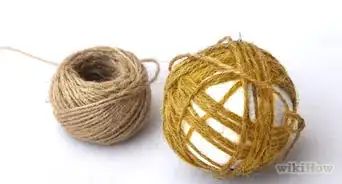
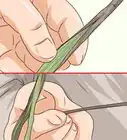
1Separate your rope into three strands. Most ropes are made up of many strands which are usually held together at the ends with a fastener or adhesive, like glue. You may need to cut the ends of your rope free to separate your rope into three strands.
- If your rope is made up of more than three strands, try to distribute excess rope evenly among your three strands.
- Eye splices are useful for making a stable loop in a line of rope.[2] This can be useful for towing, pulling, hanging, or pulleys.
-
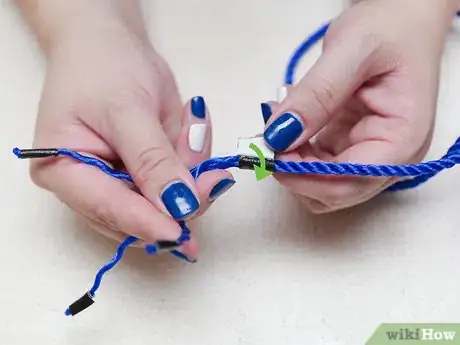
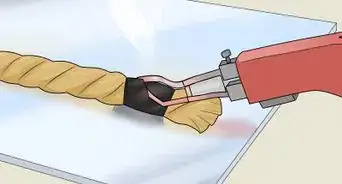
2Seal the ends of your strands. This will prevent your rope from fraying while working on it. Most kinds of synthetic rope can be sealed by singing the ends together with a lighter. Simply hold the flame of the lighter to the very end of each strand for a few seconds until the ends of each strand fuse together.
- Always exercise caution when working with fire. If your rope has soaked up a flammable substance, it could catch fire easily.
- When dealing with a natural fiber rope, tape may be your best bet for sealing loose ends. However, you should prioritize a smooth, durable tape, like electrical or duct tape. These not only hold up better to wear and tear, but will also make it easier to splice the rope.
- You might also be able to use a rope-safe glue to attach the end strands of a natural fiber rope together to prevent further fraying.
Advertisement -
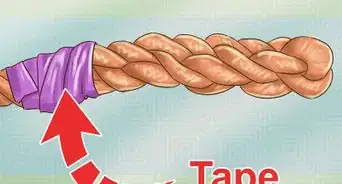
3Tape the ends for easier rope working. Fasten electrical or duct tape around the ends of your strands so it encases your rope the entire way around. Not only with this strengthen it, but this will also make your rope more rigid, which will make it easier to pass through loops and gaps.
-
4Apportion the length of and tape off your end strands. Your strands are going to feed together with the main part of your rope to create an unbroken line. You'll need each strand to be long enough to tuck around the width of the rope at least five times. At the base of this length, where the strands feed into the main rope and are yet unraveled, use a piece of tape to encase the rope and prevent more from unraveling.
- If your strands aren't long enough, you may not have enough line to tuck each strand the five times necessary to tie this knot best.[3]
-
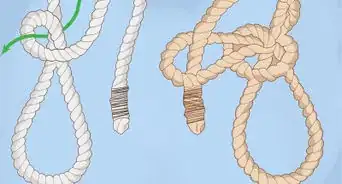
5Determine how big you want the eye of your splice. Bring the fasted part of your separated end strand back to the main body of the rope where you want your splice tied. The loop formed by your rope and the fastened base of the 3-strand end will establish the size of your loop.[4]
- Keep in mind the purpose for which you intend to use the rope. A big eye may work well for some jobs, but may not be ideal for your purposes.
-
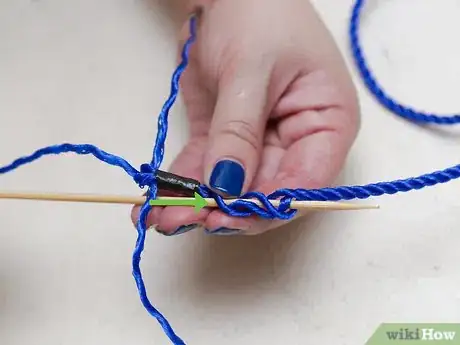
6Loosen the base of your loop and feed in your first strand. The strands at the base of your loop will still likely be woven tightly together. You can loosen these by twisting the rope until strands separate or by using a tool, like a small screwdriver or fid, to break them apart. Then:
- Divide the now loosened strands at the base of your rope into three strands. If you are using a three-strand rope, you won't have to do anything, but you may have to gather excess strands together into three for 4+ strand ropes.
- Separate your three loosened strands at the base of your loop into near (closest to you), middle (in between the two other strands), and far (the farthest strand from you) strands.
- Feed any one of your end strands above the near and far strands but below the middle strand at the base of your loop. This will pass your end strand through the loosened strands of the main body of the rope.
-
7Tuck your second end strand around the near strand. Your next end strand will pass under the near strand at the base of your loop and up through the space between the near and mid strands. After that, pull the end strand through so it emerges through and out of the space between the near and middle strand.[5]
-
8Tuck your last end strand around the far strand. Your end strand should first pass over your loop. Then tuck it under the far strand so it passes between the middle and far strands. Pull the end strand through the gap between middle and far strands.
-
9Draw the end strands tight using both hands. You should pull your end strands through the loosened strands at the base of your loop. Do this until the taped off rope at the bottom of your end strands meets the loosened strands at the base of your loop.
- You'll want both your end strands and the loosened strands at the base of your loop to be firm and tight at this point in your splice.
-
10Continue the weave of your splice. You'll need to loosen the weave of the main body of your rope to do so. At the next twisting of strands after the base of your loop, use your fingers or a tool, like a screwdriver or fid, to break them apart. Then, you'll need to:
- Separate your newly loosened strands into near, middle, and far strands, much like you did before at the base of your loop.
- Take the end strand that fed under your original far strand and bring it over your new far strand and under your new middle and near strands.
- Take the end strand that fed under your original near strand and bring it under your new near strand and over the middle and far strands.
- Take the remaining end strand and bring it under and through your new middle strand.[6]
-
11Weave until your splice has five tucks. In rope tying, a tuck refers to a rope or strand passing around another rope or strand. Due to the slipperiness of modern synthetic rope materials, using less than five tucks in your weave can cause your splice to slip.[7]
- Your weaving will follow the pattern described, with each end strand tucking around and through the near, middle, and far strands of the rope after loosening.
Back Splice (End Splice)
-
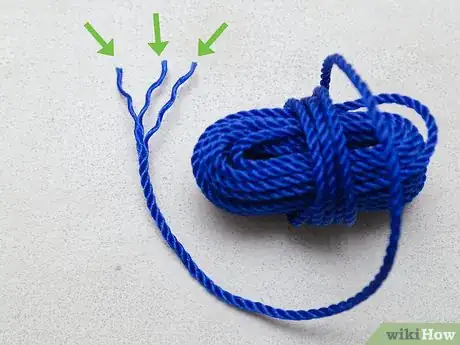
1Ready your rope. You'll need your rope divided into three strands to tie this splice. Your rope may have adhesive or a fastener on the ends to prevent it from fraying. You may need to cut these ends free with a knife or scissors to divide your rope into three strands.
- If your rope is made of many strands, you should try to collect these into three even groups of strands to use in your splicing.
- A back end splice is especially useful for preventing a rope that has become unraveled from fraying. This splice will securely keep the rope together.
- You can use this same splice to fasten two different ropes together, too. Simply use the end of a separate rope instead of using one end of the same rope, which is the example provided here.[8]
-
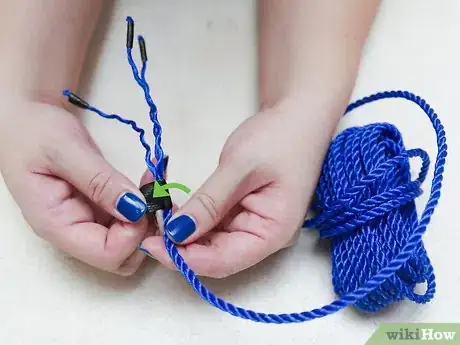
2Seal your separated end strands. You can do this easily with many kinds of synthetic rope by passing the flame of your lighter over the loose ends until they fuse together. This will help prevent fray in the rope while you're tying your splice.[9]
- You should use caution when applying fire or heat to your rope. If your rope has absorbed a flammable substance, it could start a fire.
-
3Tape below your sealed ends. You should use a durable tape, like electrical tape or duct tape, when doing this. Your tape will give rigidity to the rope, making it easier for you to guide it through holes and gaps while splicing.[10]
- Unraveling your rope can also hurt the stability of its weave. By taping the ends, you'll also provide greater stability to your splice.
-
4Apportion the length of and secure the end strands. First measure out enough length in your end strands to tuck around the body of your rope at least four times. Then fasten the base of this length with durable tape, like electrical tape or duct tape, to prevent the body of the rope from unraveling.[11]
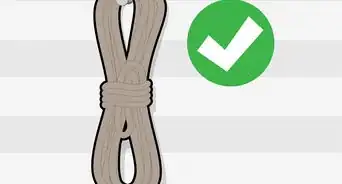
- The tape at the base of your end strands should encircle the rope completely to create a sleeve or collar that prevents your rope from unraveling more than you want.
-
5Hold the center strand to the main rope below your end strand fastener. The end strand should form a loop as it curls back to the main rope. This is the beginning of a crown knot, which will form the base for your end splice.[12]
-
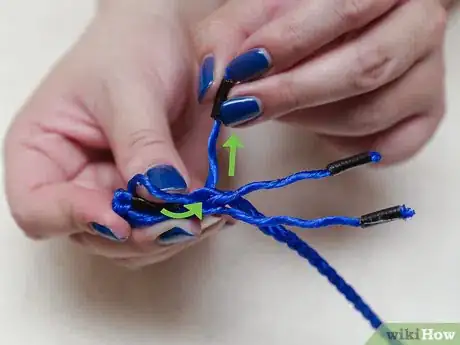
6Pass your end strand through the middle loop. If you're holding your loop in front of you, you should have two strands free. Take the rightmost strand and pass it through the loop, keeping all strands loose.[13]
- Your second strand should not be pulled completely through the loop. Enough line should remain so that a loop is formed by your second strand as well as your first.
-
7Thread your remaining end strand through the second loop. Take your final strand and pass it over your first loop and through your second loop. The current shape of your end strands should roughly resemble an airplane propeller.[14]
-
8Draw the strings together to tighten the crown knot. Pull the strands with steady pressure until the knot is firm. With coarse ropes, you may need to use your fingers to encourage the rope into place. It can sometimes help to pinch the bottom of the crown knot and pull it tightly.[15]
- At this point, if you were to look straight down on the knot, you should see all three end strands equally.
-
9Loosen the weave of your rope. Lay your rope and crown knot on your table and, using your fingers or a tool, like a screwdriver or fid, loosen the weave of your rope below the end strand fastener. You'll need your end strands to pass through the main body of your rope to complete your splice.[16]
- After you loosen the strands, divide them into one near (closest to you), one middle (in between the other two strands), and one far (farthest from you) strand. This will make weaving your splice easier.
-
10Feed an end strand through your loosened rope. Take any one of your end strands and pass it above the near and far freshly loosened strands, but below the middle one. After that, pull the end strand through the loosened strands until no slack remains.[17]
-
11Add your next end strand to the weave. Your next end strand will tuck under the near strand and come through the opening between the near and middle strands. Then pull the end strand so no slack remains.[18]
-
12Weave in your final end strand. Your final end strand will pass under and around the far strand to come through the gap between the far and middle strands. After this, you can pull the strand until there is no remaining slack, much as you did the first three strands.[19]
-
13Continue weaving the entire length of your end strands. Loosen the next twisting in your rope. Take the end strand you threaded around the far strand and pass it under the far and middle strands, but over the near strand. The strand that went around the middle strand should pass under the far strand. The strand that went under the near strand will pass under the near strand, but over the middle and far strands.[20]
- All end strands should be pulled firmly after passing through the loosened strands until no slack remains.
- Depending on the length of your end strands, you may have to continue this pattern for several twists in the rope until the full length of your end strands is spliced.
-
14Tighten the splice and enjoy your improved rope. Pull on the ends of your rope firmly until the knot is solid. You can further tighten your spliced rope by rolling it in your hands. You should feel the rope tighten as you do so. Your spliced rope is now ready to use.[21]
References
- ↑ http://www.animatedknots.com/indexsplicing.php#ScrollPoint
- ↑ http://www.animatedknots.com/usessplicing.php?Categ=splicing&LogoImage=LogoGrog.png&Website=www.animatedknots.com#ScrollPoint
- ↑ http://www.animatedknots.com/splice/index.php?Categ=splicing&LogoImage=LogoGrog.png&Website=www.animatedknots.com#ScrollPoint
- ↑ http://www.samsonrope.com/Documents/Splice%20Instructions/3Strand_C1_Eye%20Splice_JUL2012_WEB.pdf
- ↑ http://www.samsonrope.com/Documents/Splice%20Instructions/3Strand_C1_Eye%20Splice_JUL2012_WEB.pdf
- ↑ http://www.samsonrope.com/Documents/Splice%20Instructions/3Strand_C1_Eye%20Splice_JUL2012_WEB.pdf
- ↑ http://www.animatedknots.com/splice/index.php?Categ=splicing&LogoImage=LogoGrog.png&Website=www.animatedknots.com#ScrollPoint
- ↑ http://www.animatedknots.com/backsplice/index.php?Categ=splicing&LogoImage=LogoGrog.png&Website=www.animatedknots.com#ScrollPoint
- ↑ http://www.yachtunlimited.com/back-splice.html
- ↑ http://www.animatedknots.com/backsplice/index.php?Categ=splicing&LogoImage=LogoGrog.png&Website=www.animatedknots.com#ScrollPoint
- ↑ http://www.yachtunlimited.com/back-splice.html
- ↑ http://www.animatedknots.com/backsplice/index.php?Categ=splicing&LogoImage=LogoGrog.png&Website=www.animatedknots.com#ScrollPoint
- ↑ http://www.yachtunlimited.com/back-splice.html
- ↑ http://www.animatedknots.com/backsplice/index.php?Categ=splicing&LogoImage=LogoGrog.png&Website=www.animatedknots.com#ScrollPoint
- ↑ http://www.yachtunlimited.com/back-splice.html
- ↑ http://www.animatedknots.com/backsplice/index.php?Categ=splicing&LogoImage=LogoGrog.png&Website=www.animatedknots.com#ScrollPoint
- ↑ http://www.yachtunlimited.com/back-splice.html
- ↑ http://www.animatedknots.com/backsplice/index.php?Categ=splicing&LogoImage=LogoGrog.png&Website=www.animatedknots.com#ScrollPoint
- ↑ http://www.yachtunlimited.com/back-splice.html
- ↑ http://www.animatedknots.com/backsplice/index.php?Categ=splicing&LogoImage=LogoGrog.png&Website=www.animatedknots.com#ScrollPoint
- ↑ http://www.yachtunlimited.com/back-splice.html
About This Article
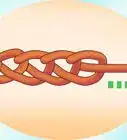
To splice rope, start by separating the end of the rope into 3 strands. Then, singe the ends of each strand with a lighter so they don't unravel, and wrap electrical tape or duct tape around the ends so they're easier to work with. Next, loosen the strands on a piece of rope that you want to splice the first rope to, and insert the strands through the loosened loops on the new piece of rope. Finally, continue to weave the strands through the loops until you've passed them through 5 times. To learn how to splice rope using a back splice, scroll down!
