X
This article was co-authored by wikiHow Staff. Our trained team of editors and researchers validate articles for accuracy and comprehensiveness. wikiHow's Content Management Team carefully monitors the work from our editorial staff to ensure that each article is backed by trusted research and meets our high quality standards.
There are 8 references cited in this article, which can be found at the bottom of the page.
This article has been viewed 127,067 times.
Learn more...
A woven seat is easy, customizable, and a great way to make professional-quality chairs at a fraction of the cost. All it requires is some sort of thread -- rope, yarn, string, ribbon, etc -- and a solid square base.
Steps
Part 1
Part 1 of 3:
Weaving the Warp
-
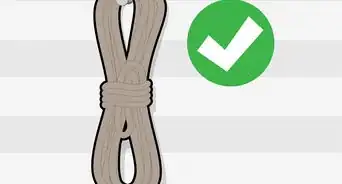
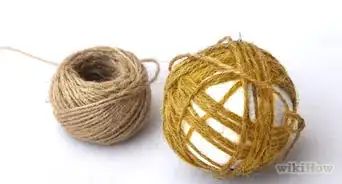
1Gather rope, shuttles, spacers, and a crochet hook, from a local craft store. The materials needed are light and easy, though you may have some questions about how much you actually need:
- About 2lbs of rope chord, cut into two roughly even halves (roughly 200 ft)
- 2-3 completely flat, 1/8" thick weaving shuttles, (various lengths)
- 1" thick wooden spacer, same length as chair
- 1/2" thick wooden spacer, same length as chair
- Very thin wooden spacer, same length as chair (a yardstick works well)
- Crochet hooks (for detailing)[1]
-
2Tie the first half of your rope to one of the horizontal seat poles using a clove hitch. You can start on any one of the four sides of the seat. Tie your knot and slide it all the way to one corner -- this is the starting point of your warp. A "warp" is simply the first round of rope, pointing in one direction, that gives the weave its shape.[2]
- You should have the majority of your rope at the other end of this knot. Just keep it attached to the large ball of yarn/rope it came from.
- Click here to learn how to tie a clove hitch below.
Advertisement -
3Lay the 1" spacer across the seat, perpendicular to your knot. This spacer will keep some slack in the weave as you start in the first direction. This will make it much, much easier to weave in the opposite side later. If you make this first weave too tight you will have to remove it and start over.
-
4Wrap the rope around the whole width of the chair, then back to your starting point. Take your rope and lay it over the spacer, over the opposite seat pole, then back underneath everything to your starting point. This is one loop.
- You don't want to pull this as tight as possible. It should be tight enough to hold its shape, but not so tight you can't lift it slightly with your fingers.
-
5Keeping the strings from overlapping, wrap the rope around everything four more times. Starting with the pole you tied the knot on, lay the rope over the spacer, over the opposite pole, then back under everything to where you started. Use your fingers to push the strings close together, then repeat until you have 5 total wraps.
-
6After wrapping five times, individually wrap the seat pole to create a spacer. Instead of wrapping across the whole width of the chair, wrap it the rope once around the pole opposite your starting side.
-
7Run the rope to the other side and wrap the first seat pole once to create a second spacer. Come back to the beginning and wrap the rope just around this horizontal seat pole.
-
8Slide the strings close together, making sure they don't crisscross. If you started on the left side of the seat, slide everything to the left. You should have a total of 6 parallel strings on the seat posts:
- The string wrapped for your clove hitch.
- The five (5) strings woven across to the other side.
- The string wrapped around the pole to create a spacer.
-
9Repeat the process of five horizontal wraps and one spacer until you cover the whole chair. This process simply continues until you've finished one side of the chair. To repeat:[3]
- Wrap the string across the width of the chair, going over the spacer, around the far pole, and back to where you started.
- Repeat wrap for a total of five times.
- Wrap around each pole individually to create a spacer.
- Repeat.[4]
-
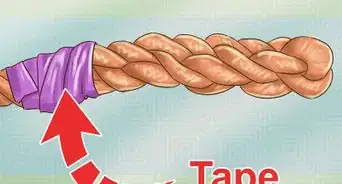
10Tie a new clove hitch instead right after creating a spacer if you run out of rope and need to add more. Don't try and tie a knot between two ends of the rope and keep going. If you're running out of rope/yarn/etc, simply finish the set of 5 you are on and create your two spacers. Tie the second spacer in, then create a clove hitch with a new strand of rope and "start over" from this point.
-
11Use a crochet hook to weave any stray strands back into the weave. Once you get to the end of the seat pole, snip the rope so you have a 2-3" tail. Use your crochet hooks to tuck this strand into your warp, preventing it from unraveling, then snip any excess string.[5]


Advertisement
Part 2
Part 2 of 3:
Weaving the Other Side
-
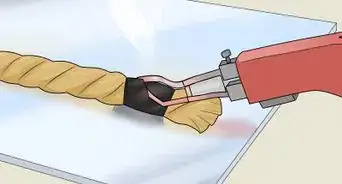
1Wrap the remainder of your rope onto your shuttles. Shuttles are simply thin yarn holders that you can slide into your weave, making it much easier to get a tight weave than forcing your hands through the warp. Wrap up a small and a large shuttle, at minimum.[6]
-
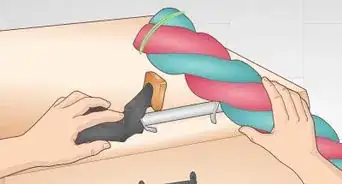
2Work your large spacer into warp, passing it over every other group of five strings. Pick up the first five strings, and slide the spacer under it. Then slide the spacer on top of the next five strings, alternating so that you have a ladder-like pattern.
-
3Turn the seat upside-down and repeat the step above with your other spacer, lifting the other sets of five strings. This time, your job will be easy as every other set is already being held up by the other spacer.
- To get a little extra width, turn the spacers so that their widest side points upwards.
-
4Starting with the rope on the larger shuttle, tie the rope down to a seat pole with another clove hitch. You'll be starting perpendicular to your first set of weaves, but it doesn't matter which side you start on.
-
5Using the shuttle to slide under the lifted strings, wrap the rope around the width of the chair five times. You're doing the same thing as before, just keeping the string between your first set of weaves. This will help create the checkerboard pattern you're looking for.
-
6Wrap up the seat poles after five rounds to create spacers. Again, this is identical to the work from before -- you create another spacer on each side of the chair every five times you wrap around the width.
-
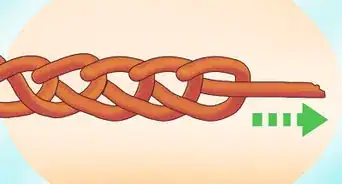
7Follow the same pattern as above -- five wraps, one spacer -- by sliding the shuttle underneath the lifted strings. You should already see how the weave is forming small squares. As you work, you'll likely need to switch to smaller and smaller shuttles in order to fit under the weave, and you may have to switch to using just the thinner, 1/2" spacer or yardstick instead of both at once.
- If you run out or rope, don't worry about tying another knot. Simply
-
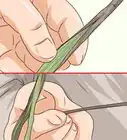
8Use the crochet hook to manually weave the final few strands, as the weave is likely too tight for the shuttles. This takes time, but the precision is necessary for the final bits of the weave. Simply pull the rope through, using the crochet hook to get into the center and pull the rope up and down every five strings.[7]
-
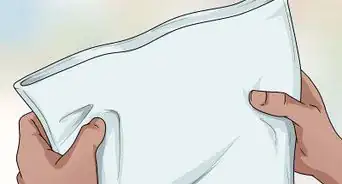
9Use scissors to clean up any loose threads, strands, and tails. Once you've finished the weave, it should hold strongly on its own. Your woven chair is done!


Advertisement
Part 3
Part 3 of 3:
Tying Your Clove Hitch (Beginning Knot)
-
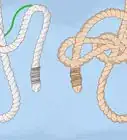
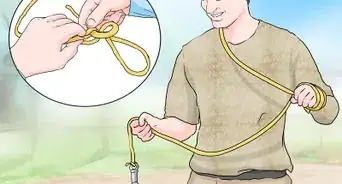
1Lay the end of the rope over the top of your pole (the edge of the seat). The weave goes perpendicular to the pole where you tie this knot.[8]
-
2Pull the end under the pole and wrap it back around. You should have a single strand of rope wrapped around your pole.
-
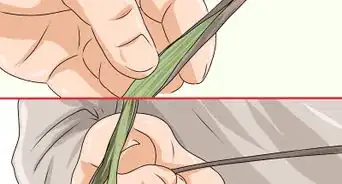
3Cross the end of the rope over the standing line wrapped around the pole. Make sure you do this loosely, so you could still get underneath the rope. You'll still have the rope wrapped around the pole, with crisscrossing ropes on top.
-
4Tuck the end back under the pole as if double wrapping it. Again, come under and around the pole.
-
5Slide the end underneath the loop you just made. Basically, you're making another crisscross of the ropes but, this time, you need to go under the line. Note that this is under the second wrap you made, not the first one.
-
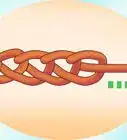
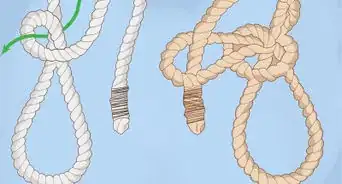
6Pull tightly on both ends of the rope to tighten it. Hold onto the end of the rope, then pull hard on the rest of the line to tighten your knot.[9]


Advertisement
Community Q&A
-
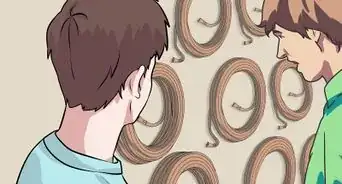
QuestionHow much rope and what thickness is required?The amount of rope/cord depends on the size of the chair and the thickness of cord used. Macrame cord come in 3 mm and 6 mm thickness. Braided cord at the home improvement stores are 3 mm and 50' in length. Measure the distance to go around the frame and include extra length for knots. There are lots of articles and videos online that can answer any other questions.
-
QuestionWere do I find string or straps?There are various thickness of cord available at home improvement stores in the rope/cord department. It does come in different colors. Natural-colored twine is also available, as well as colored raffia balls. Craft stores that carry macrame cord will have 100-yard spools for about $10 (use their coupon, usually 40%). Strapping can be found in fabric stores in their upholstery or trimmings department. It is generally sold by the yard.
Advertisement
Warnings
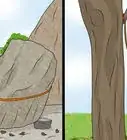
- Test the strength of a seat gingerly at first to ensure your weave is strong enough to hold your weight.⧼thumbs_response⧽
Advertisement

References
- ↑ https://www.youtube.com/watch?v=3d3b_uO-Kco&feature=youtu.be
- ↑ http://kitchenlivingwithcoryanne.com/how-to-weave-a-chair-seat/
- ↑ http://www.finewoodworking.com/how-to/video/weaving-a-danish-cord-seat.aspx
- ↑ https://www.youtube.com/watch?v=3d3b_uO-Kco&feature=youtu.be
- ↑ https://www.youtube.com/watch?v=3d3b_uO-Kco&feature=youtu.be
- ↑ http://kitchenlivingwithcoryanne.com/how-to-weave-a-chair-seat/
- ↑ https://www.youtube.com/watch?v=3d3b_uO-Kco&feature=youtu.be
- ↑ http://www.netknots.com/rope_knots/clove-hitch/
- ↑ http://www.animatedknots.com/cloveend/#ScrollPoint
About This Article

wikiHow Staff
wikiHow Staff Writer
This article was co-authored by wikiHow Staff. Our trained team of editors and researchers validate articles for accuracy and comprehensiveness. wikiHow's Content Management Team carefully monitors the work from our editorial staff to ensure that each article is backed by trusted research and meets our high quality standards. This article has been viewed 127,067 times.
Co-authors: 11
Updated: August 10, 2021
Views: 127,067
Categories: Upholstery | Yarn and Thread | Rope
Advertisement