This article was co-authored by Tanglewood Sue. Tanglewood Sue is a DIY and Upcycling Specialist and the Owner of Tanglewood Works out of Hyattsville, Maryland. With over nine years of experience, Sue specializes in upcycled painted furniture and other handmade, personalized, and sustainable goods. With her passion for art and reinvention, marketing experience, and Bachelor’s Degree in Broadcast Media, Sue has been able to create a business that not only provides quality pieces but empowers customers to create their works through her library of DIY tutorials and live demos as well as DIY supplies.
There are 8 references cited in this article, which can be found at the bottom of the page.
This article has been viewed 65,879 times.
Alder is a medium-density hardwood that is often used with furniture, trim, doors and finer finishing. It can be stained to resemble most popular wood finishes, but it is a notoriously difficult wood to stain, as it often results in uneven coloring without proper preparation. For best results, use a wash-coat before you apply stain to alder wood to reduce blotching.
Steps
Preparing Alder Wood
-
1Choose your stain. Stains generally come in two varieties -- oil and water based. Oil based is easier to apply but harder to clean up, and requires a well-ventilated work area. Water-based stains are cleaner, non-toxic, and tend to have lighter colors. If you have lots of space and fresh air, oil-based stains are generally preferable.
- Gel stains are hybrids that are easy to apply and clean. However, they can be significantly more expensive.[1]
-
2Remove any existing stain or paint using a chemical stripper, coarse sandpaper, or both. If you want to stain the wood a darker color than it is now or the wood is unfinished (its original color), you can skip to the next step. If not, you need to remove any coatings or old coloring using a chemical stripper. To do so, use a coarse-grit sandpaper (60-100 grit) to sand off as much as possible. For deep stains that sanding doesn't cover you can use a chemical stripper:
- Work in a well-ventilated area, with eye and hand protection.
- Apply a thick coat of stripper over everything, letting sit according to the directions.
- Use a putty knife and steel wool to remove the stripper after the required time.
- Wipe any excess stripper off with a damp cloth and let it all dry.[2]
Advertisement -
3Use a medium-grit sandpaper, around 120 grit, on the entire piece of wood. Use a hand sander to smooth the wood. Make sure you sand in the direction of the wood grain, along the natural lines in the alder wood.[3]
- Wipe the wood down with a cloth after every sanding, removing the dust from the surface. Tack clothes will work the best at picking everything up.
-
4Finish sanding with a fine-grit paper, 200 grit or above. Hit the wood again with a nice, fine-grit paper, which will smooth it out attractively. For the best results you should work your way up, using 180-200 sandpaper, then 200-220, and then a final pass with an ultra-fine grit. Wipe off the dust with your tack paper whenever you switch to a new grit.[4]
-
5Wipe the wood down with mineral spirits after sanding. This helps clean the wood and brings out its natural coloring. A rag is fine, and can be used to rub a light coating of mineral spirits on everything. Let it sit for 2-3 minutes, then wipe off with a clean cloth.[5]
-
6Apply a wood conditioner, helping absorb pigments more thoroughly. Alder wood is not an easy wood to stain, as it absorbs the stain unevenly.[6] If you want a weathered, rustic look then this is a good thing -- skip the wood conditioner and move on. However, for a nice even coat, you must apply a wood conditioner.
- Stir the wood conditioner thoroughly.
- Use a clean rag to apply a thin, even layer of conditioner on the wood.
- Let the conditioner soak in and dry for 15 minutes.
- Remove any excess conditioner with a clean rag.[7]
-
7Be ready to stain within two hours of applying conditioner. The conditioner will get the wood ready for stain, but it will start to evaporate out if you wait too long. Conditioner should be applied, dried, and wipe clear within two hours of staining.[8]


Staining Alder Wood
-
1Test a small area of wood with the stain. Choose an inconspicuous area and apply a thin square of stain on it. Wait a few minutes for the stain to soak in, then wipe it all off with a clean cloth, making sure you timed how long you waited to remove it. If you want a darker stain, you'll need to let the stain sit longer. If you want lighter coloring you'll have to wipe it off faster.[9]
-
2Mix up your stain with a paint brush, foam brush, or rag. Make sure you completely stir up the stain, allowing you to get a nice even coloring on the wood.
-
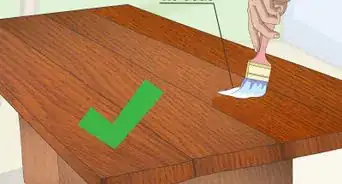
3Apply a thin, even coating of stain on the entire piece of wood. Using a rag may allow a more uniform coating, but brushes work well too. Work slowly, adding a thin, even coat instead of big globs of stain. You shouldn't need more than a little bit of stain on your brush at any one time.
-
4Make a final pass along the grain of the wood with your brush. Wipe away any places where the stain pools, avoiding bubbling, puddles, or blotches. Your final brush of stain should be following the wood grain for the best results.
-
5Wipe the stain off with a clean rag after 5-15 minutes. You don't want the stain to dry on the wood. If it does, it can make it much harder to add more stain or a finish later on. Instead, wait several minutes and then wipe the stain all off with a clean rag.
- The longer you leave the stain on, the darker the coloring will be.
-
6Allow the coat to dry. This usually takes 6-8 hours, but check the can for specific instructions for your stain. After the stain has completely dried you can always add another coat of stain to get an even darker finish.
-
7Sand the surface with 240 to 280-grit if you're adding a finish. Stain is decorative, but finish is what you need to protect the wood from scratches, moisture, and scuffs. Use a fine-grit paper to lightly sand the surface, just like you did before sanding. Wipe the surface down with a clean cloth once you finish.
-
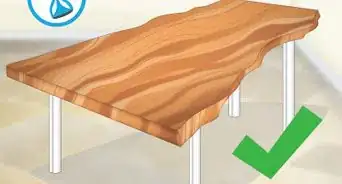
8Apply your preferred sealer or finish. Once you finish, sand again with the very fine grit sandpaper and apply a second coating. Your options for finish, in order from most durable to least durable, are:
- Polyurethane
- Water-based polyurethane
- Wood lacquer
- Finishing oils.[10]
-
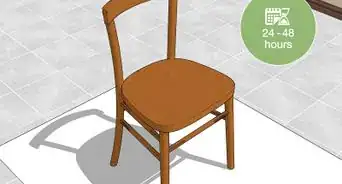
9Let the wood cure at 70F (20C) for 2-4 days. The wood will take 48 hours to several weeks to cure completely. This allows the color and finish to set attractively.


Community Q&A
-
QuestionI have already applied one coat of stain to my alder wood table top and, as noted, it did take the stain evenly in all areas. Can I re-sand and apply the conditioner?
 AutumnBombCommunity AnswerYes, you can re-sand solid wood; take care with veneer so as to not go through it. Sand enough to rough it up and stain again, there's no need for conditioner. Keep a fast, even pace. Rag quickly with gel stains, use a foam brush for others.
 -
QuestionI am trying to stain alder in a light grey, but it wants to yellow. How can I prevent this?AutumnBombCommunity AnswerDoes the stain contain linseed oil? If it does, try putting it in the sun.
Things You Need
- Natural alder wood
- Stain
- Paint brush/rag
- 180-220-grit sandpaper
- 240 to 280-grit sandpaper
- Tack cloth
- Finish


References
- ↑ http://www.diynetwork.com/how-to/make-and-decorate/decorating/how-to-stain-wood-furniture
- ↑ https://www.quickenloans.com/blog/idiots-guide-refinishing-wood-furniture
- ↑ Tanglewood Sue. DIY & Upcycling Specialist. Expert Interview. 24 March 2021.
- ↑ Tanglewood Sue. DIY & Upcycling Specialist. Expert Interview. 24 March 2021.
- ↑ http://www.diynetwork.com/how-to/make-and-decorate/decorating/how-to-stain-wood-furniture
- ↑ http://www.woodweb.com/knowledge_base/Staining_Alder.html
- ↑ https://www.lowes.com/n/how-to/refinish-wood-furniture
- ↑ http://www.minwax.com/wood-products/preparation/minwax-prestain-wood-conditioner
- ↑ http://www.familyhandyman.com/woodworking/staining-wood/how-to-stain-furniture/view-all
About This Article